
I somehow managed to find them ( don’t ask me how…  ) … I saved everything, but now have to go, so I’ll check it later…
Okay… glad you found them…
1 Like
It’s free software so you can’t expect much of it.
What were you building?
If you replace the ones that were removed exactly as they were they might get removed again.
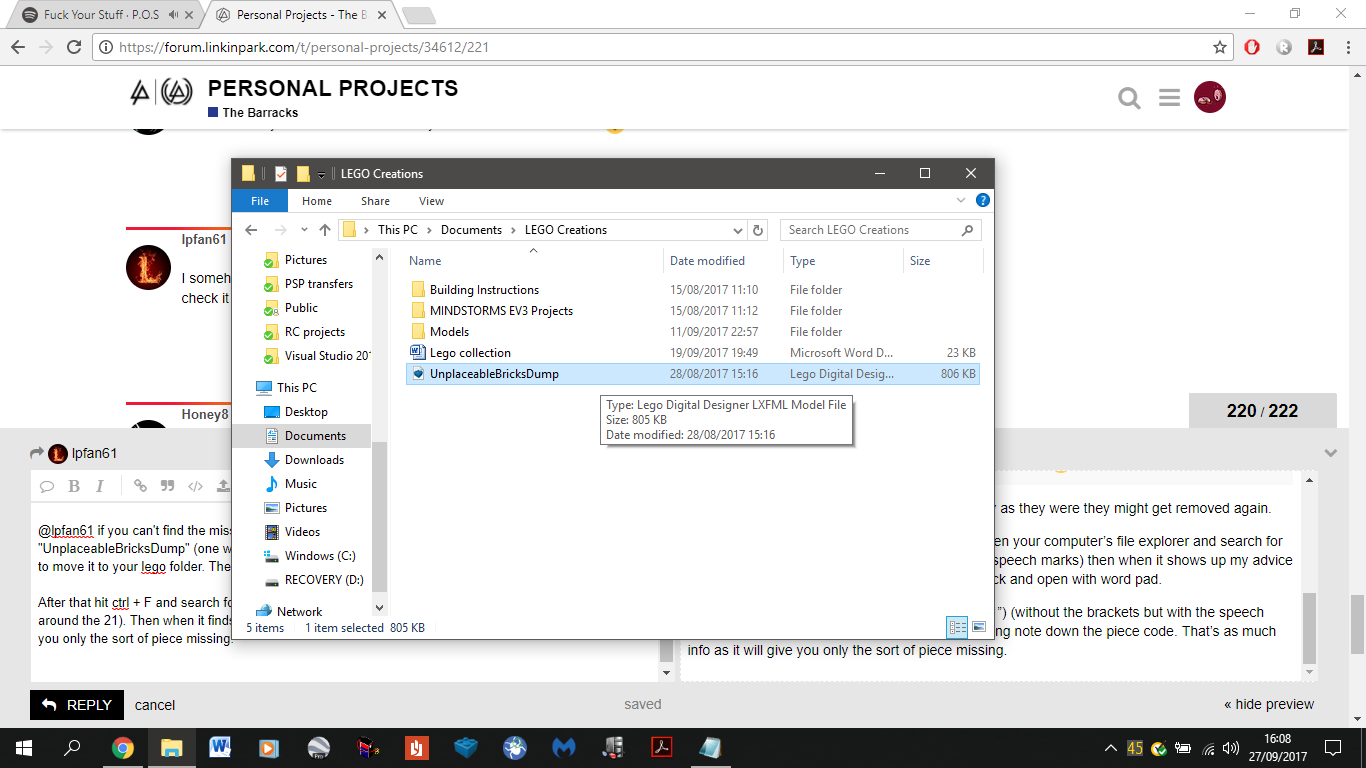
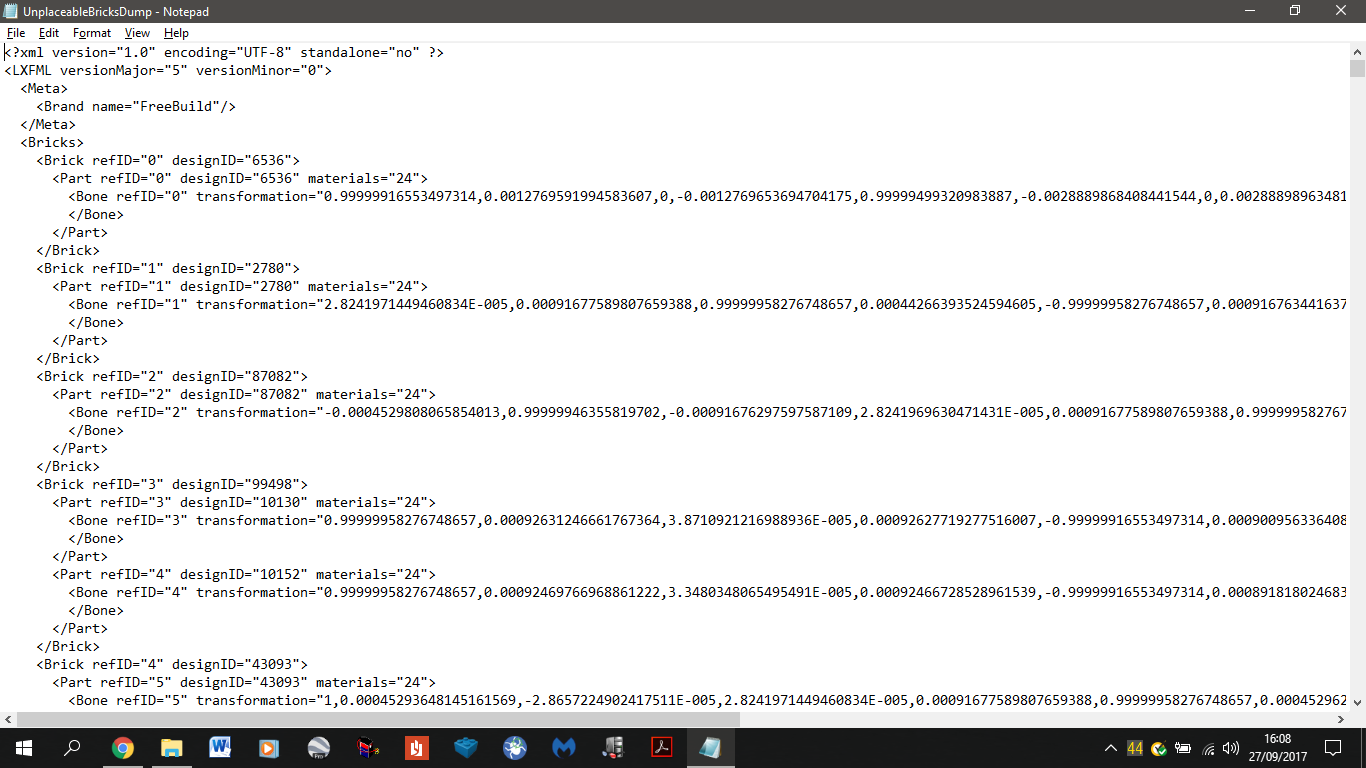
@lpfan61 if you can’t find the missing pieces, open your computer’s file explorer and search for “UnplaceableBricksDump” (one word without the speech marks) then when it shows up my advice is first to move it to your lego folder. Then right click and open with Notepad.
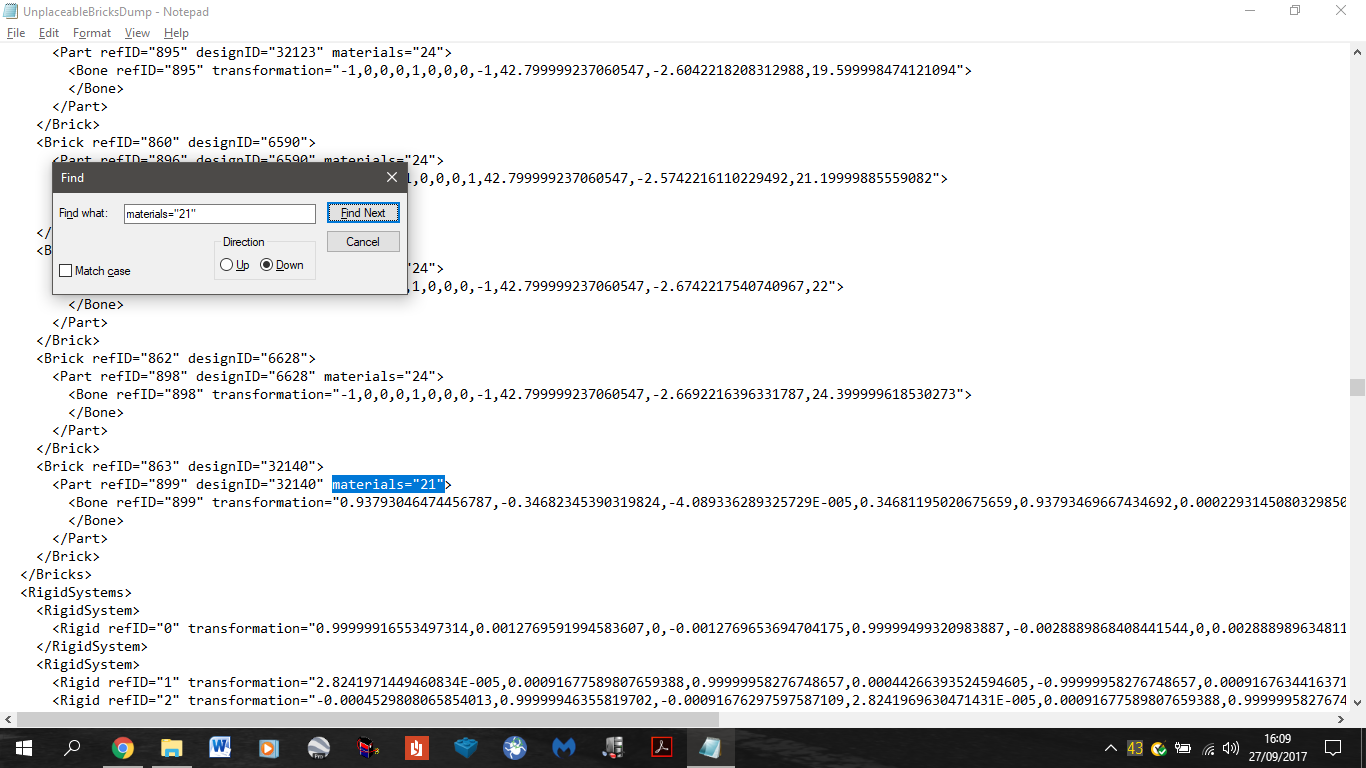
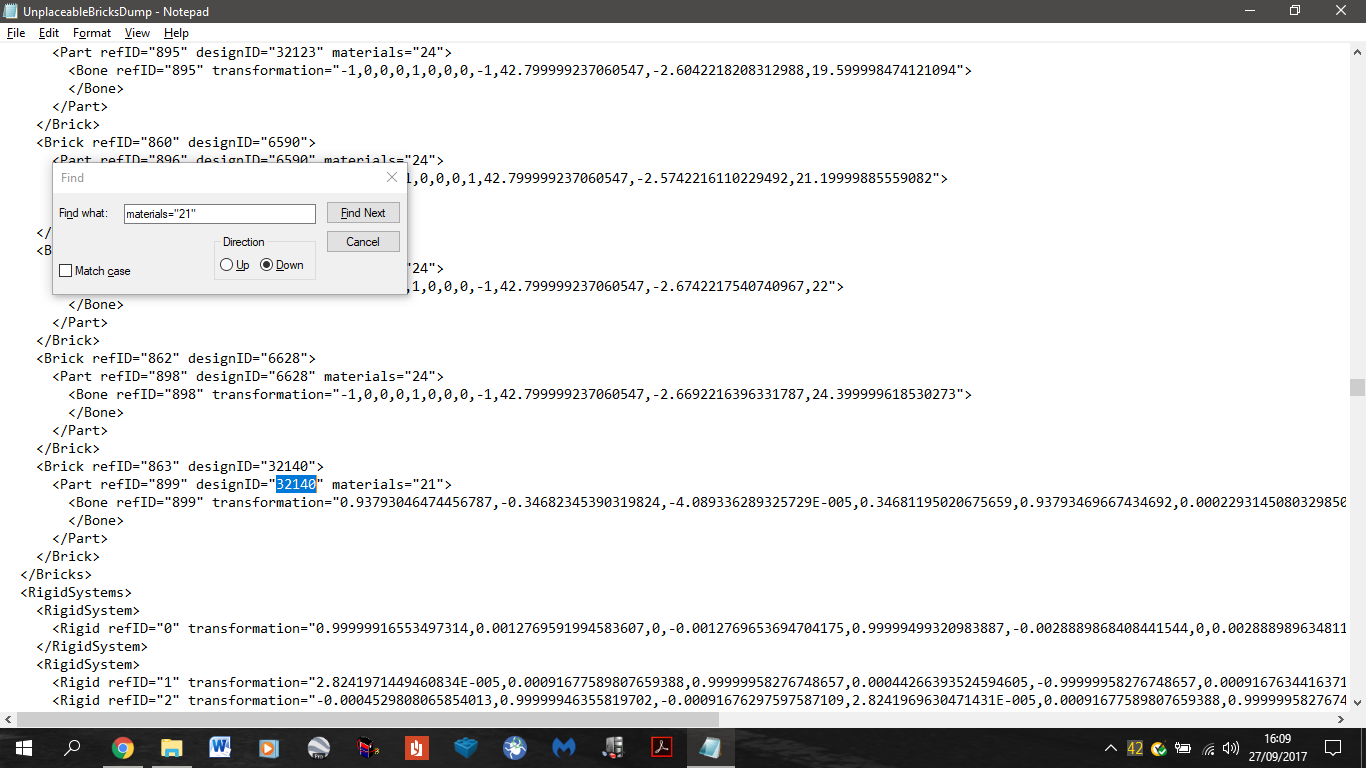
After that hit ctrl + F and search for (materials=“21”) (without the brackets but with the speech marks around the 21). Then when it finds something note down the Design ID. That’s as much info as it will give you, only the sort of piece missing. Then once you have the design ID, find out what it is by searching in LDD with the search function. Then is a question of remembering everywhere you used that piece.  If you’re lucky you would have used that piece only a couple of times.
Like this:
2 Likes
thank you so much for let me know this trick ! next time I try to do it… even because I was digging everywhere and it was by chance that I found the 2 missing pieces… 
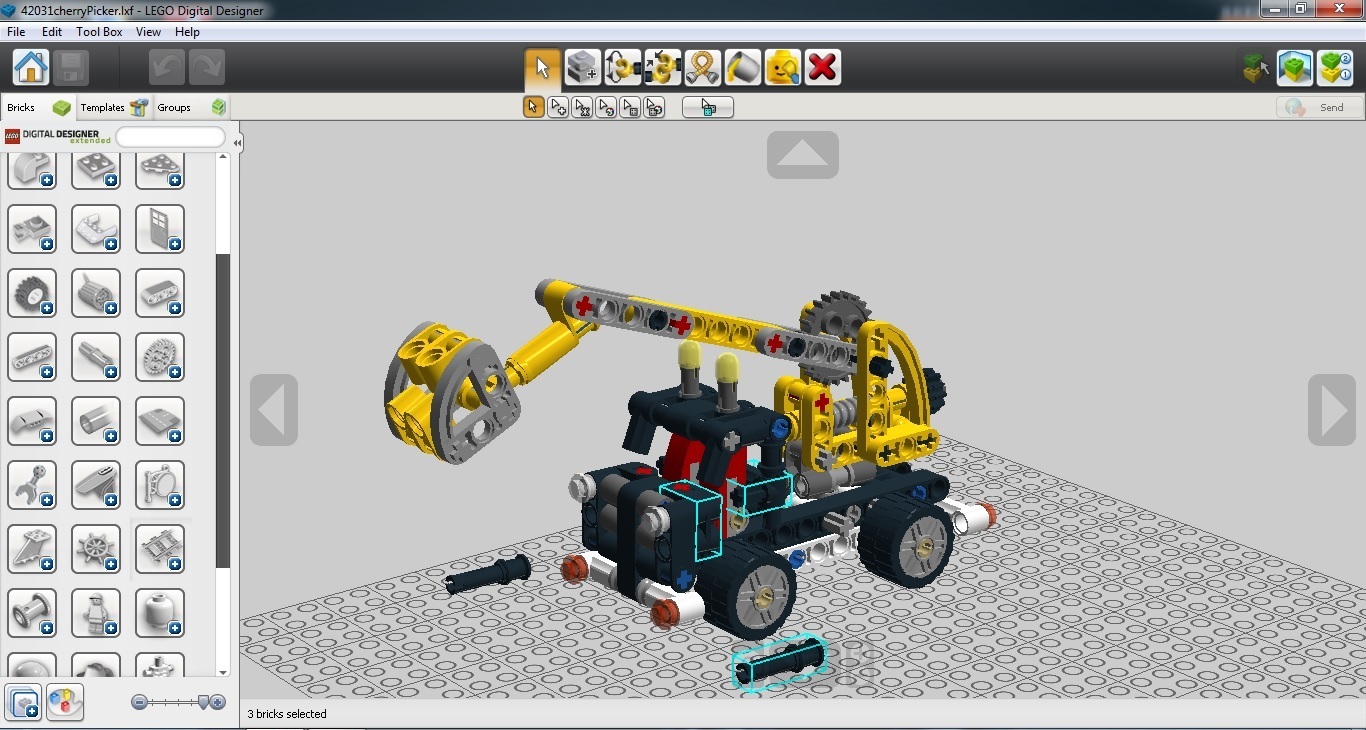
i was building the cherry picker, 42031… I know for you it’s an easy one… but I had some complcations with the software…it was so stubborn!!! 
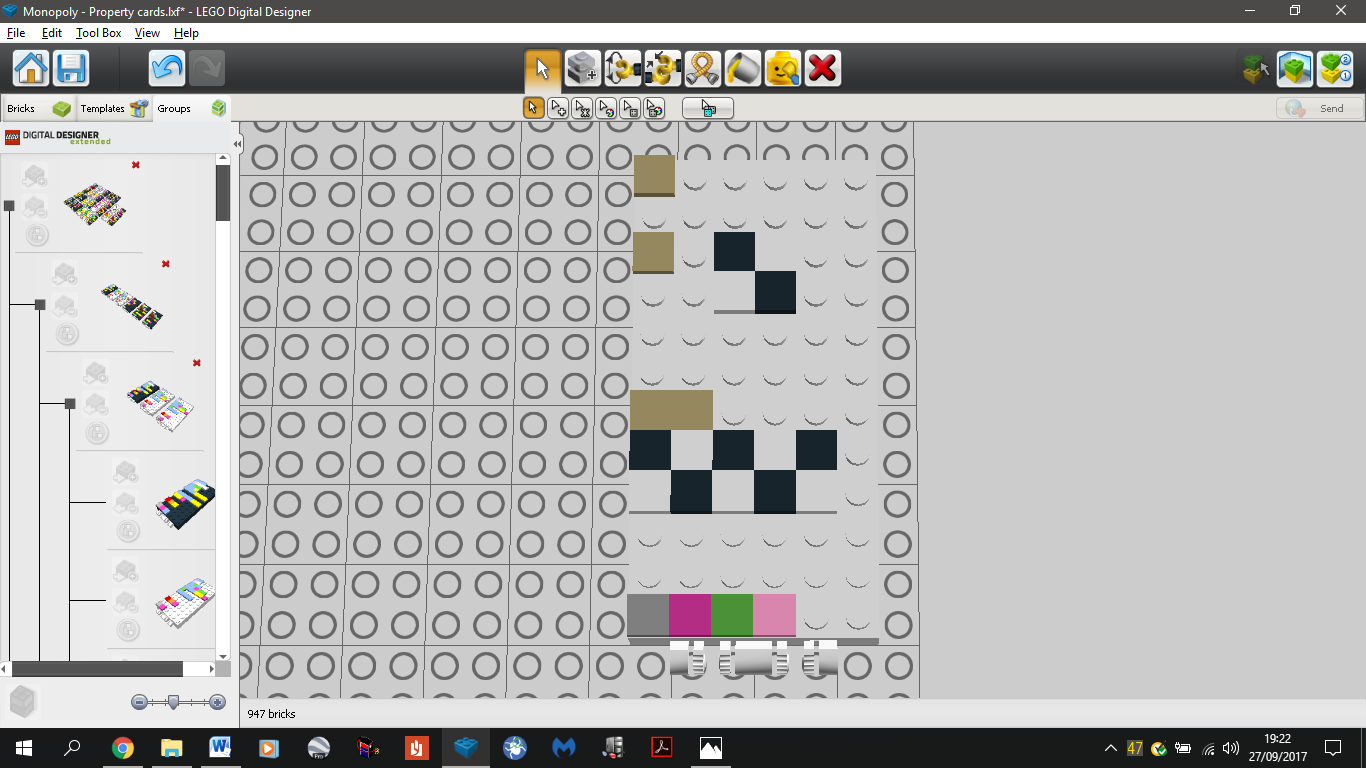
Also, see…it didn’t let me place these 2 pieces and I don’t know why… 
EDIT: maybe it’s my fault… 
1 Like
It’s a bit tricky to see it like this. Could you send me the file please? I’m seeing some minor errors in the other parts of the build though. For example the gears in the back aren’t meshed and the wheels are on the wrong way.
 I made a disaster…

Happens to everyone. The messes I’ve made have been ridiculous.
1 Like
Sent you the mail… 
Ok, give me 5 mins. I’ll sort out your removed pieces, but I’ll let you work the rest of the issues out yourself as it adds to your experience.
1 Like
Whoa!!! You’re great!!!how do you manage to fix it?? Thank you Rob!! 

1 Like
I see where you went wrong. I’m posting this here because I think others can benefit from it too.
Use the camera to your advantage, when you’re building you will always need to change viewpoints to see what you’re actually doing. I suspect that you try to stick to one view for the majority of the build, don’t, because it just makes it harder for you.
The program isn’t placing your pieces because you’ve got misaligned pieces. If you change your viewpoint you can see how to better align them. And you also need to have things like axles flush with a surface at the ends if it goes all the way in.
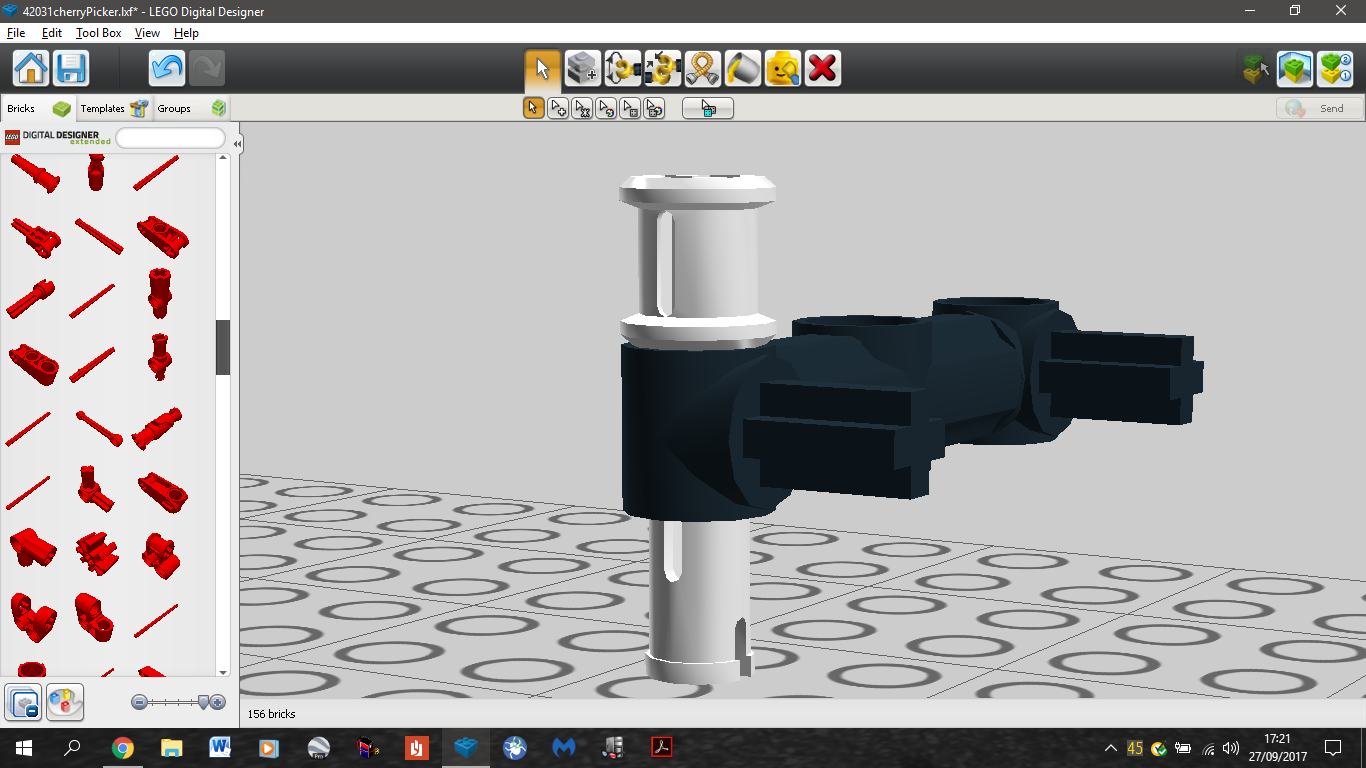
Like this for example: Here you hadn’t ‘pushed’ the vertical one all the way down (I changed the colour so you can see better, I will return it to black):
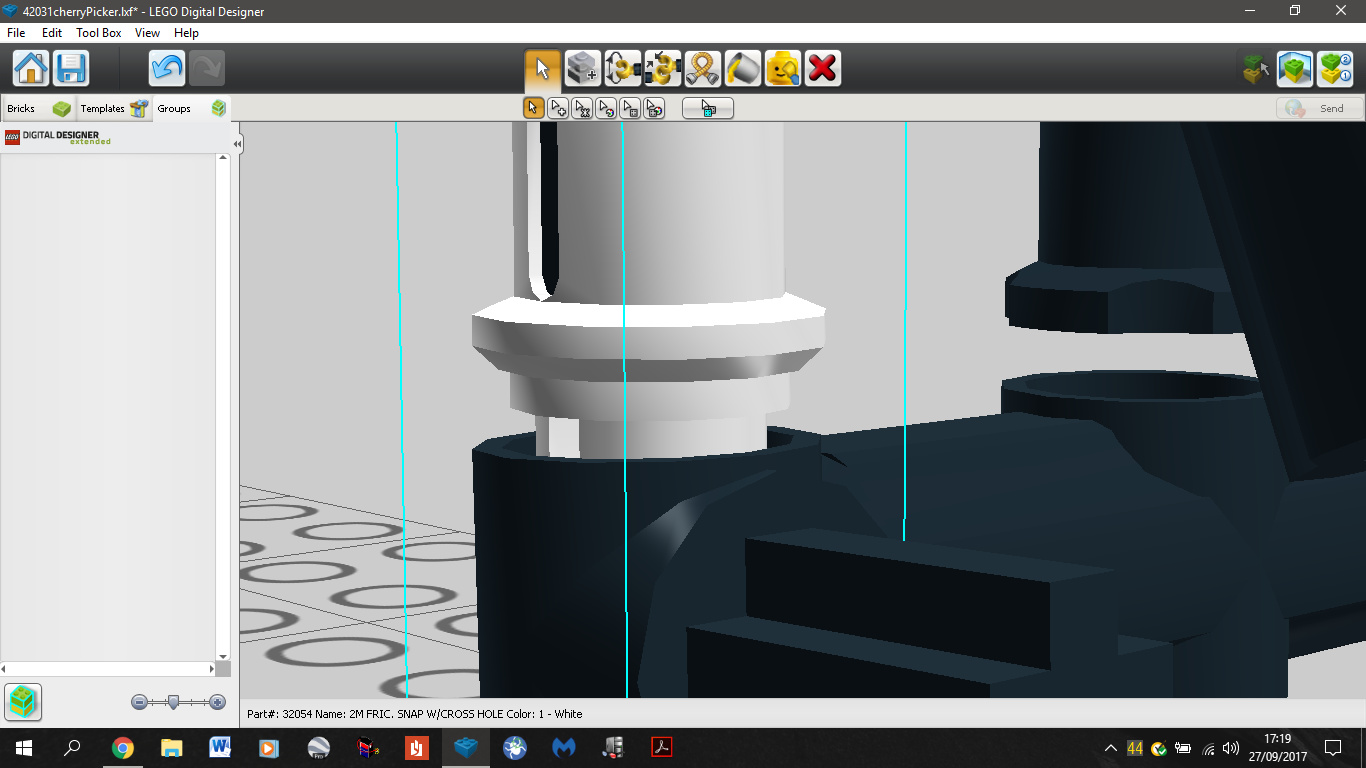
It should be like this:
Also I suspect you tried to rotate something when it it was attached to a lot of pieces. That’s not something I recommend because the program gets confused and tries to rotate the wrong part. Always take out what you are rotating, rotate it, and then put it back in.
One last thing that will make life a lot easier for you is to use the grouping function. When you have a main set of pieces group them so that you don’t have to move them piece by piece when you need to.
All of this comes with experience so don’t think you’re being an idiot. I was making similar mistakes to you at the start.
I’ll send it back in a moment, I’m almost finished.
1 Like
Ok, I sent it back.
Also the Monopoly board is ready for sharing. If anyone wants it they need a Dropbox account.
1 Like
You’re incredible!!! You understood all my mistakes with my file…  it’s all like you said…I did all like you described it…
Thank you so much! I was thinking that… the fact that you made similar mistakes is refreshing…
Thank you sooooo much!!!
1 Like
If you do something accidentally in a build and have no clue what you just did hit undo, don’t try to fix it by moving the parts back because it usually makes it worse. The only time undo doesn’t work is if you’ve just saved (I trust you’ve found that out by now). But don’t forget to save regularly, especially if you’re about to move a lot of pieces at once or are about to rotate something that looks a bit iffy because the program might crash and delete everything that is not saved.
No worries 
1 Like
Yes!found out at the first built! 
Thank you so much again! I saw the mail (didn’t reply there, cause we’re talking here), I’ll try to “study” to not make the same mistakes… 
A little, because I can’t help you with something… 
1 Like
I tend to be stubborn and I don’t take help even if I need it 
I’ve sent you another email you might be interested in.
1 Like
you’re so nice!
I’ll check it!
1 Like
Sent you a reply…
1 Like
Note: PLEASE DO NOT EDIT THIS POST, IT IS ONLY A WIKI SO THAT THE EDIT TIME DOESN’T EXPIRE.
Right, time for the mega post I said I’ll get to.
I’ll start with the basics.
-Total piece count: 13,186
-Physical size (with cover) ~ 80 x 80 x 20 cm
So I guess I’ll talk about the colour code system before I move on to the other bits.
Obviously lego doesn’t really have pieces with letters on them so making words in a sensible scale out of pieces in impossible so I had to devise a colour code based on the existing colours in the real game.
Money:
In the real game the money colour code is as follows:
$1 - White
$5 - Pink
$10 - Green
$20 - Blue
$50 - Purple
$100 - Faded yellow / cream
$500 - Orange
I tried to replicate this colour code as best as I could for the money. The physical money is made of 2x2 smooth flat tiles. On the board and cards they are represented by smooth flat 1x1 tiles. In the real game there is 30 of each amount so I made that many.
Property spaces:
Next is the colour coding of the property squares. All the property squares apart from the stations and utilities have colours. So again, I tried to replicate them as closely as possible. For the utilities I used beige and for the stations I used dark purple.
The main problem I faced here was making sure each one was different. Well in almost every colour zone there are 3 properties (a couple have 2); instead of representing them with names I simply represented them with a colour. For example the first orange property is Bow street, because it is the first and orange I used a 1x1 smooth flat orange to represent it, consequently the 3rd orange (Vine street) would be a 1x3 orange.
So the length of the colour indicates the property. This is why I can’t make an LP edition @theearlywalker , because I’d have to represent the songs as a series of coloured blips and it won’t look LP related. Each property also has the price at the bottom given in coloured 1x1 tiles. And above each row of the board is an indication of the house building price for each property.
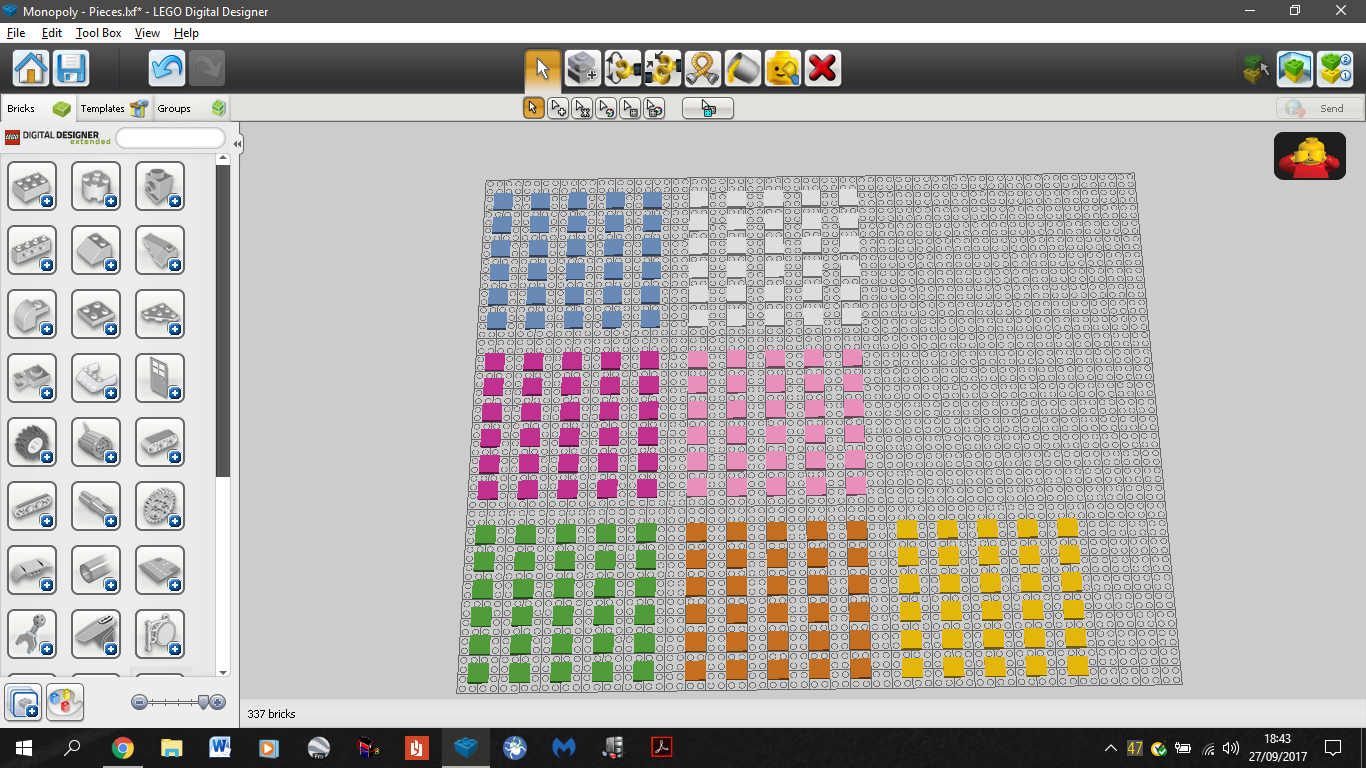
Here’s part of the main play area of my board matched to a real monopoly board.
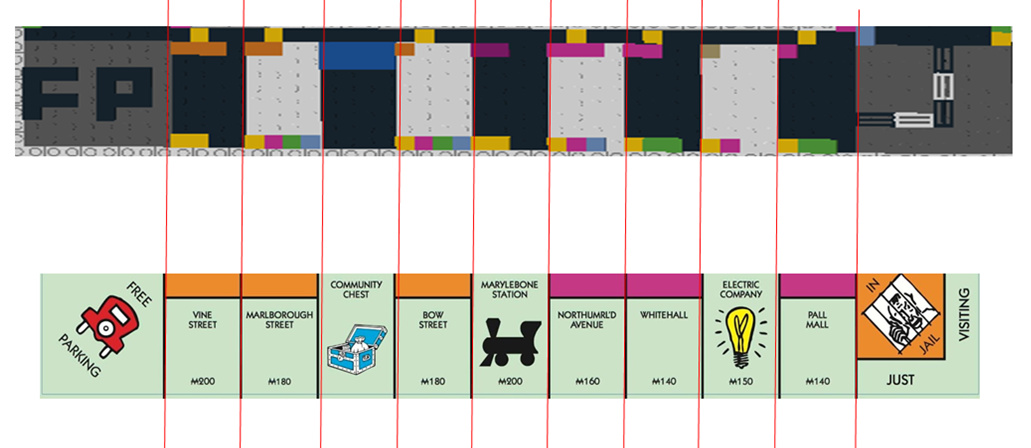
If you look at the Bow street space you will see the 1x1 orange designation, above it is 1 yellow 1x1 to represent $100 per house and at the bottom you see yellow, purple, green, blue. That means 100+50+20+10 = 180 which is the price on the real board. All the space designations follow the same principle, an area colour and a length that corresponds to its position within the coloured area (i.e. 1st, 2nd, etc…) and a price.
Other pieces:
Other pieces I’ve made include the avatars (which I couldn’t make into proper figures in the appropriate size), dice (2 regular and 1 speed dice) and the house and hotel figures. In the real game there is deliberately not enough hotels to fill up all the spaces but I find that annoying so I included more  .
.

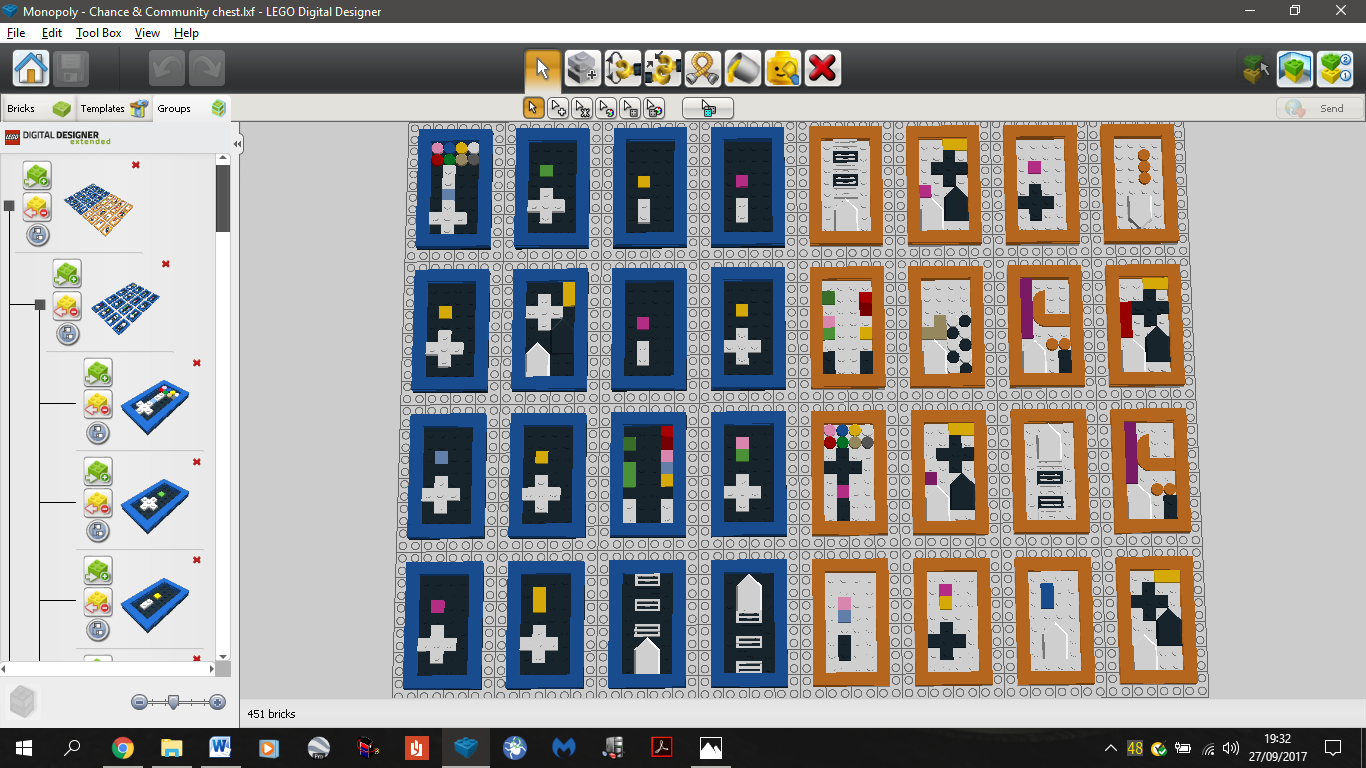
Property cards:
Going to the property cards, they use the same colour code system except this time the first row tells you the property, the second tells you the base rent, then the length of the coloured pieces goes up by one with each row for the next 4 rows to represent the rent for any houses you have built and then the red square gives the price for hotel rent. The grey square is mortgage.
For example if we look at Bow street again we see the following:
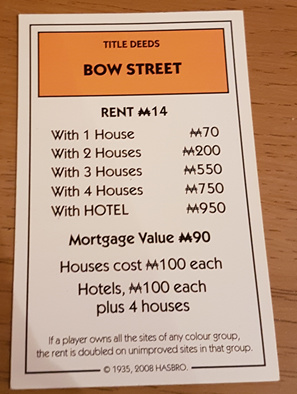
Now if we look at my card you will see that it corresponds:

You can see that the base rent on my card is blue+white+white+white+white = 10+1+1+1+1 = 14 which is the same as the card. If you look at the price of a hotel you will see orange + 4 yellow + purple = 500+(4x100) + 50 = 950. All of the cards apart from the utilities use this system. The utilities are different because for one it is 4 times the amount on the dice, for 2 it is 10 times the dice. So I represented them like this:
Some cards had pretty awkward numbers to make.
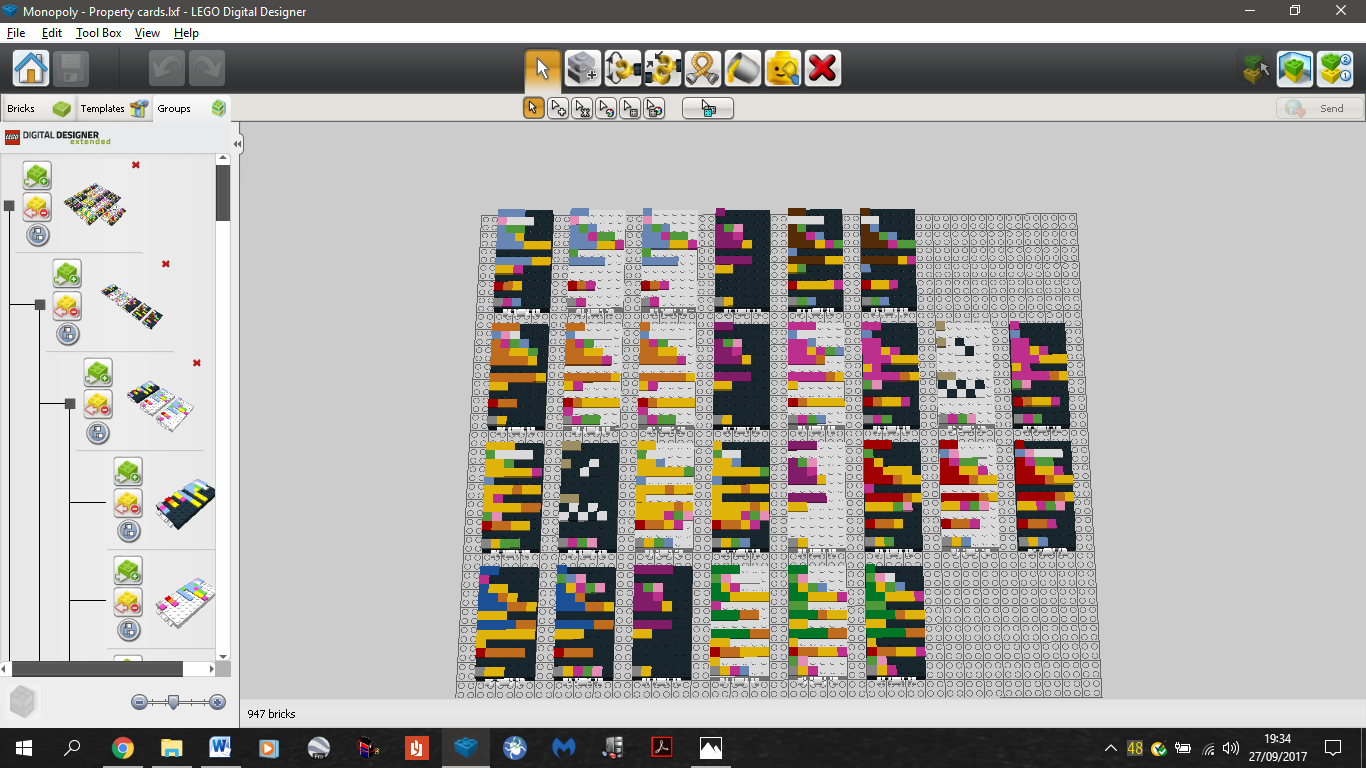
This is the full set:
NOTE THE LITTLE WHITE CLIPS AT THE BOTTOM OF THE CARDS, I WILL EXPLAIN THOSE FURTHER DOWN
Chance and community chest cards:
Similarly to the property cards I had to devise a system for reading cards that are mostly text so what I did was I ditched all the text (e.g. Bank error in your favour collect $200) and made it say the bare minimum (so the last example goes from a load of text to “+200” on the card). Some were a bit tricky to make. Like the “It’s your birthday, collect 10 from every player” card. I ended up coming with this:
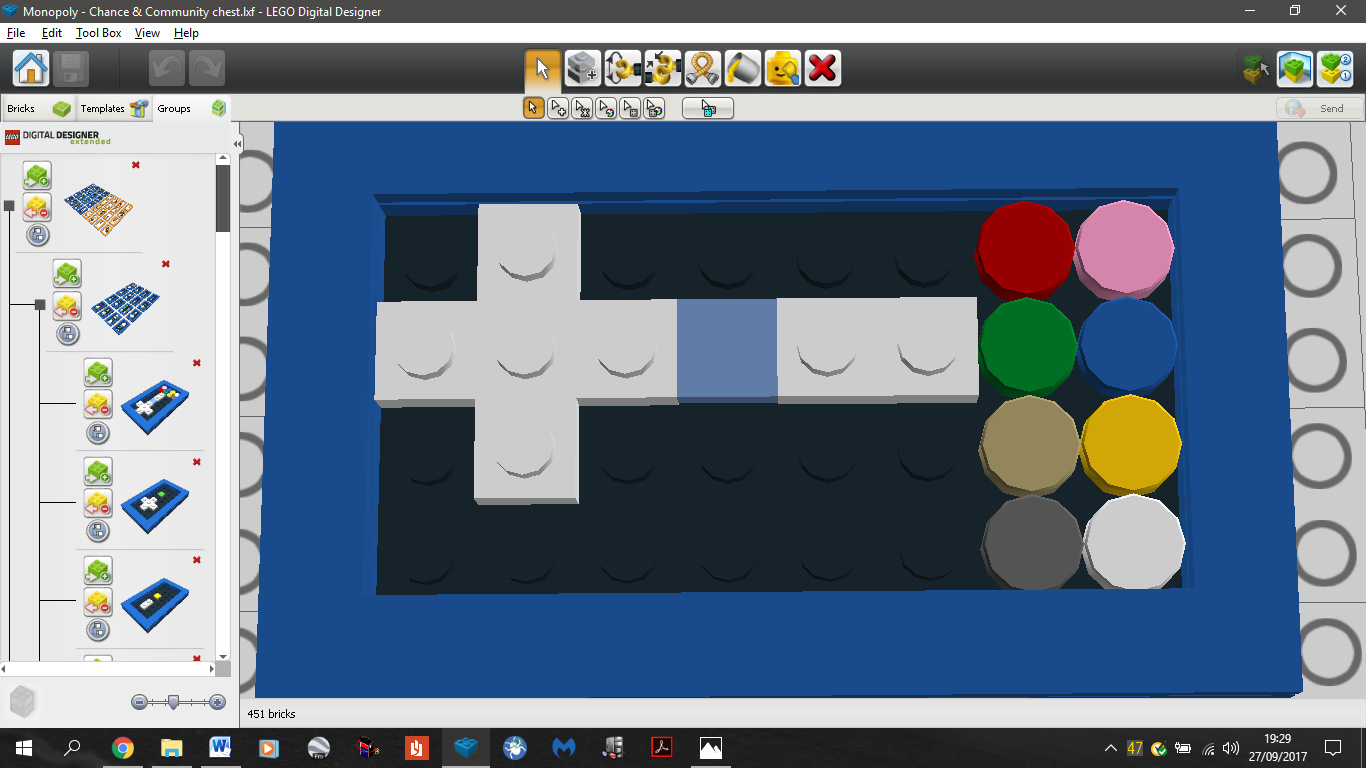
It reads +10 (for you) - from every player
The most diabolical was by far the one that tells you to go the the nearest train station and if owned pay double rent. I had to devise something along the lines of “go to the nearest station (represented by a 5 stud long piece to signify 1st - 4th) and pay 2x r (the r standing for rent, it looks messed up).”

This is the full set:
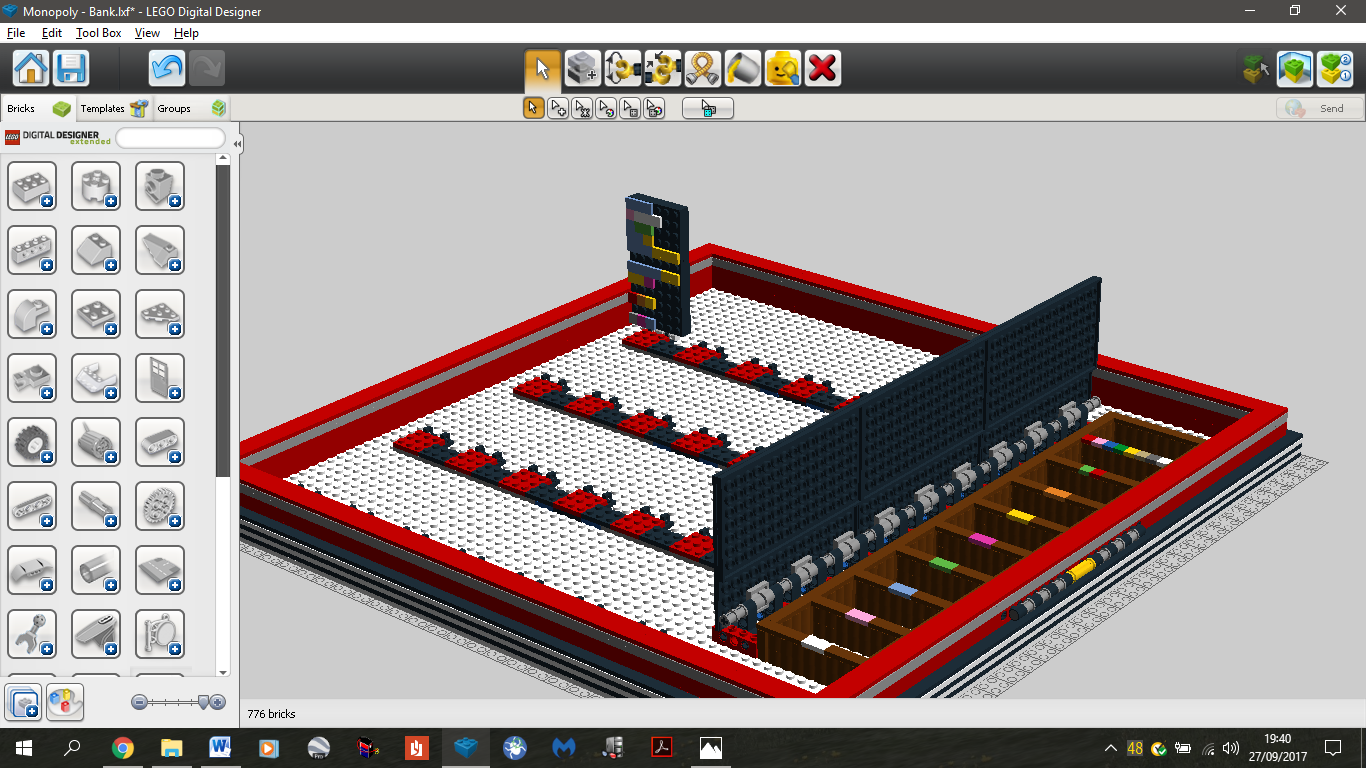
The bank tray:
It does what it says on the tin. This is where all the properties and the bank’s money is stored during the game and where everything is stored when nothing is being played. Remember those white clips on the bottom of the property cards? Well those are so that it can connect to the bank (on the black clips) so that they can stand up and fold over for easy recognition. They also detach and reattach to the same sort of clips on the board when somebody buys them. The other part is just a money and pieces compartment section with a lid.
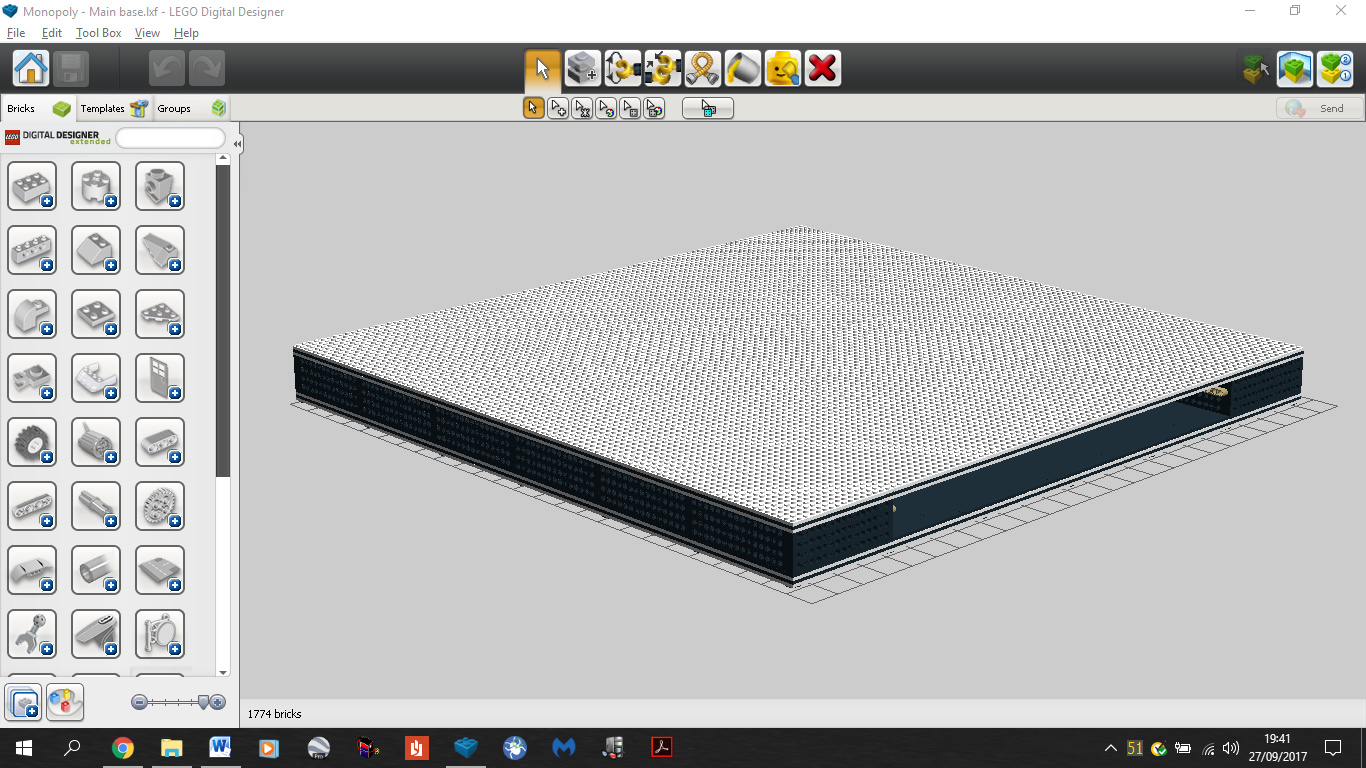
Main base:
Again nothing much to say, the board is attached to the top and the bank tray slots into it. It is also where the cover pins connect to the set so that the cover doesn’t just fall off.
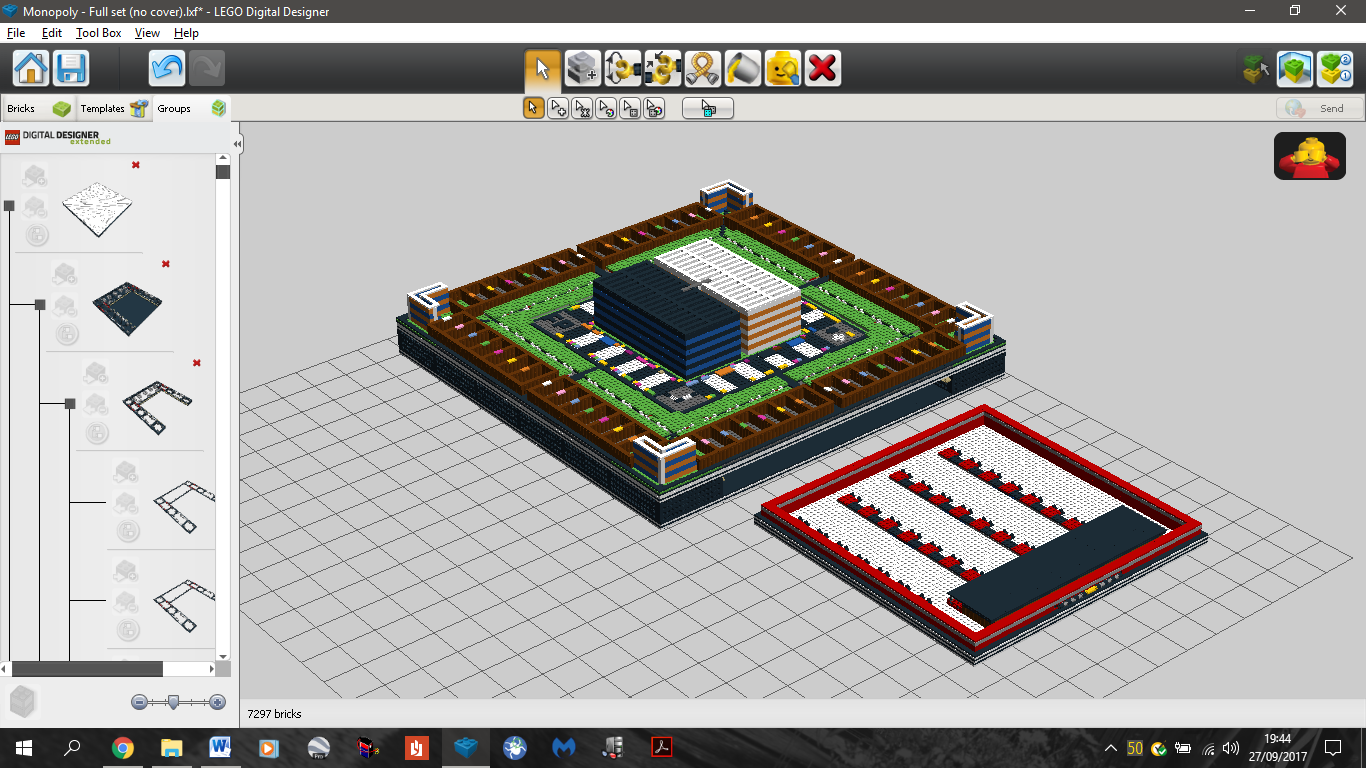
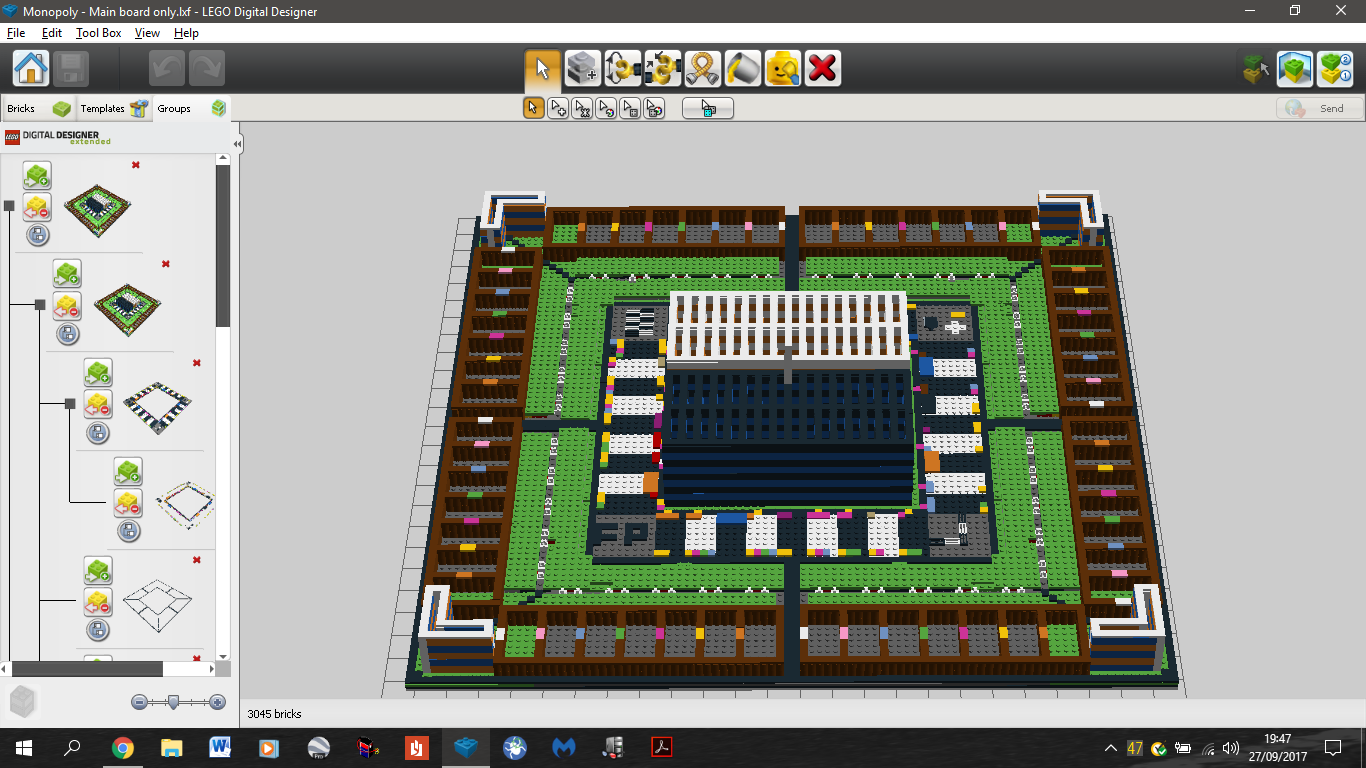
Main board:
At last we come to the main board. Here we see that it is divided into 8 identical sections for 8 players. Each player has a colour coded money compartment section, 5 property clips (like in the bank) and a get out of jail free card storage ‘pot’ at the corner of the board if they happen to have a card. Just past this area we see the actual play area and in the centre we see the chance and community chest card storage area, the outer slots are for fresh cards and the inner slots are for the used ones. There really isn’t much more to the main board.
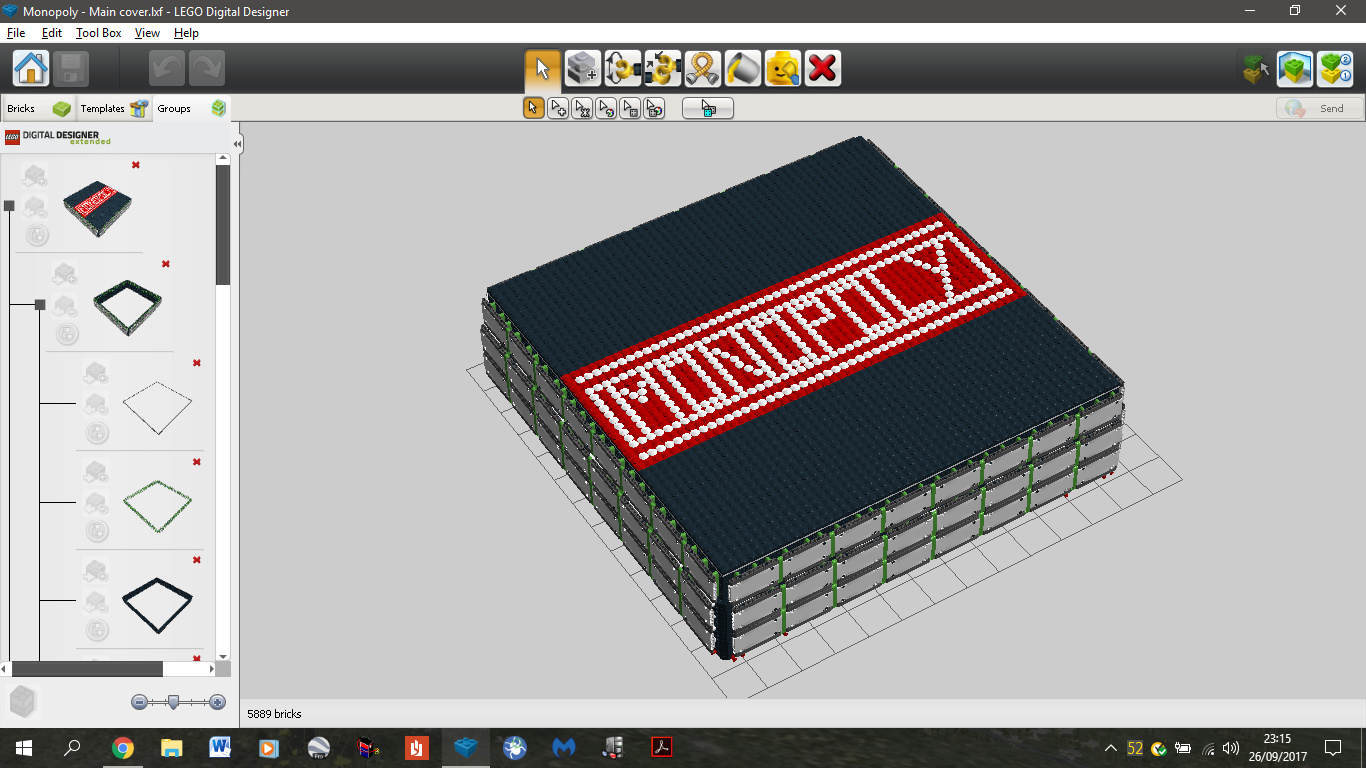
Cover:
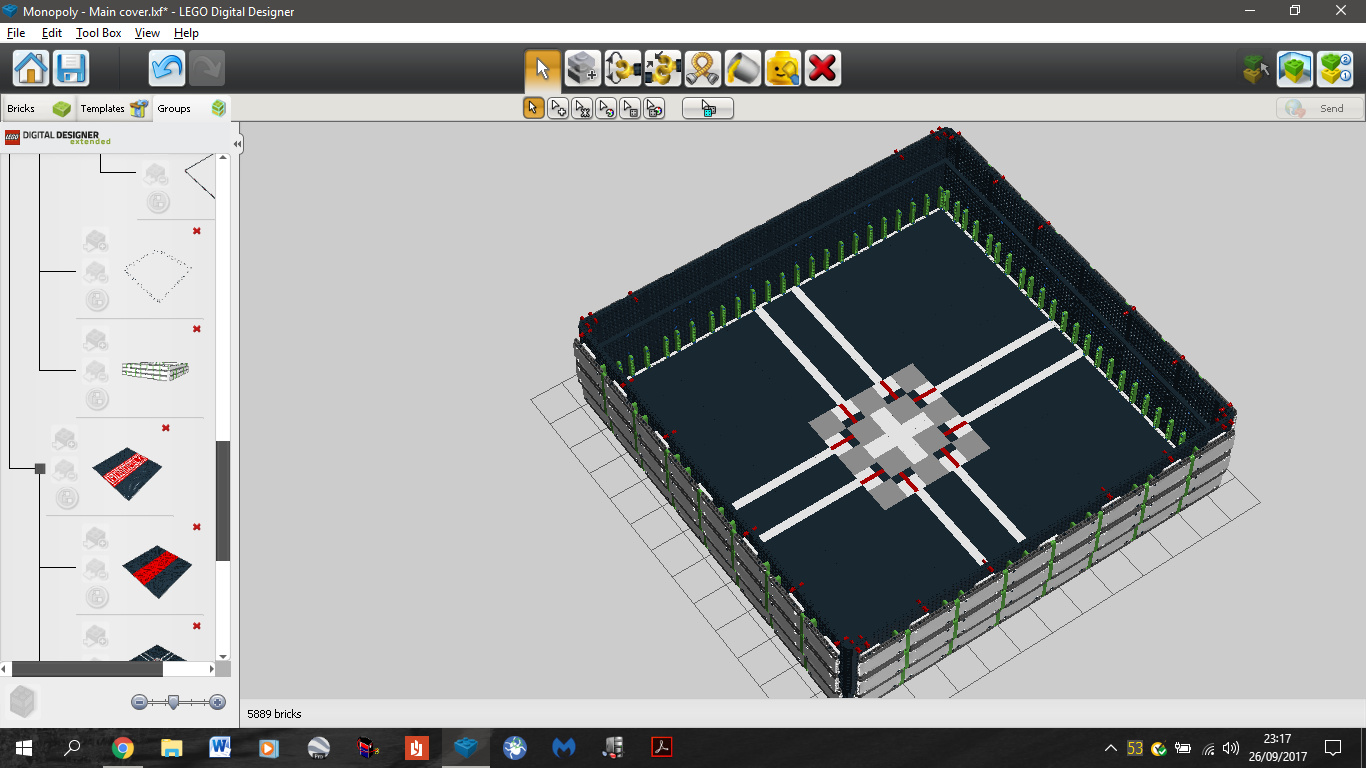
And finally we have the cover of the whole set. Structure-wise it is rather simplistic and yet uses a f*ck-ton of pieces (5889 to be exact) and the top ‘mosaic’ (the entire top surface) is made of 2297 pieces (2x2 round domed pieces [ID:2654] ). The cover has several pins that connect to the main base when you put it on. It also has a pattern on the inside surface just because I felt like putting one on.
And of course here is the full set but without the cover because LDD kept crashing.
https://sjc3.discourse-cdn.com/business6/uploads/linkinpark/optimized/3X/2/6/26f1e9fb34d96937c4ebe4b189c5edbdaf60bc47_1_690x387.png
5 Likes
Impressive…
1 Like