So I finally got around to fixing Camazotz and luckily I managed it (without stabbing anything into my desk  ). It works for now, hopefully it won’t go wrong.
I only took 1 pic at the start. Ignore the crappiness of my soldering helping hands.

So I finally got around to fixing Camazotz and luckily I managed it (without stabbing anything into my desk ). It works for now, hopefully it won’t go wrong.
I only took 1 pic at the start. Ignore the crappiness of my soldering helping hands.
It looks like everything is going great
Quick update on Camazotz, I just did about 20 mins of running on the kitchen floor and it seemed to be fine…for now. Hopefully it will stay that way.
If for some reason any of you are looking to buy a Q32, WALK AWAY , it’s hideously unreliable and costs way too much for what it is.
So I ordered parts for one last wave of upgrades for Banshee, after that I reckon it will be as good as I need it to be. I’ll only occasionally replace the tyres and clutch pads as those are parts that wear out. I’ll update the OP once I actually swap the parts out.
Parts list:
Had to catch up with 46 posts on your thread-  but guess what I loved most inhere? You changed ya avatar back to the one I liked mostly of your variety- :))))) this is just cool
  and: go on this passionated with your projects
This just randomly popped into my head, but I forgot to mention that my glossaries aren’t in alphabetical order on purpose. I’m working under the assumption that you guys know little to nothing (please don’t misunderstand that) about what I’m talking about.
So I’ve arranged them in such a way that they flow. This is because some terms refer to other terms, if they’re in alphabetical order then a term that follows from another might come before the term that it follows from and it would mean that you just keep scrolling up and down the page.
Thanks to explain… that is logical… you’re doing it the right way… 
Well as glossary standards go I’m not really 
I truly hope that everything gose great for your project.
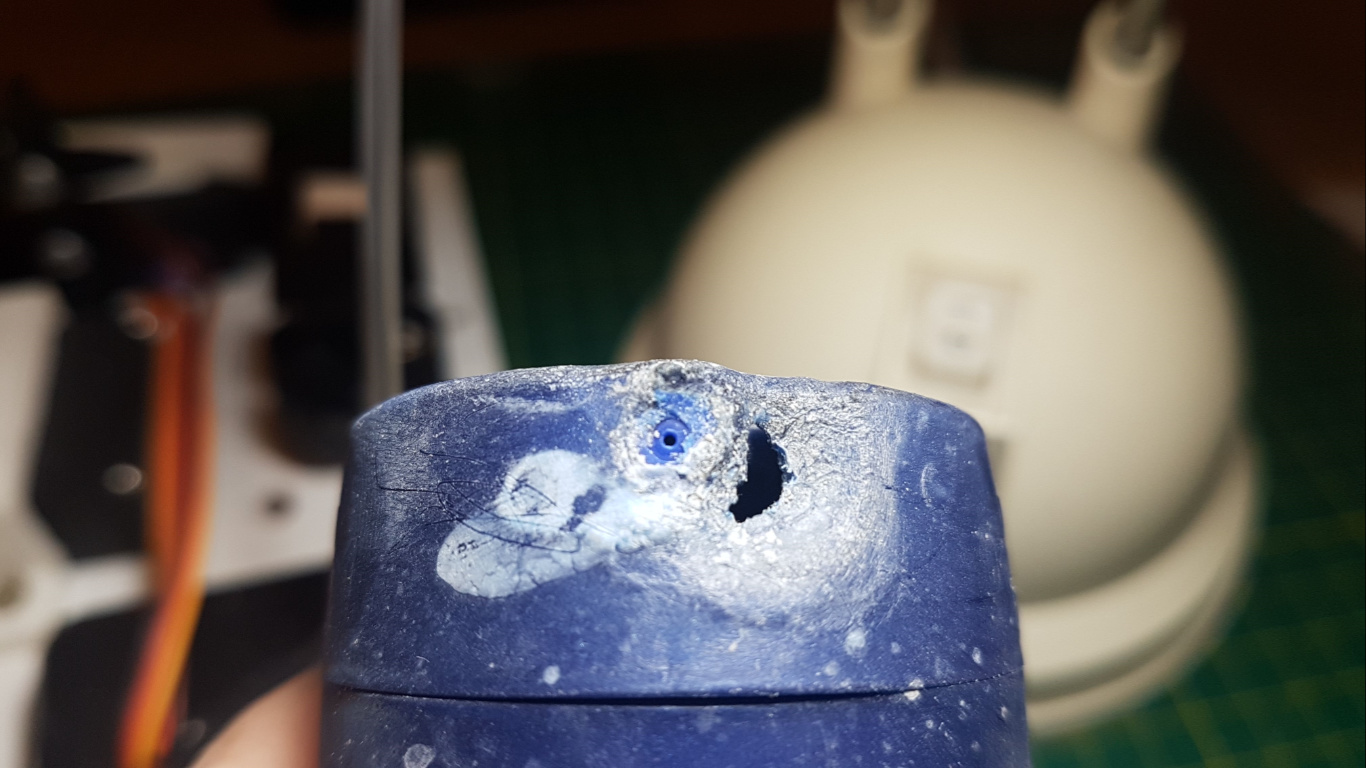
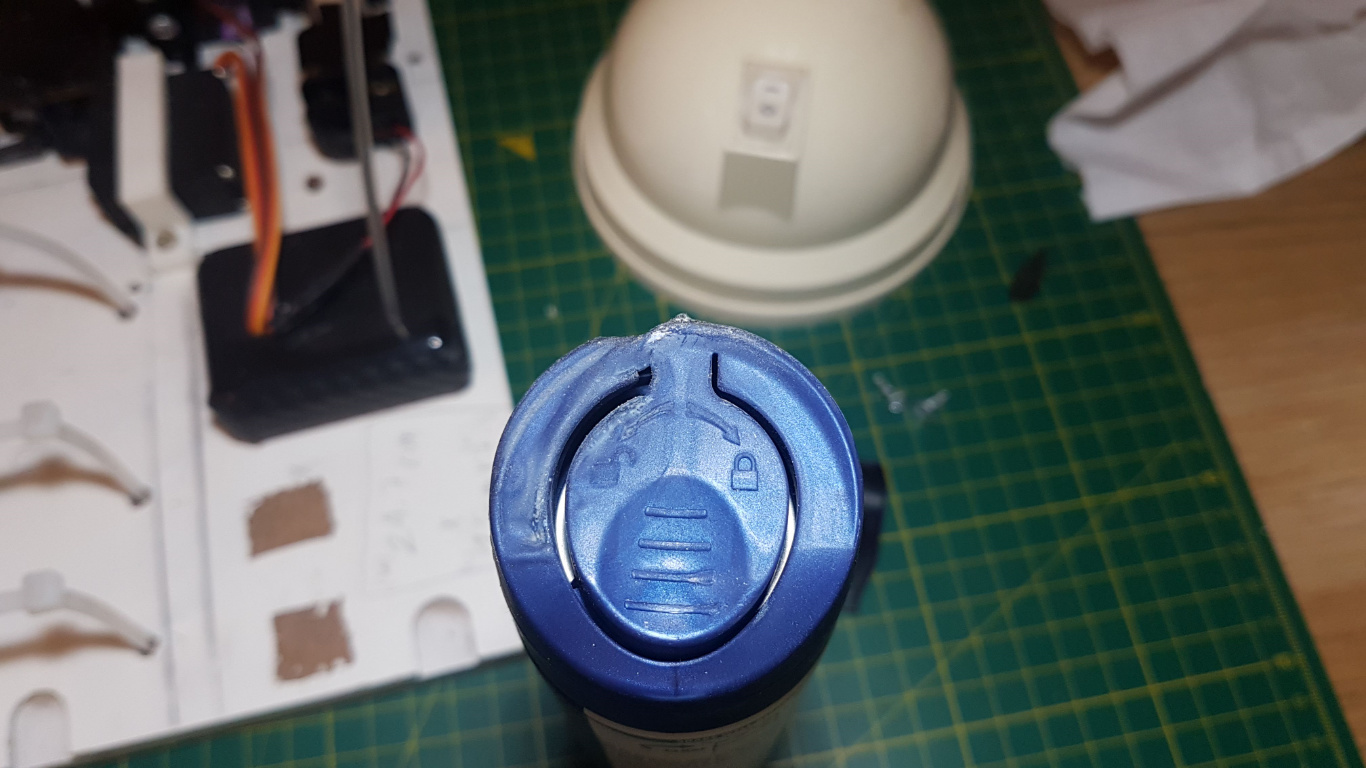
Post Halloween run damage to Hellhound. Strictly speaking the car is fine, the deodorant can cap melted. I need to find better deodorant.
??! What’s that 
Yeah hellhound is fine. So whom did you scare on Halloween?
I guess casing is an incorrect term on my part. I meant the main gear.
https://www.teamassociated.com/pictures/products/9828/9828_lg.jpg
Okay. Yeah i have seen those pieces before… didn’t knew what we call them. Thnx!
Miracles have happened today. I got a couple of my components from the US in under a week. As far as I’m concerned that’s lightning speed. Usually they take 2 weeks min.
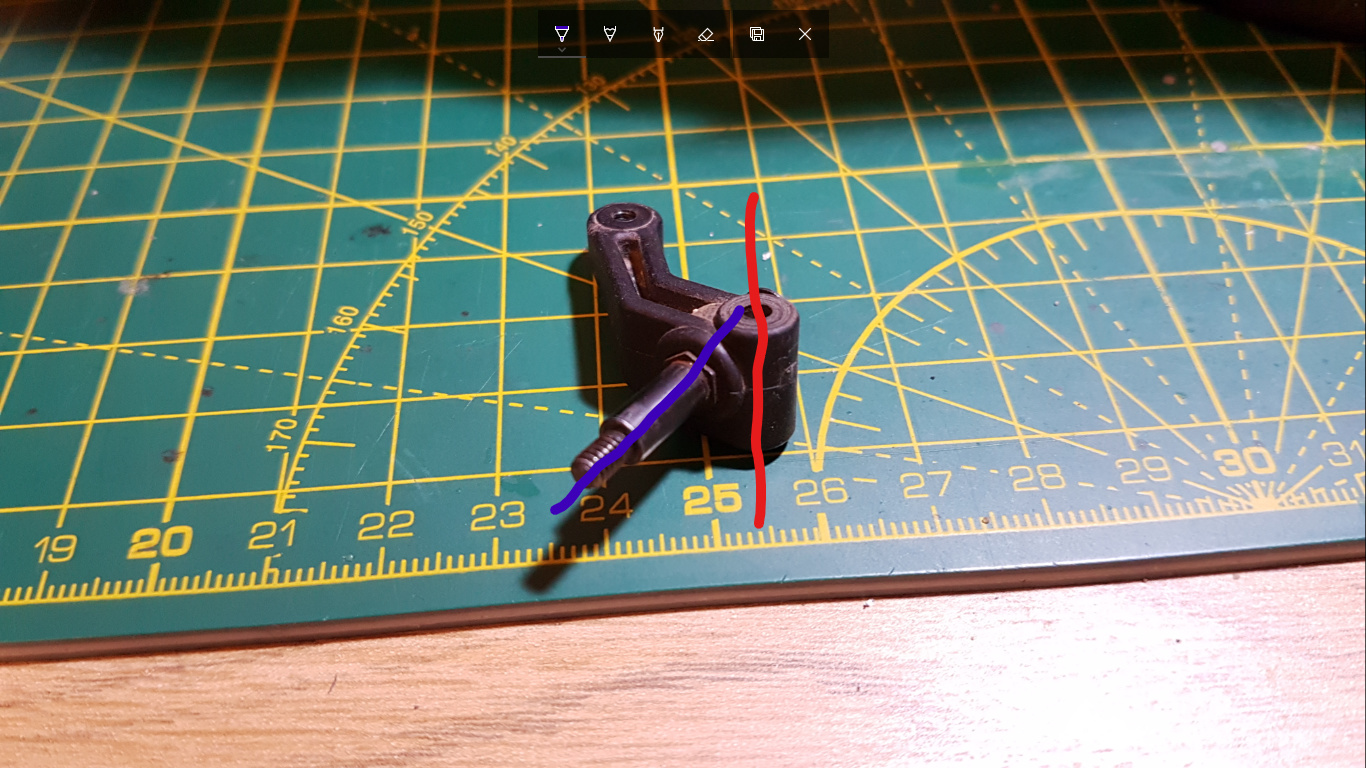
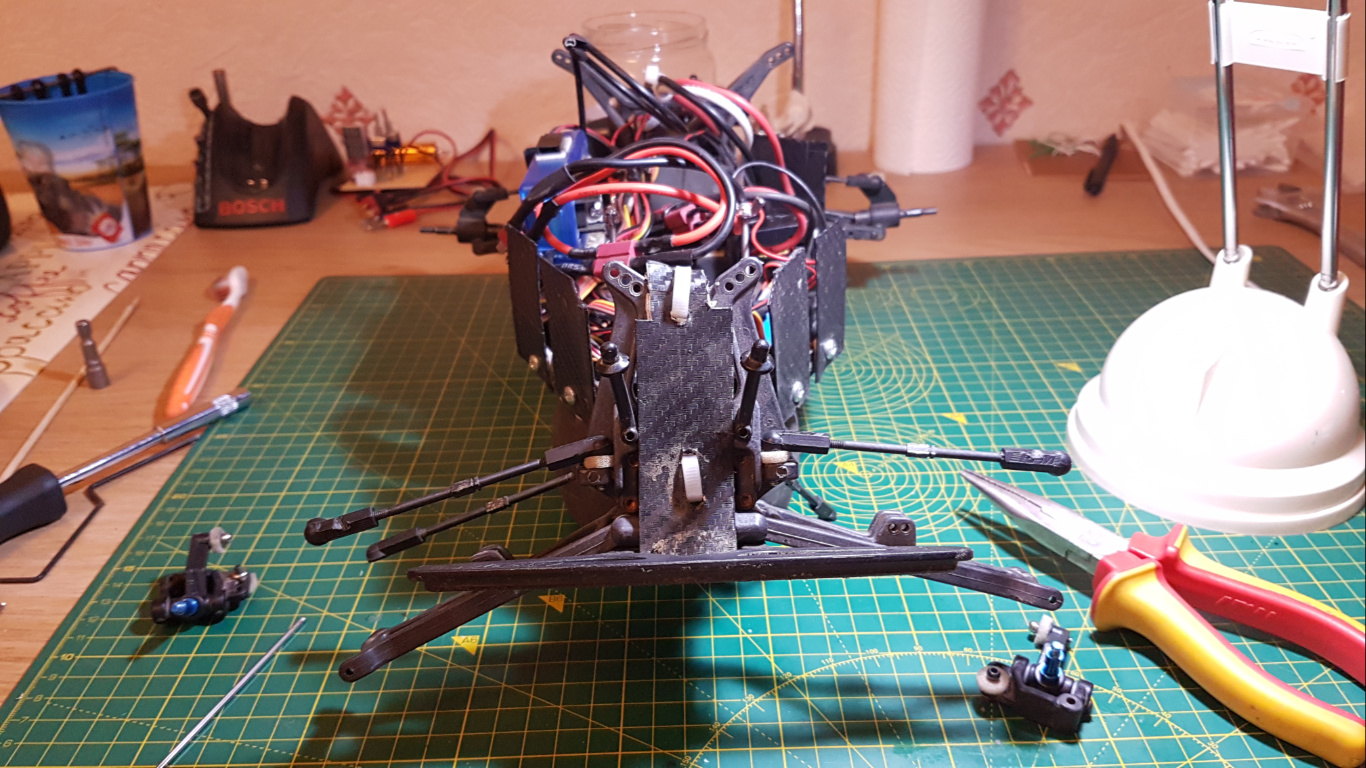
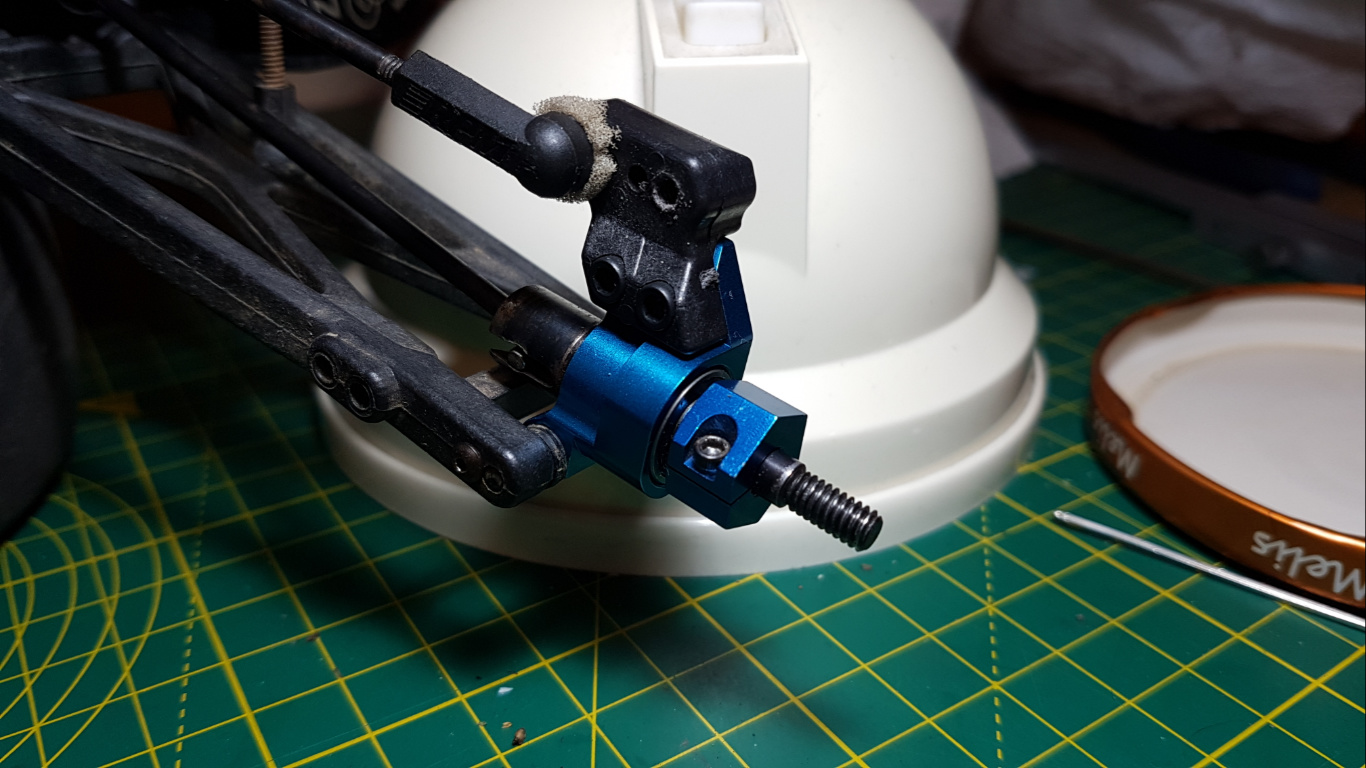
Anyway, I spent my evening replacing my trailing front axles and hubs with inline ones.
If you don’t know what trailing axles are take a look at the pic below. Notice how the vertical hole (the one between the 25 and 26 cm marking on my mat) for the shaft about which the knuckle rotates is in front of the horizontal black axle. This is what a trailing axle is, it’s called that because the axle is trailing behind the axis of rotation.
Whereas with an inline axle, the axis of rotation goes through the horizontal blue axle. It’s called an inline axle because the axis of rotation is inline with the axle. The advantage of an inline setup is more sensitive steering.
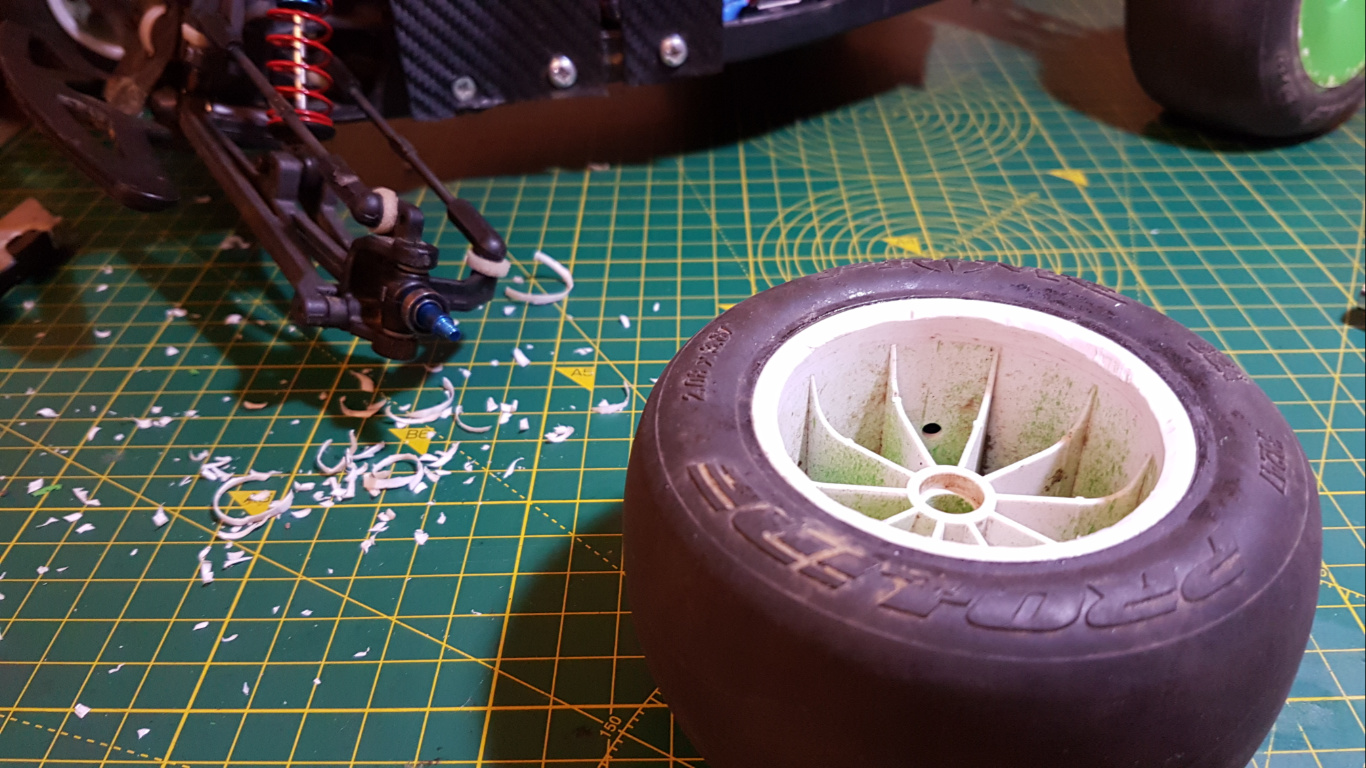
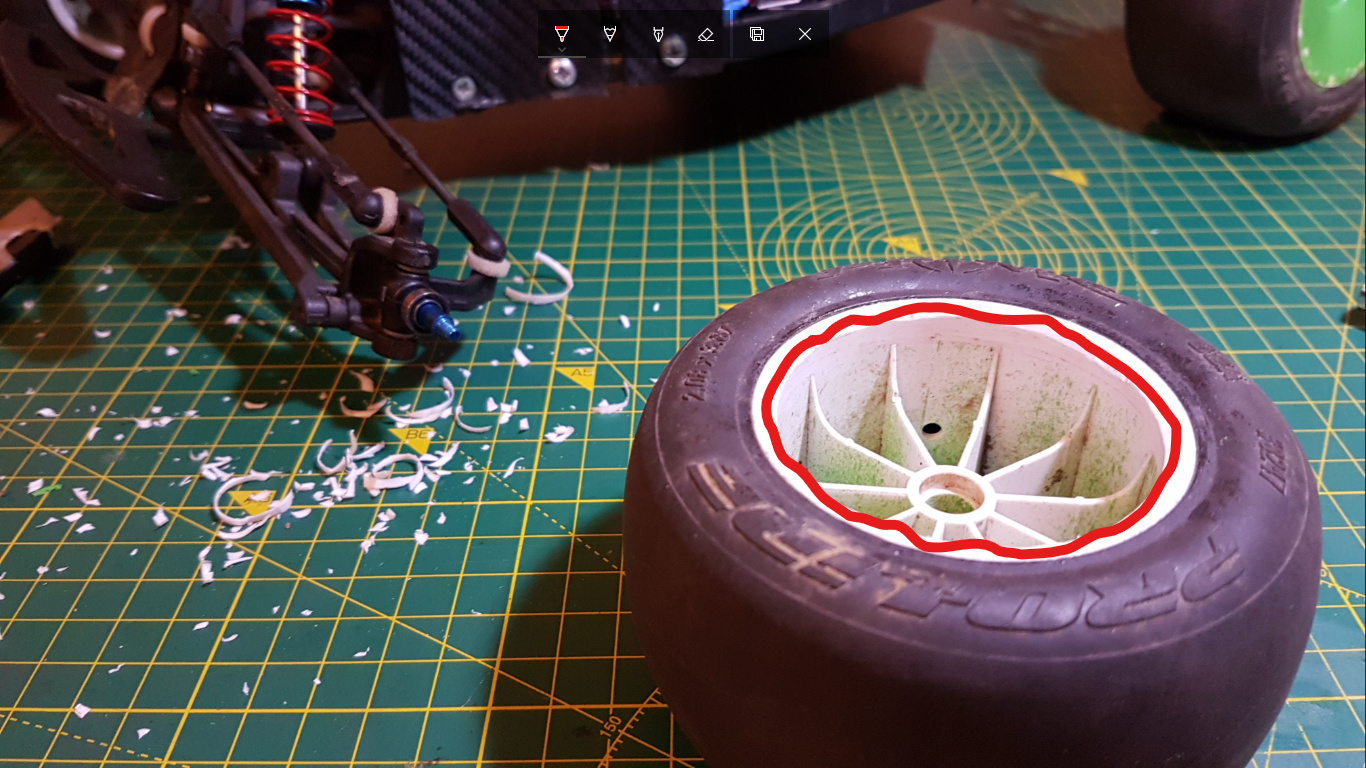
I also spent my evening shaving bits off of my front rims because the idiot who designed the inline knuckles didn’t do their job properly and the ball ends (circled in yellow) kept rubbing against the rim. Excuse my terrible drawing, it’s meant to be a proper circle.
Even more of my pieces came. I’ll probably fit them on Sun.
Everything looks good so far i can’t wait to see the finished project .
The changes won’t be visible on the surface, they’re handling upgrades. I’ve got plenty of pics in the OP if you look under “RC Projects” > “Banshee” > “Banshee Pictures” The closest to the finished product are the ones under “Post Mods V5”. Of course I’ll post pics after these mods too.
That’s great this glossary  makes me understand it at least a lil - from the technical part of your projects!
  and nice you got the ordered parts- was it banshee there - naked on your Desk??
What are you improving on her  in easy words please … and good going with it
Yes and yes.
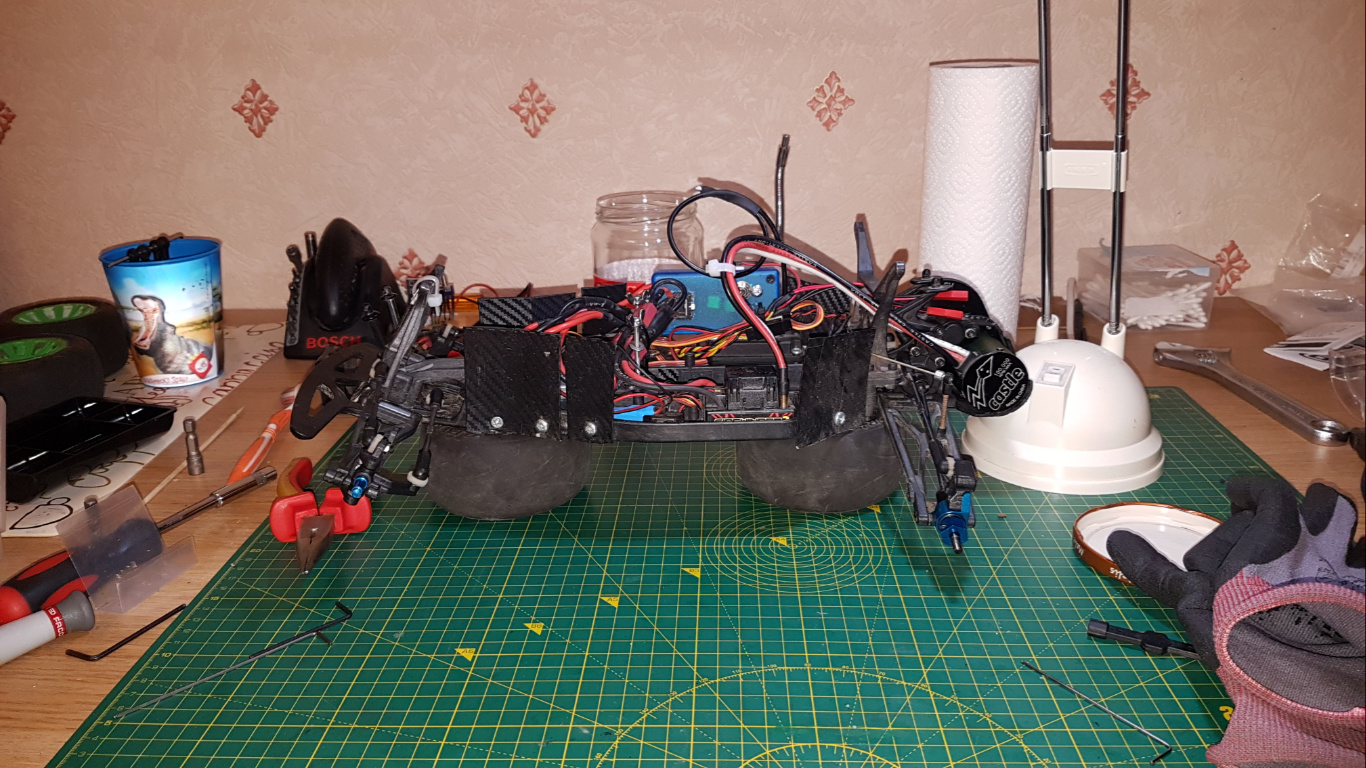
Progress report for today:
-Diff gear replaced
-Idler gear replaced
-Anti squat added (6 degrees)
-Aluminium rear hubs installed (1.5 degrees of toe in)
-Caster blocks swapped (30 degrees)
-Shocks emptied
I’m just waiting for the V2 spring and washer so I can install the clutch plates and I should be done. I’ll refill and fit my shocks tomorrow. After that it’s just tuning without buying new parts.
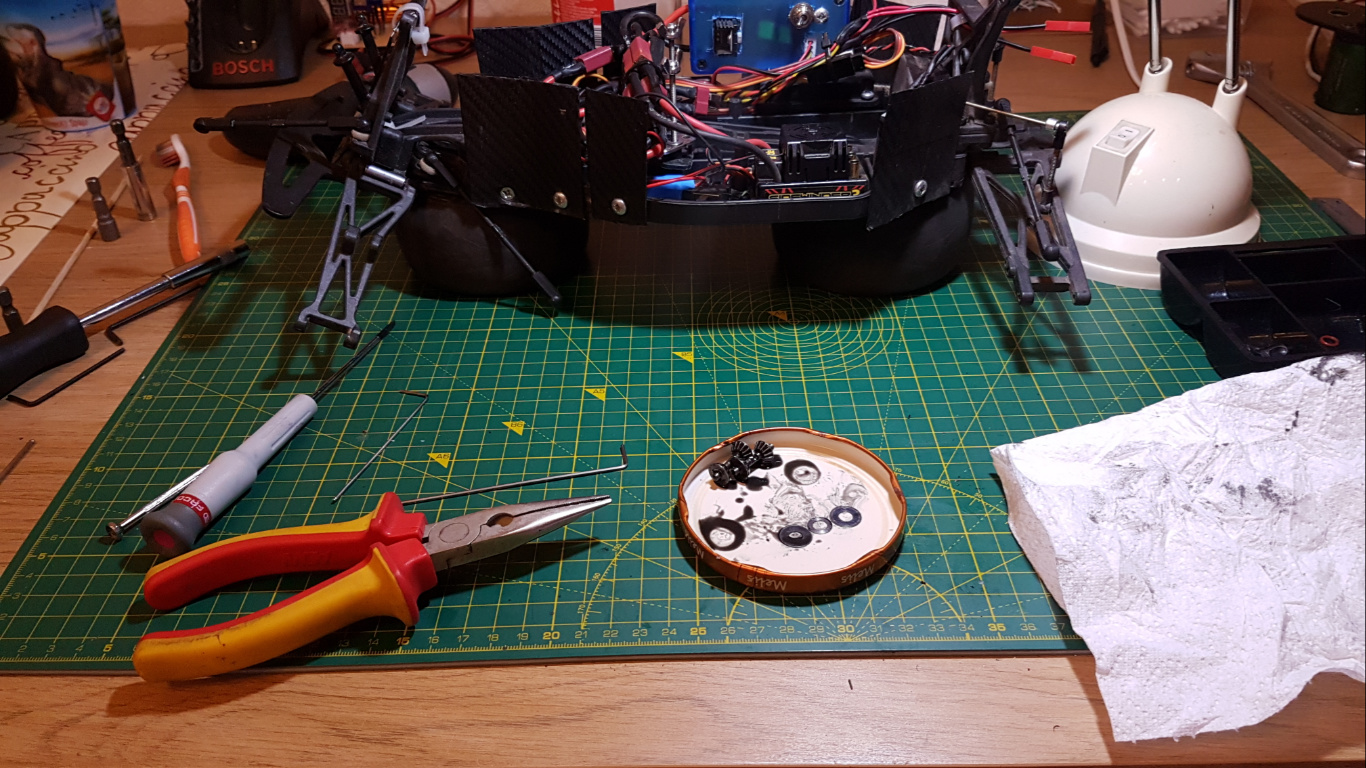
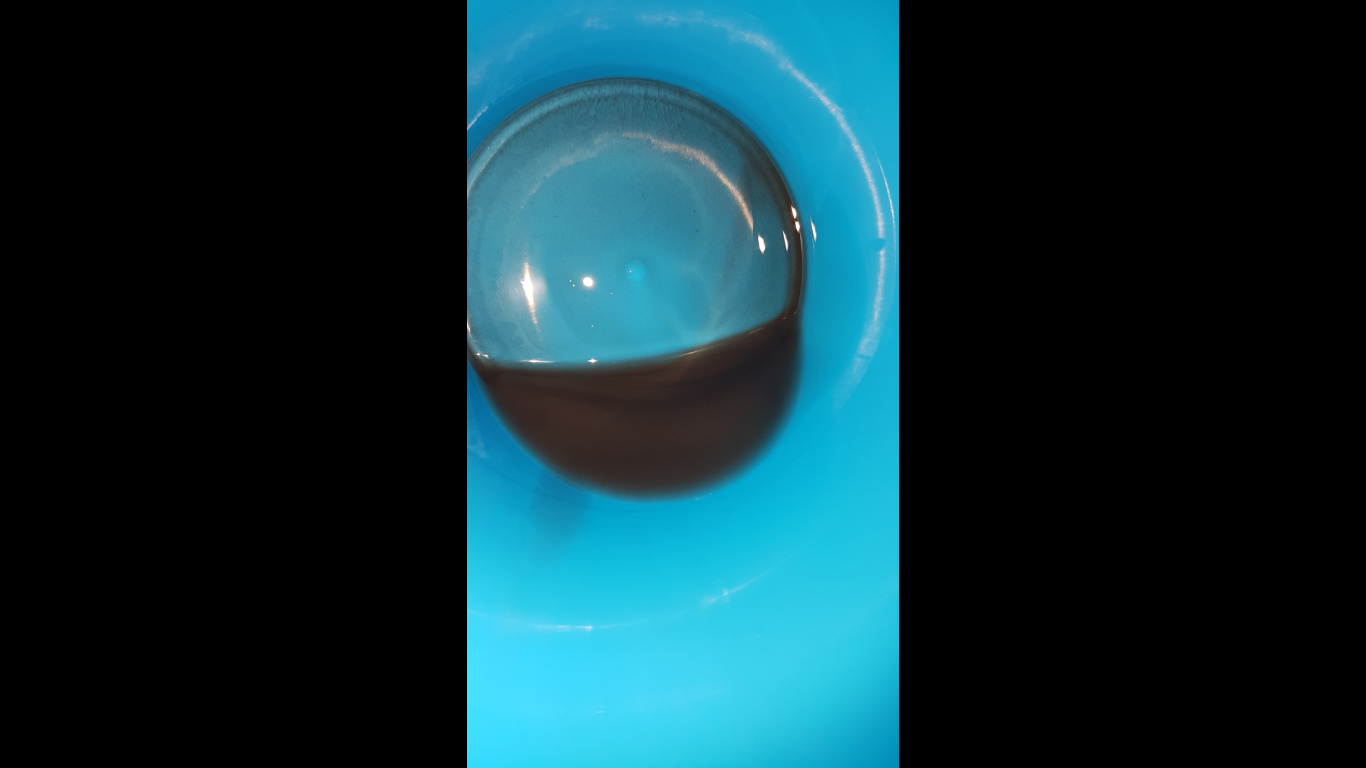
This was the state of my shock oil…it’s supposed to be clear. I’ve never replaced it before.