
Without practice there is no progress  Happy V-Day

ok, I have a lot of stuff inside, needed to be painted out, mb this wholesunday on, I´m not needing much more, a fine music, a white screen and me and my mood, mb it itsa good idea to start right now a new pic? I alsways, mostly draw with aquarell wax pencilss on paper or with acryl on screen , so today a biiig size one on screen, dunno if it gets light or dark, but @coon, tell me a song you adore pl…
I love watercolor pencils too. By the way, I plan to make a tutorial about them. Because there are many different techniques of drawing by using watercolor pencils.
I’ll draw a tutorial with “Blackout” by LP. This song makes the heart beat faster, and due to enhanced blood circulation is my head works better lol 
oh I love BLACKOUT MB THE REAL RIGHT MU SUGG!!! mostly I love the turning part, the “calm down” part, thanx @coon again, so I will prepaire my kitchens table [ugly photos are made, will be sended during my TODAYSPROGRESS have to do, so I will, I´m exited and fwd looking to MY SLEEVE::::
 tutorialös of aquarell pens would be more than GREAT:::::))))))))) LOL
edit prepaired, but weired descision, water pen on screen? but how is this working @coon, now I suggest this 1:49h show for my process…lol 
for not confusing topics no more, my music sugg here:
No no no! Watercolor pencils on paper. But they can be drawn in various ways, to achieve various effects. But I’ll explain later
but I´m still beginning a tube violett, and it works, me I´m like water pens on screen…lol, mb shit or hit…lol @coon
…ot and the post aftet tv is leading me…
This is so awesome! i like to draw but i think i sucks when i try to use the shadows or color something x3 like an elementary school child with no talent xD! but i will practice all you shared thank you so much =D! <3 I Love it!
When I was 18, I drew something like this: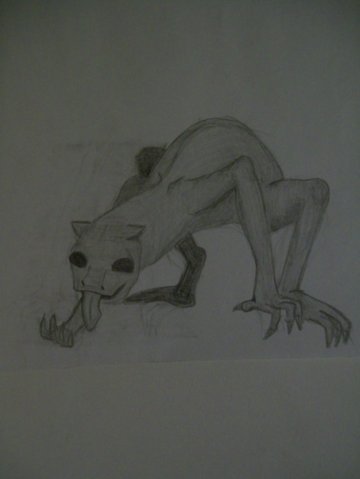
Yes, this is my drawing. Now I’m 24 and I draw like this:
The main thing is do not give up. Practice, try to draw every day. As a little bit, but every day. I believe in you

1 Like
Part 6
About perspective.In order to build an image in three dimensions at the same time, we need the horizon line. Draw a horizontal line, and put a point on it - it is called the vanishing line.
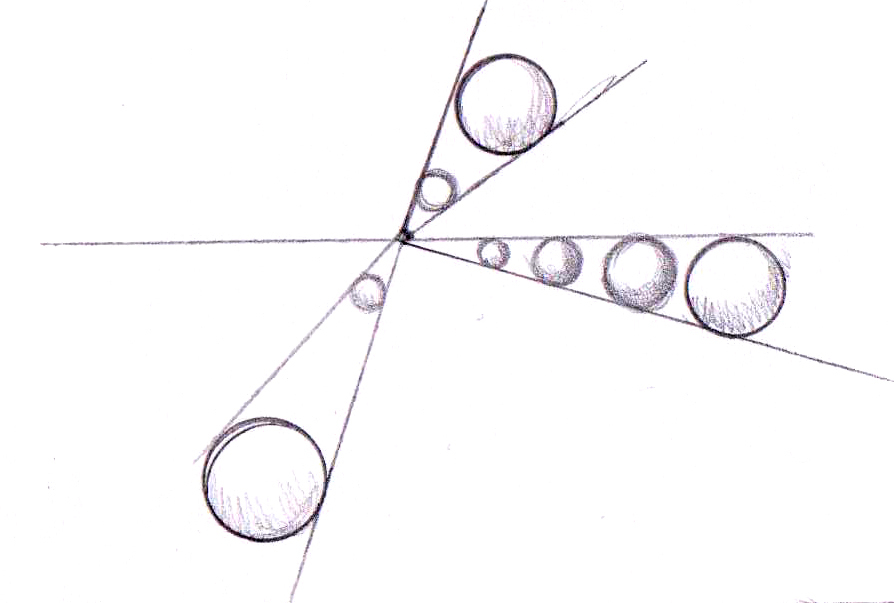
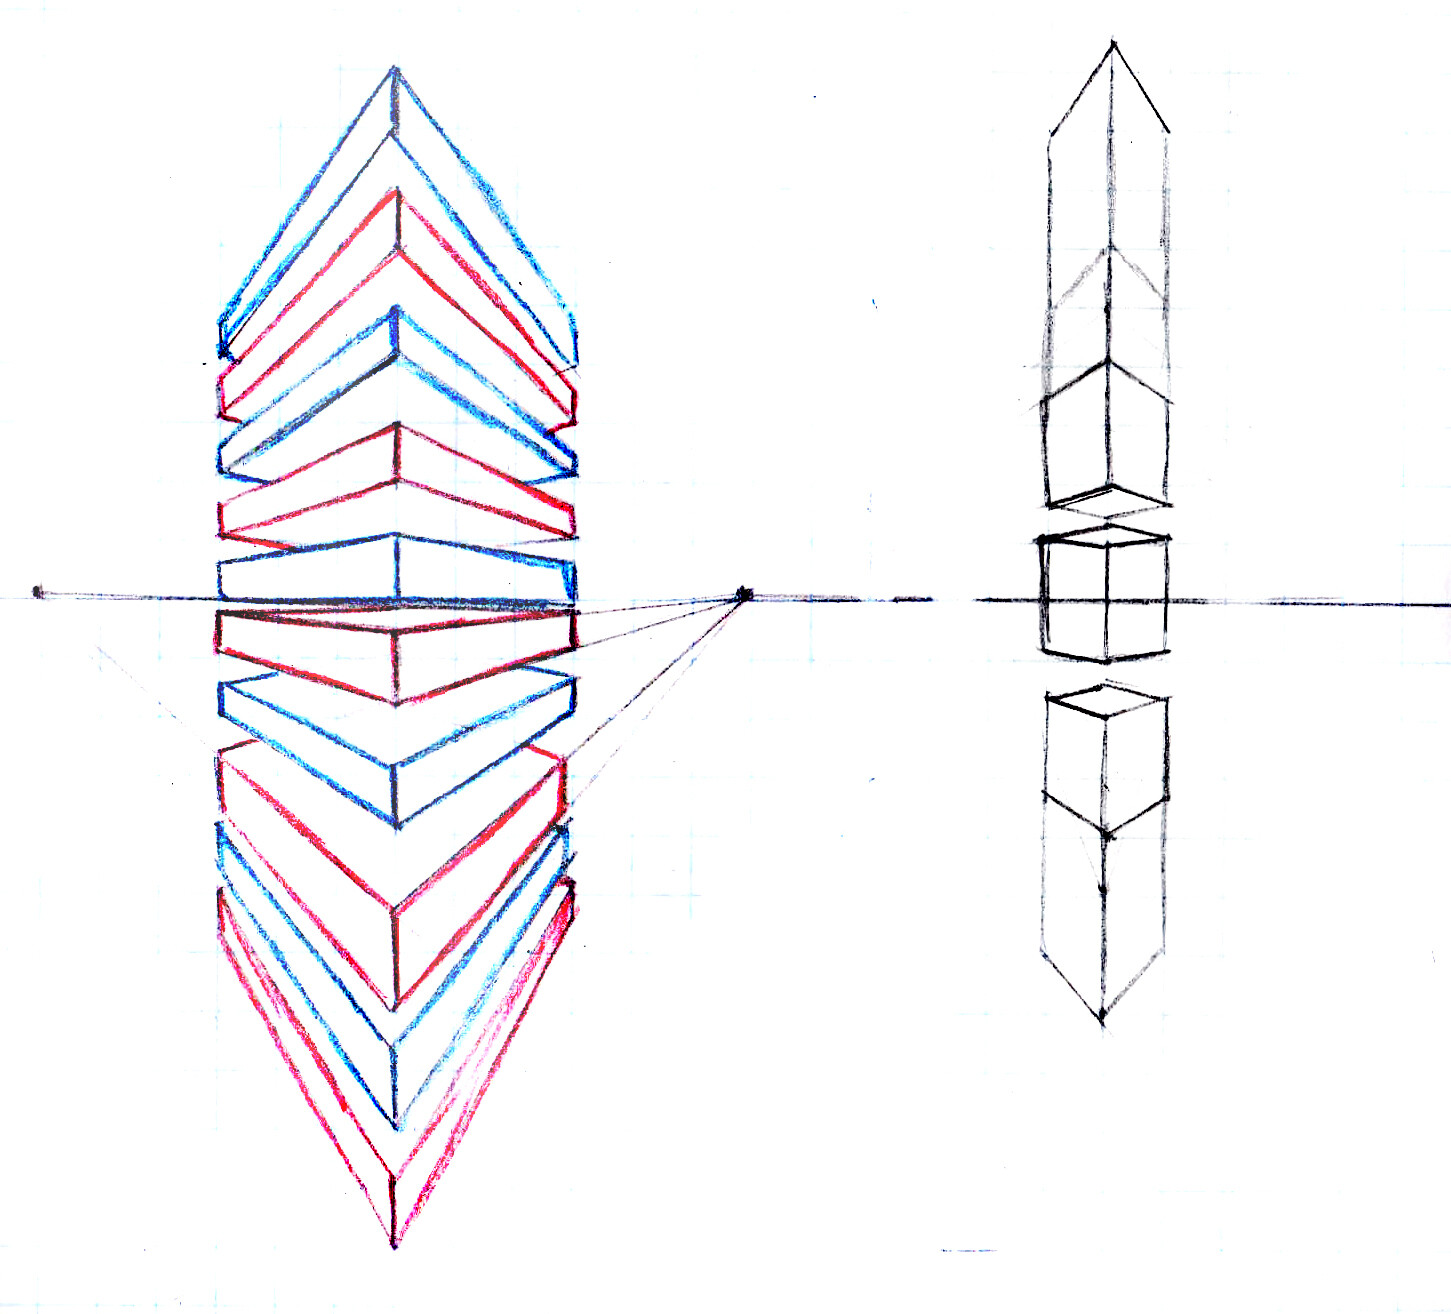
What is volume? It’s height, width and length. Let’s look at the shelves in the wardrobe. If I look at the very top shelf, the image will distort in one way, if I look at the bottom shelf, the distortion of the remaining shelves will differ. Look at the illustration.
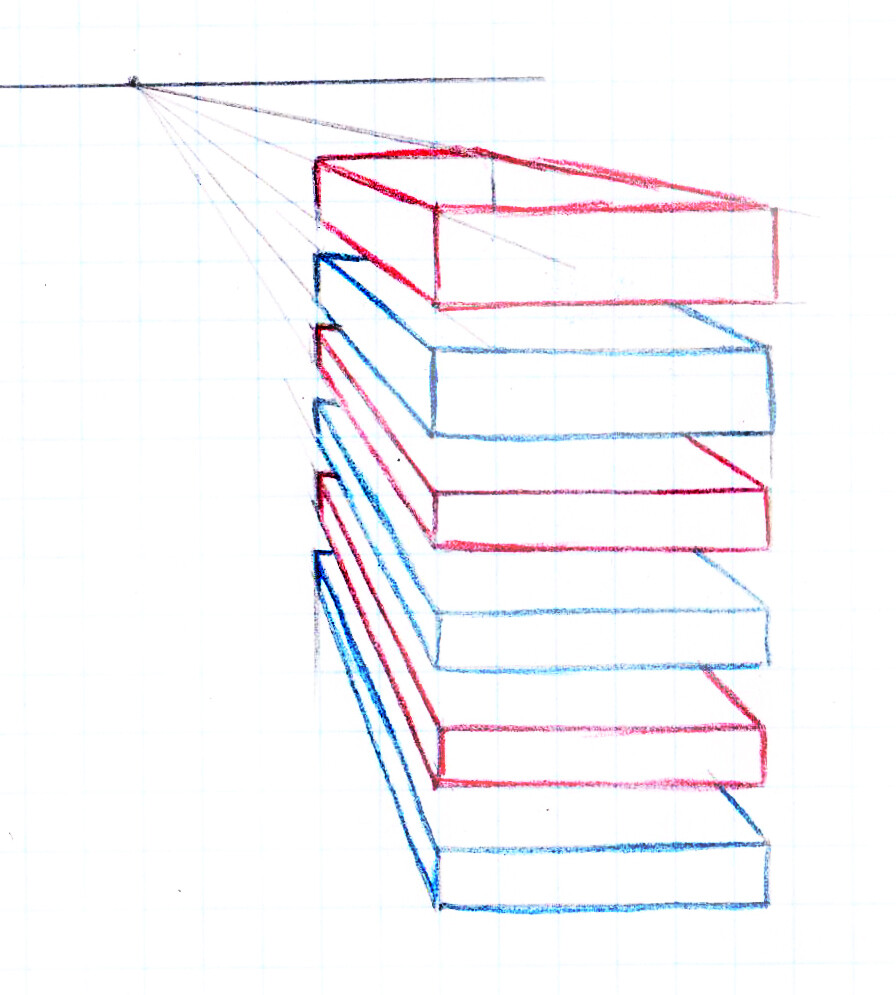
I drew absolutely identical shelves, which are located at different heights regarding the horizon line. Any complex shape will be distorted the same way. As you could see, I built three lines, which had started from the vanishing point. The lines that have been drawn out from the vanishing point are the edges of your figure. Everything is simple.
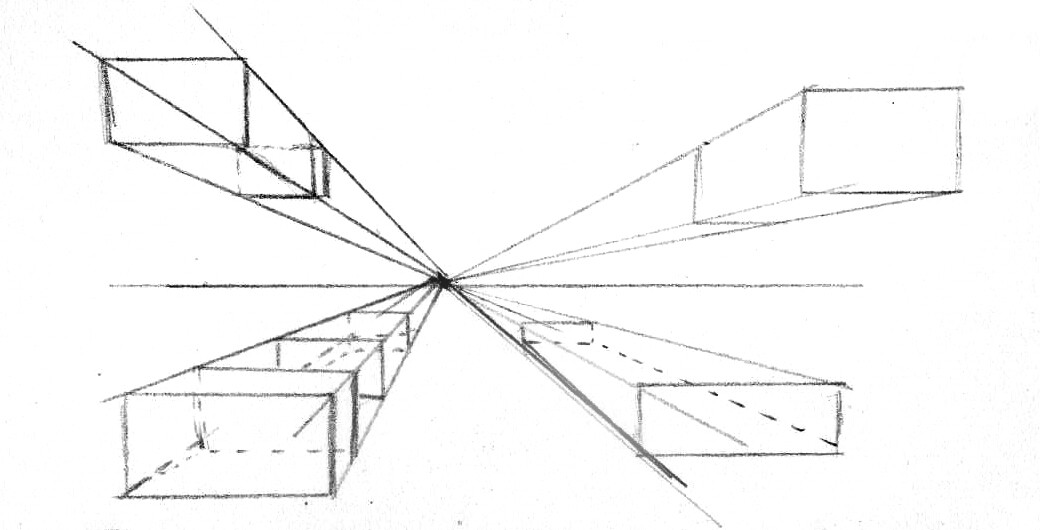
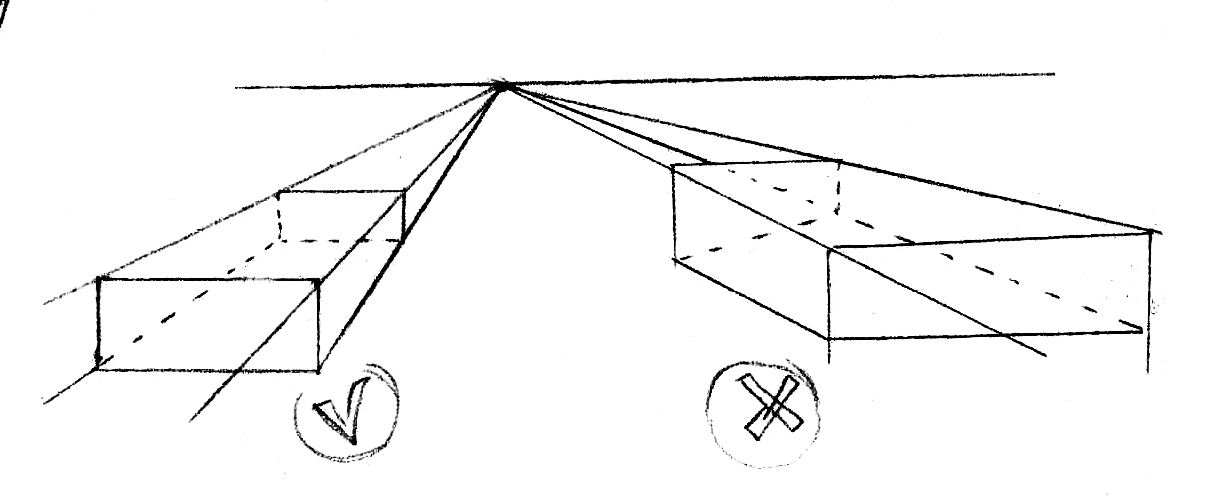
There is one more trick, when the two vanishing points are used. Try to draw three lines out each of these, in a way, that they cross somewhere in the lower or upper dimension (regarding the horizon).Due to usage of simply points and lines you can create complex constructions.
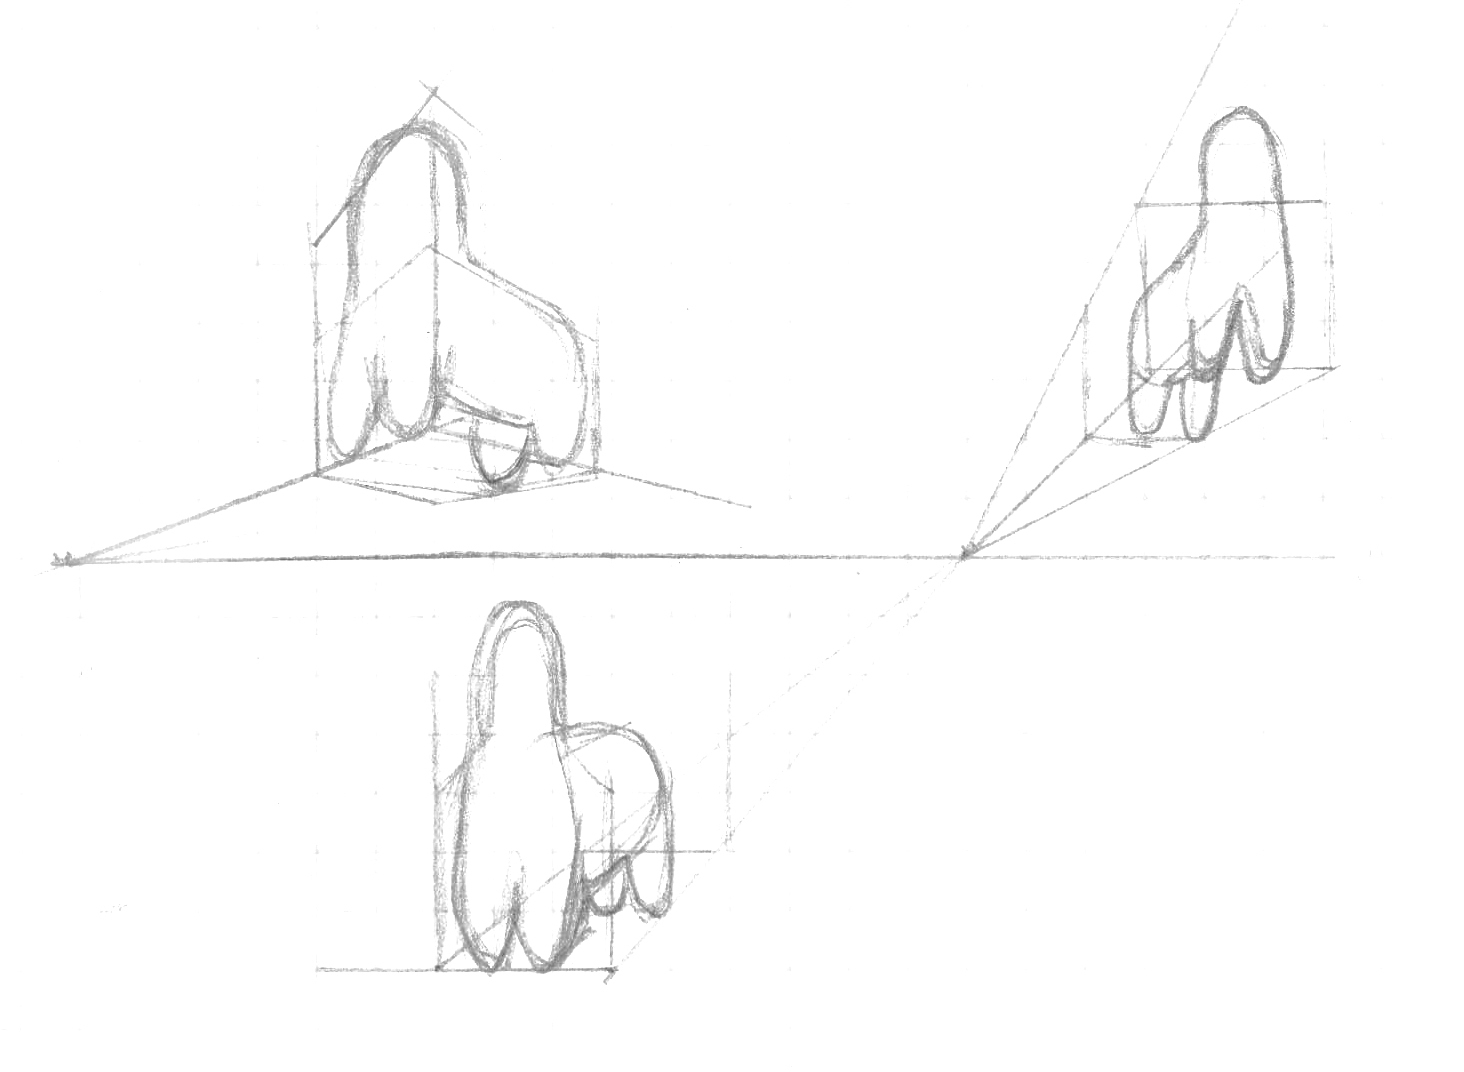
Why do you need to know this? It’s easier this way to understand the position of the figure in space. For example, if you draw two legs, and one of them is located at a distance from the second-one. Where should it be placed? It is possible to figure out precisely, due to the perspective. The same way, the total basic figure (without detail) its position and angle are defined.
1 Like
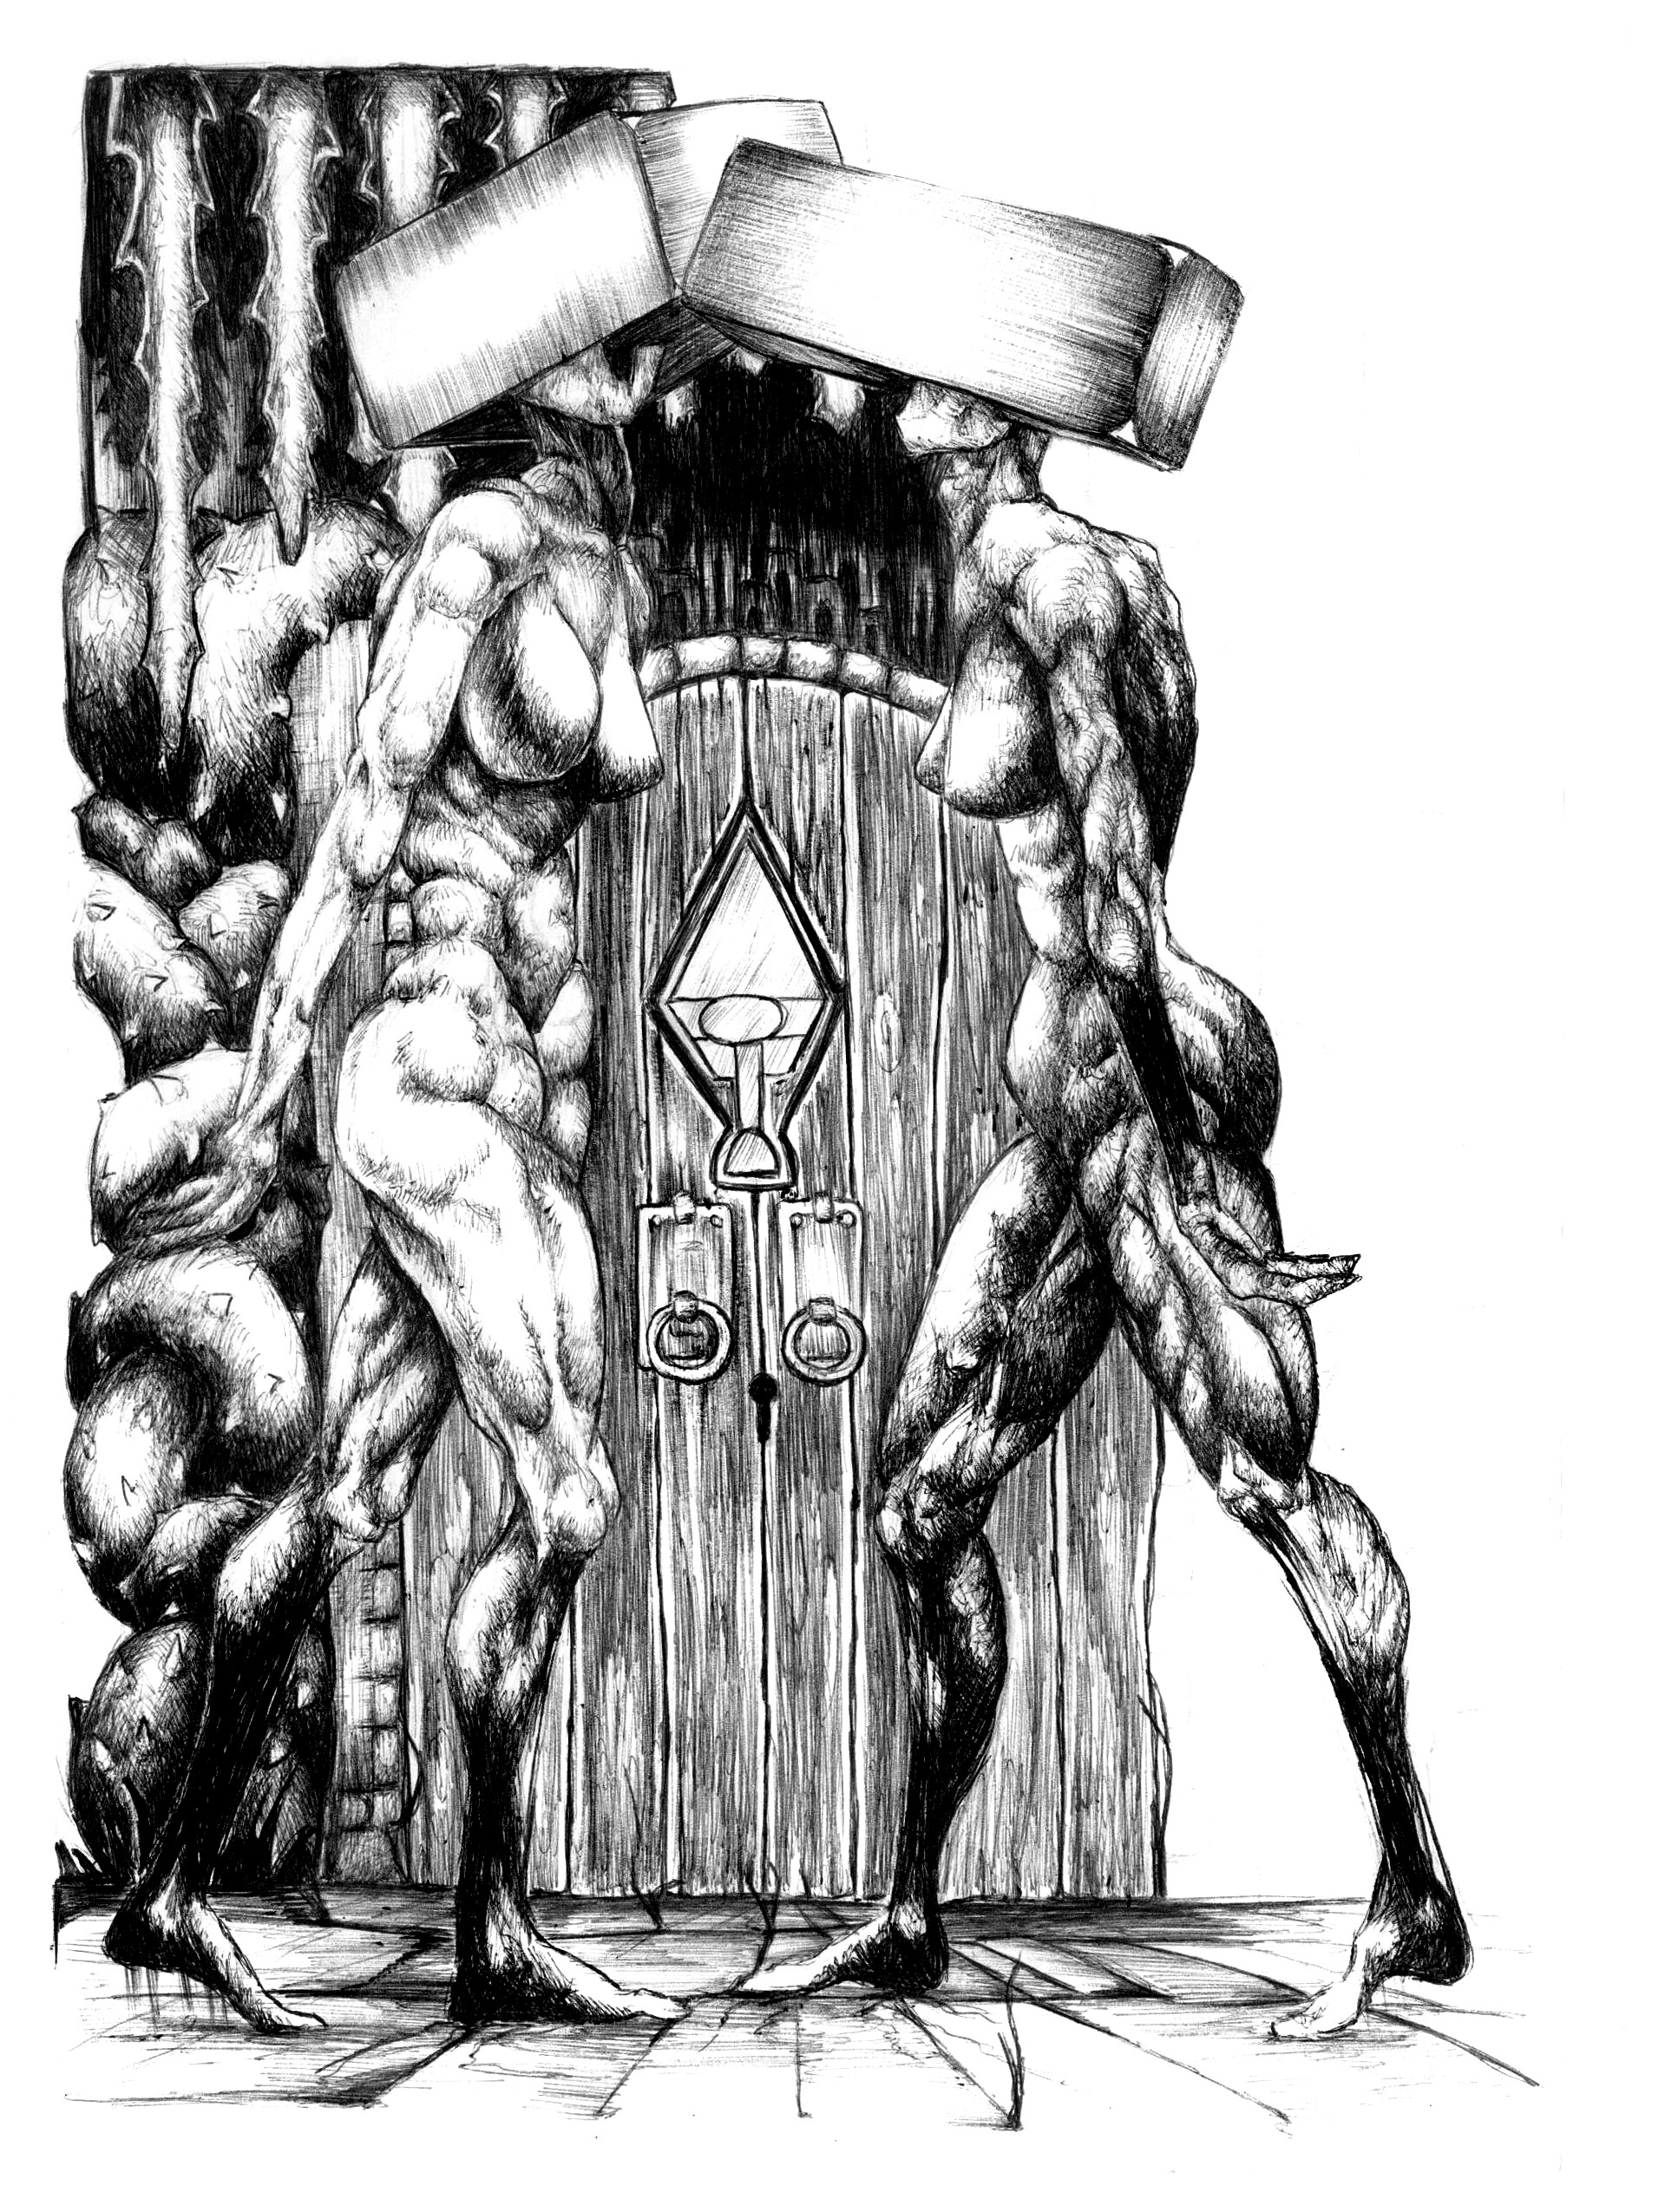
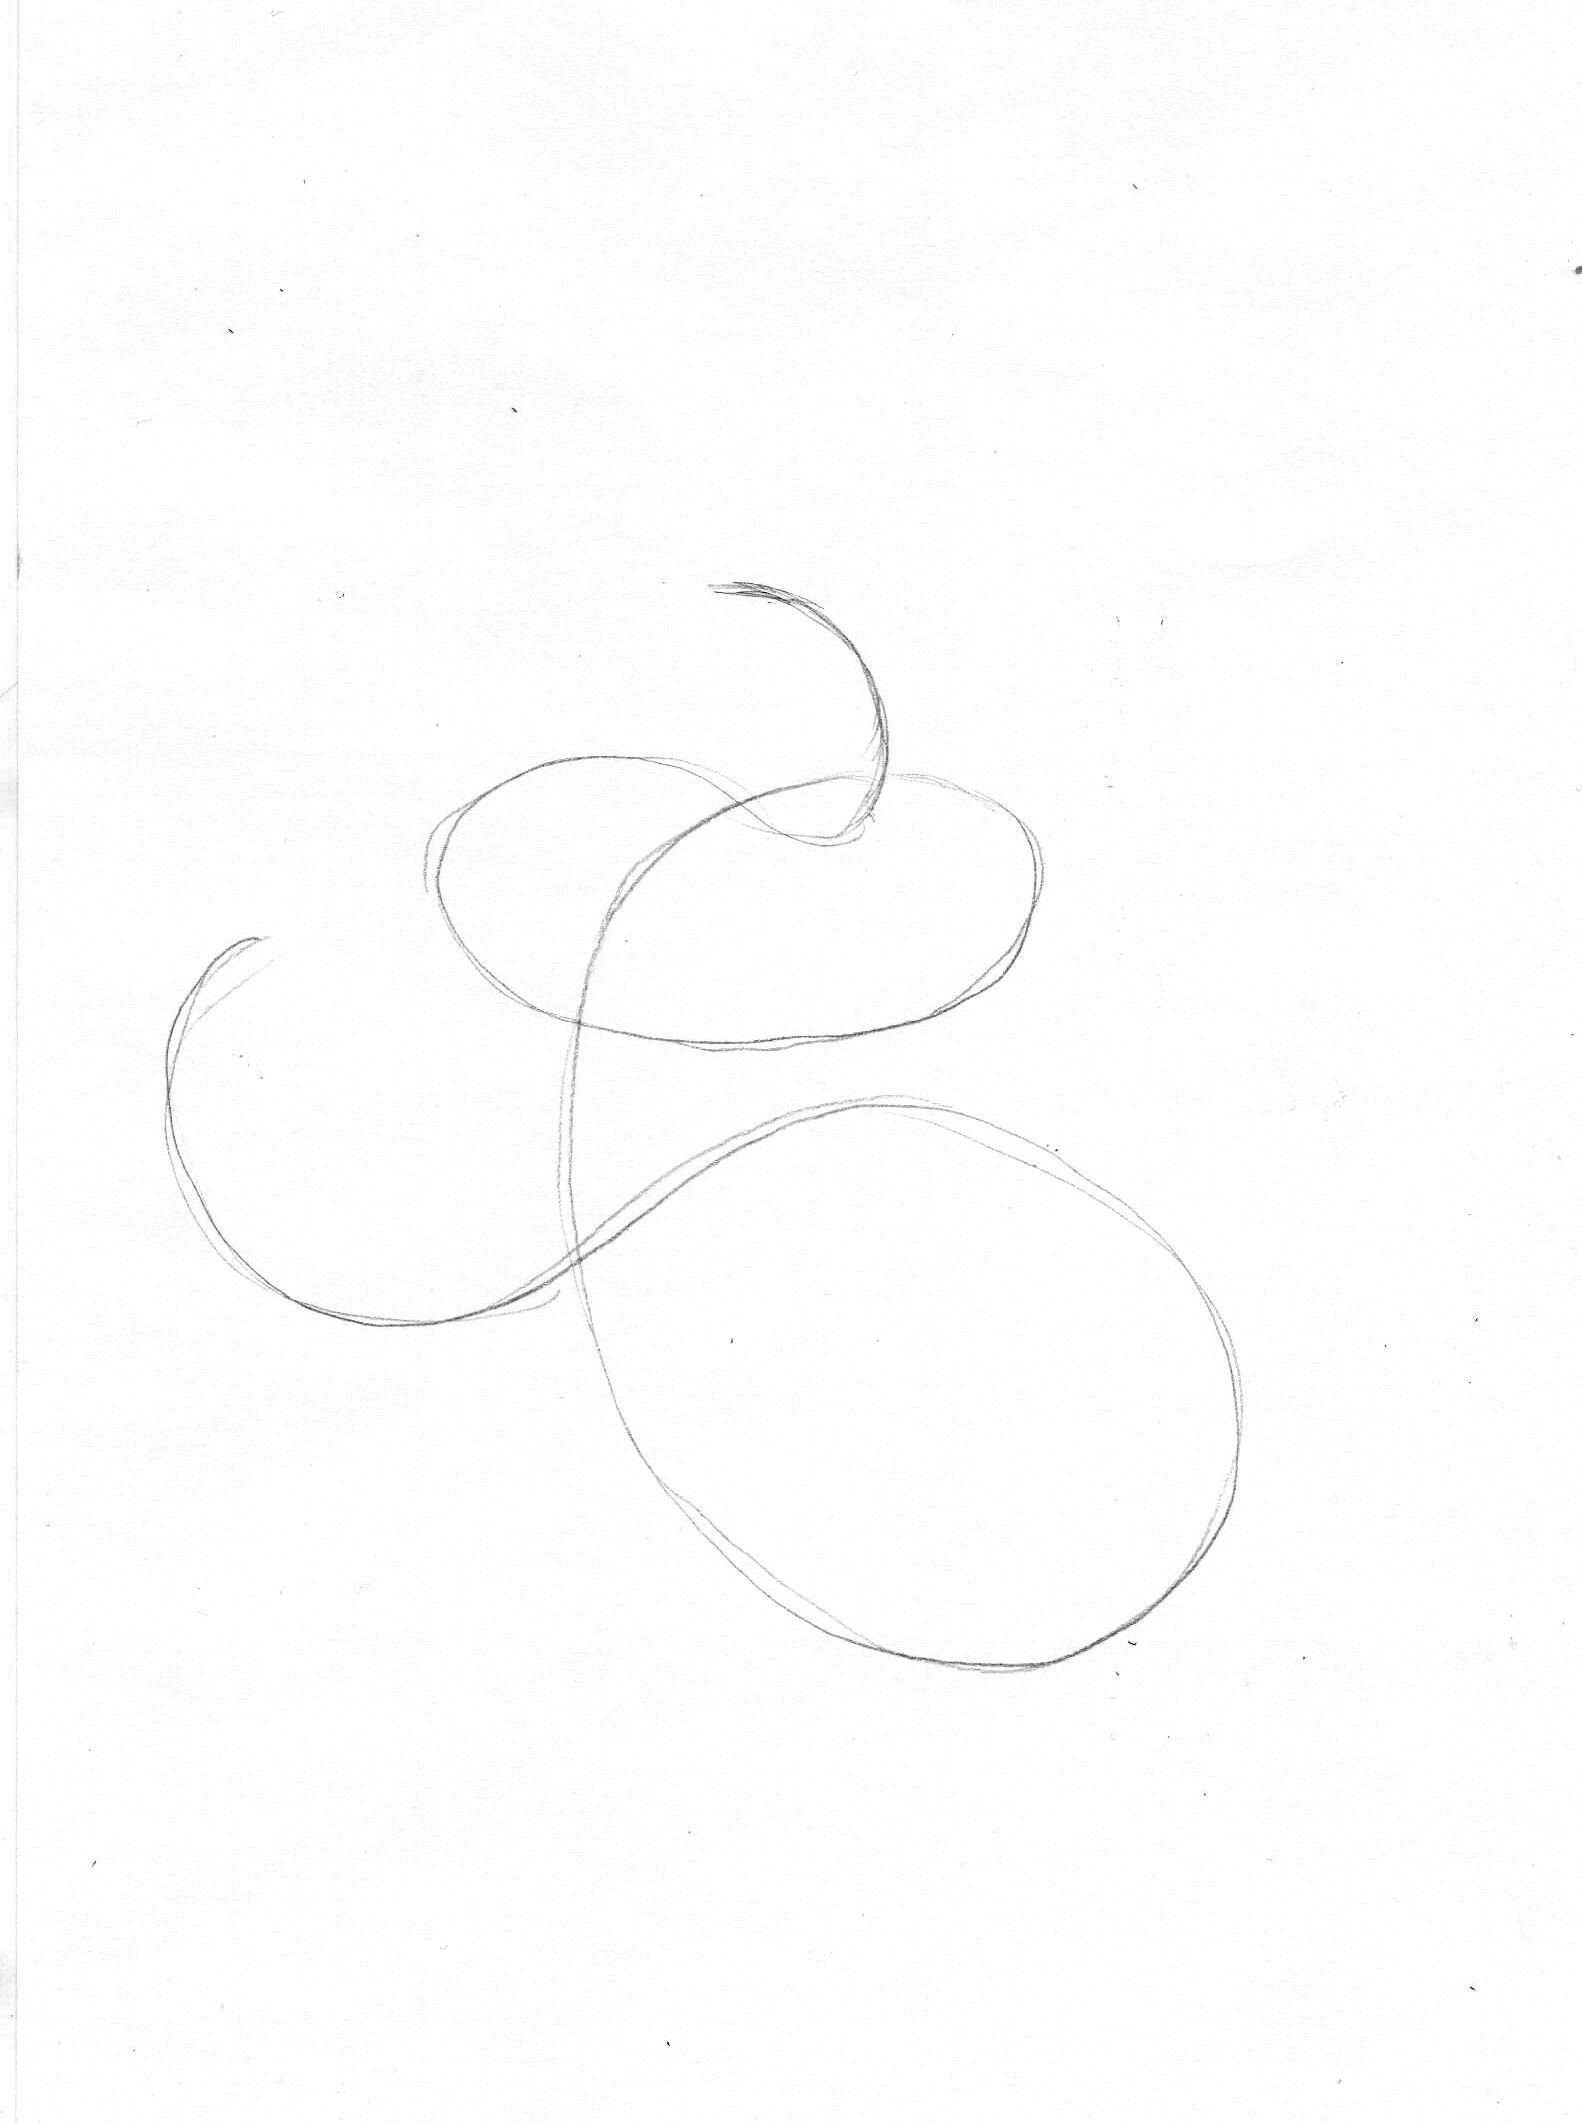
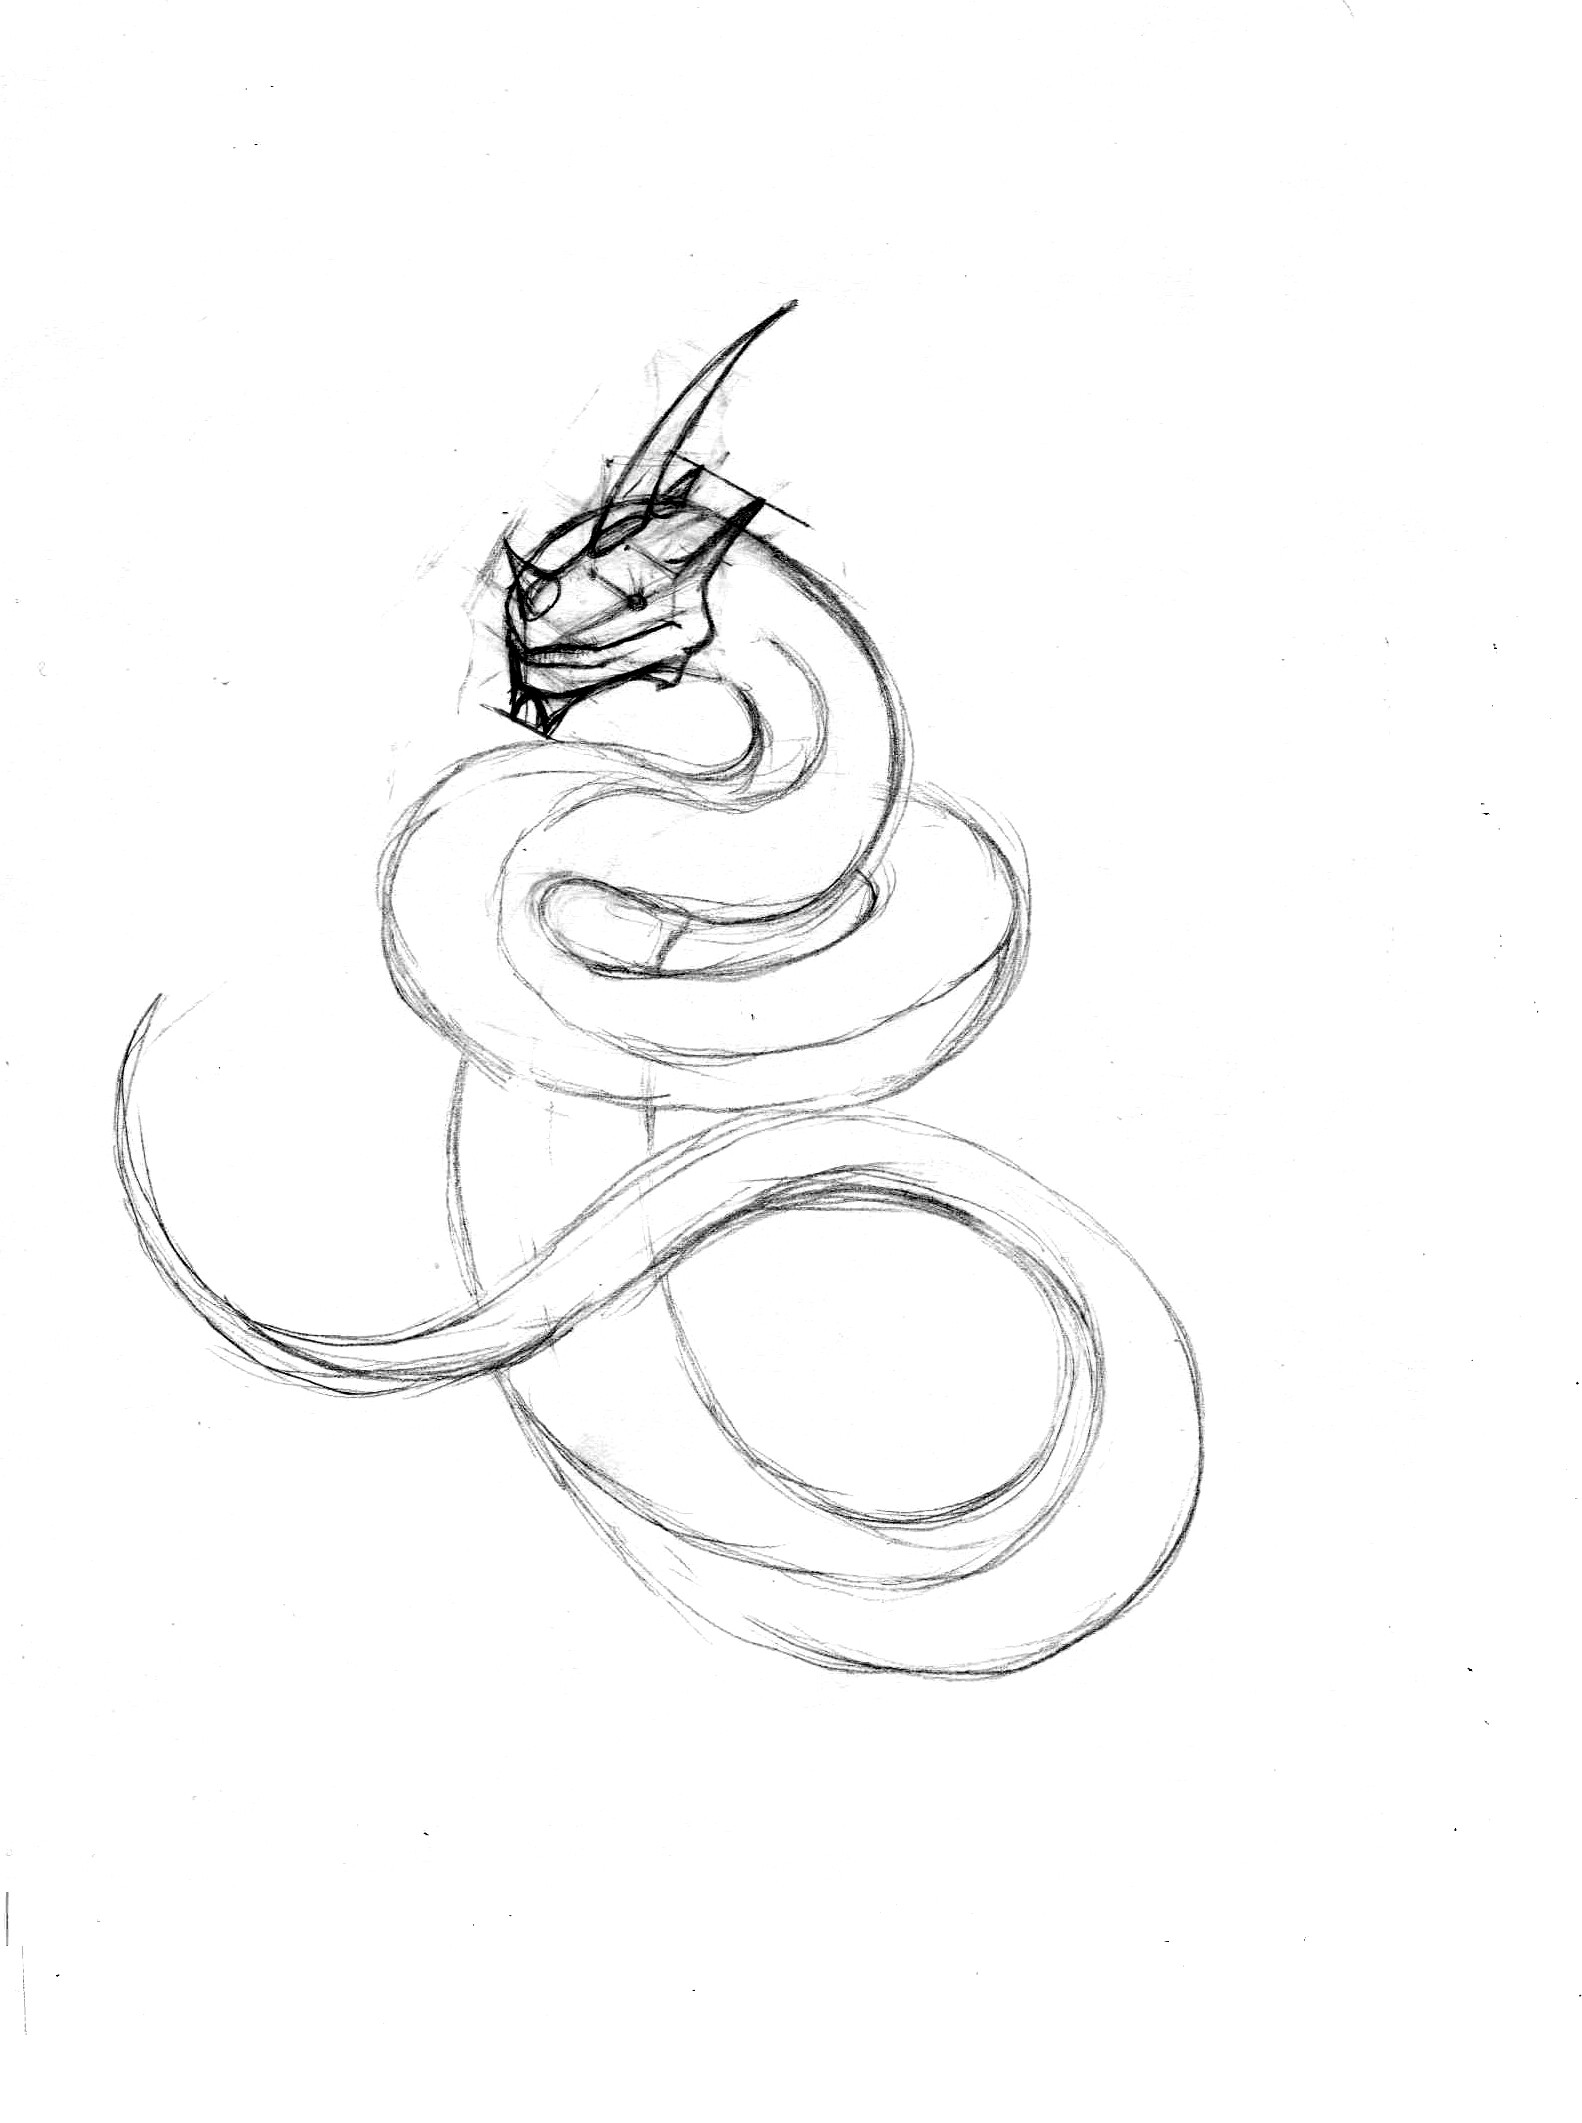
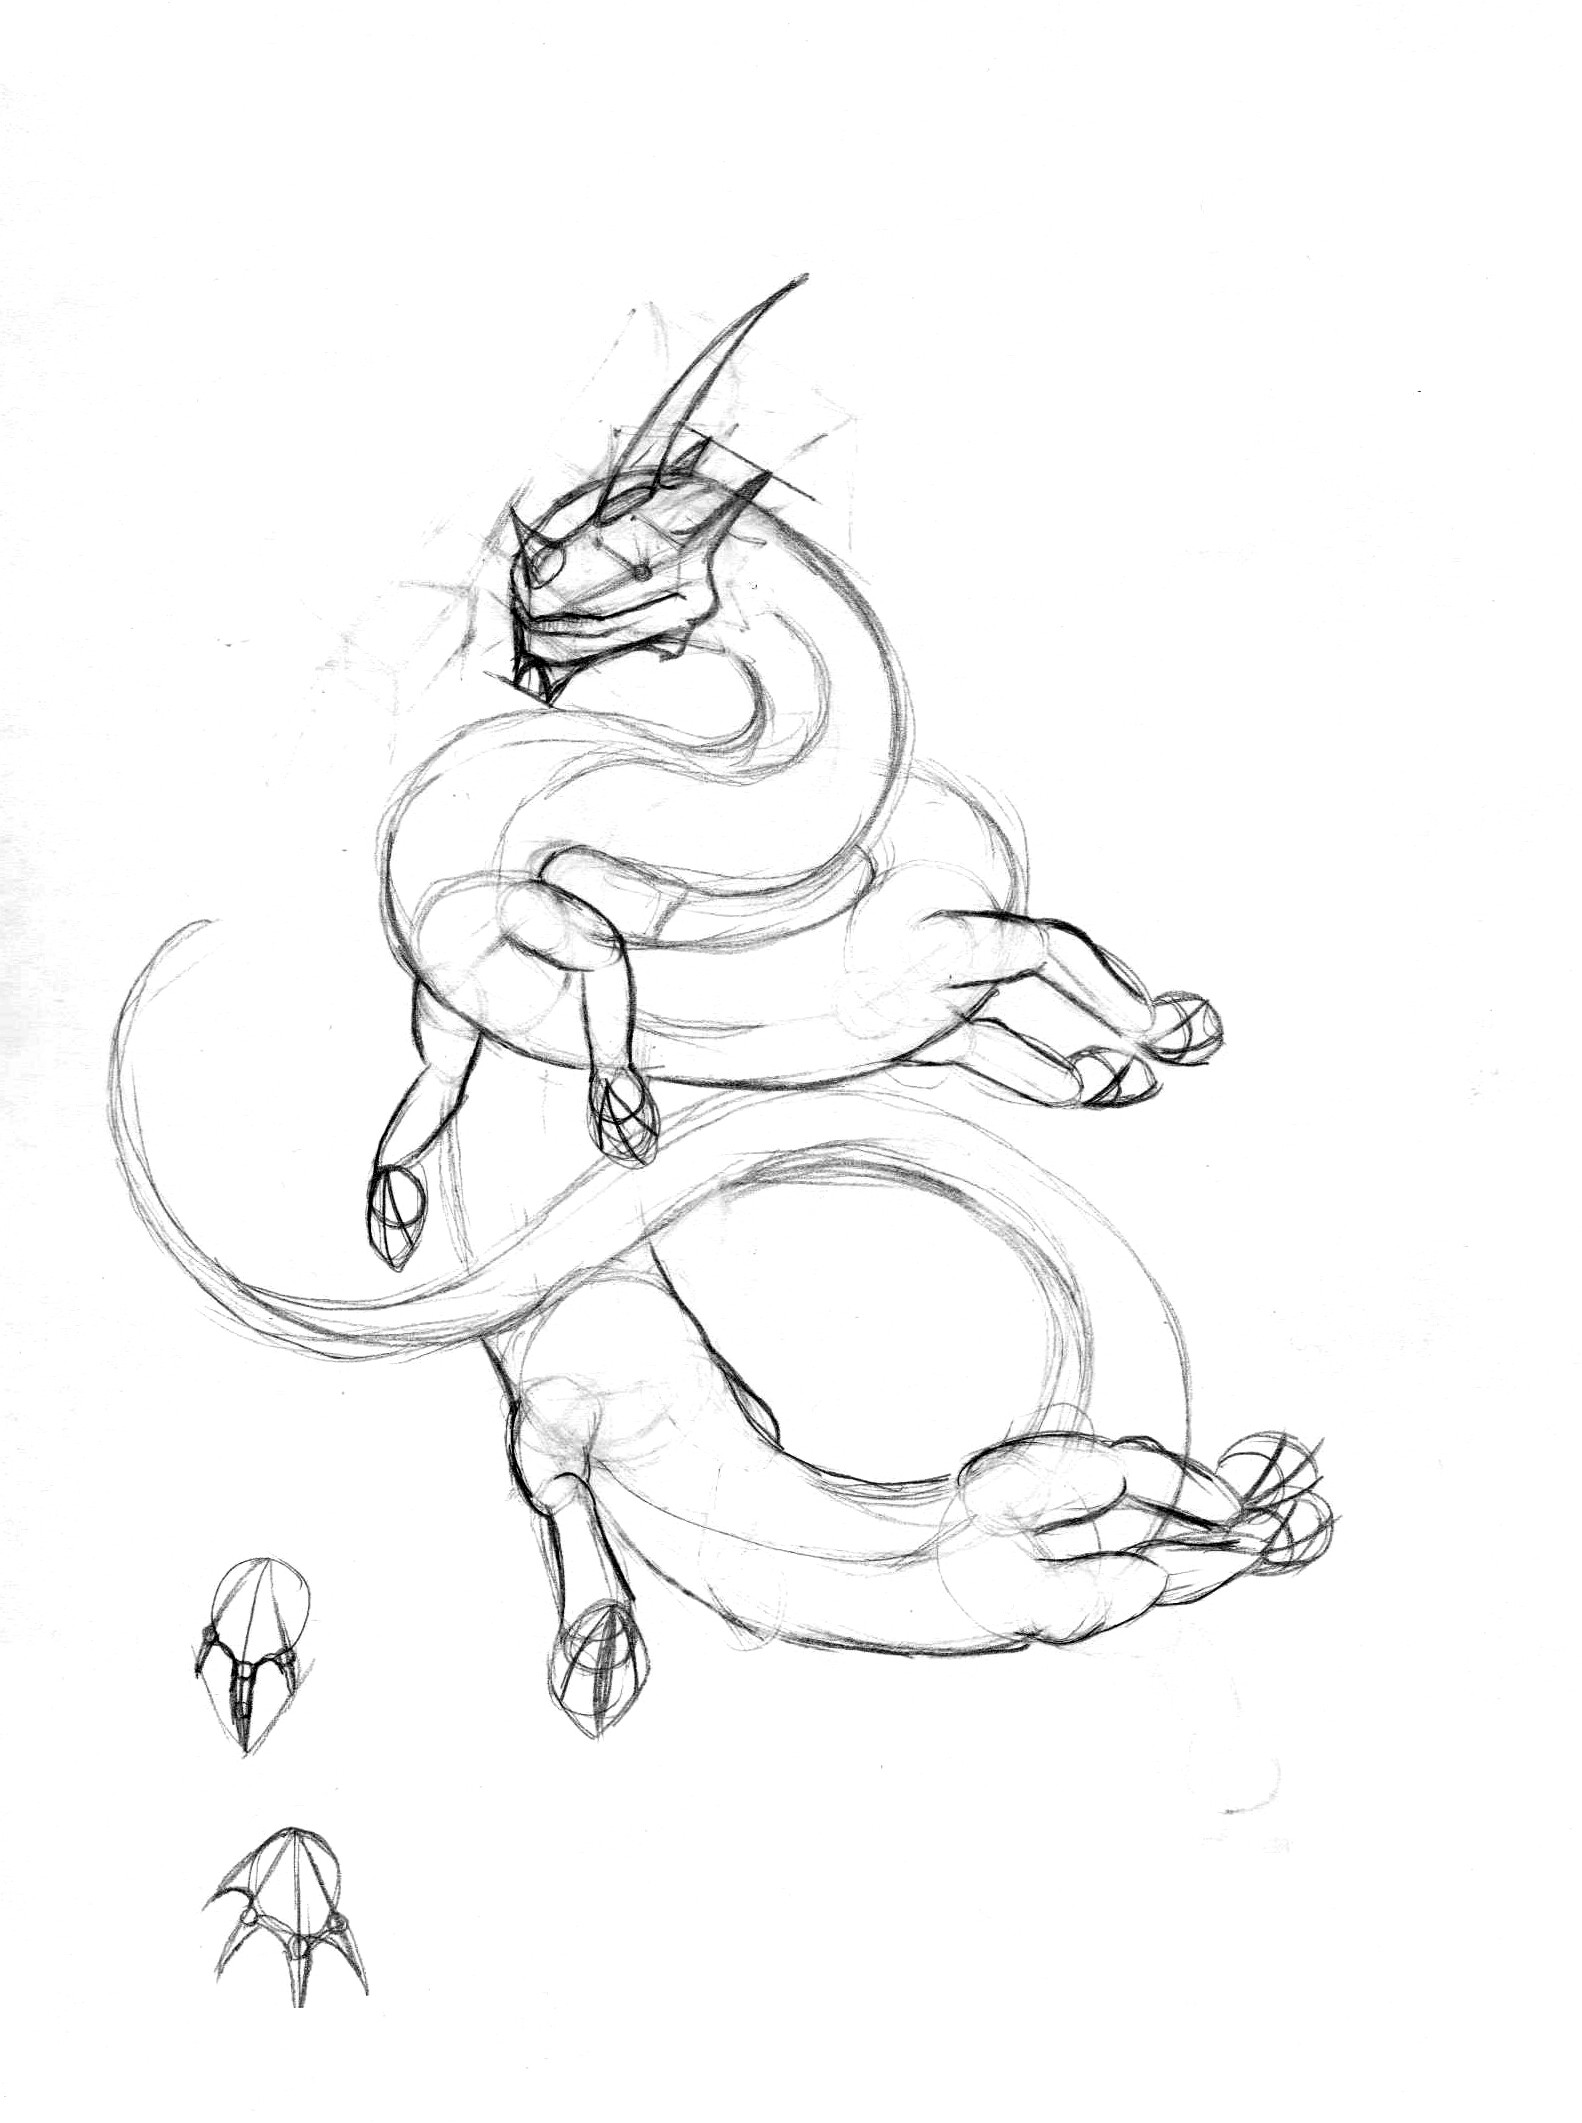
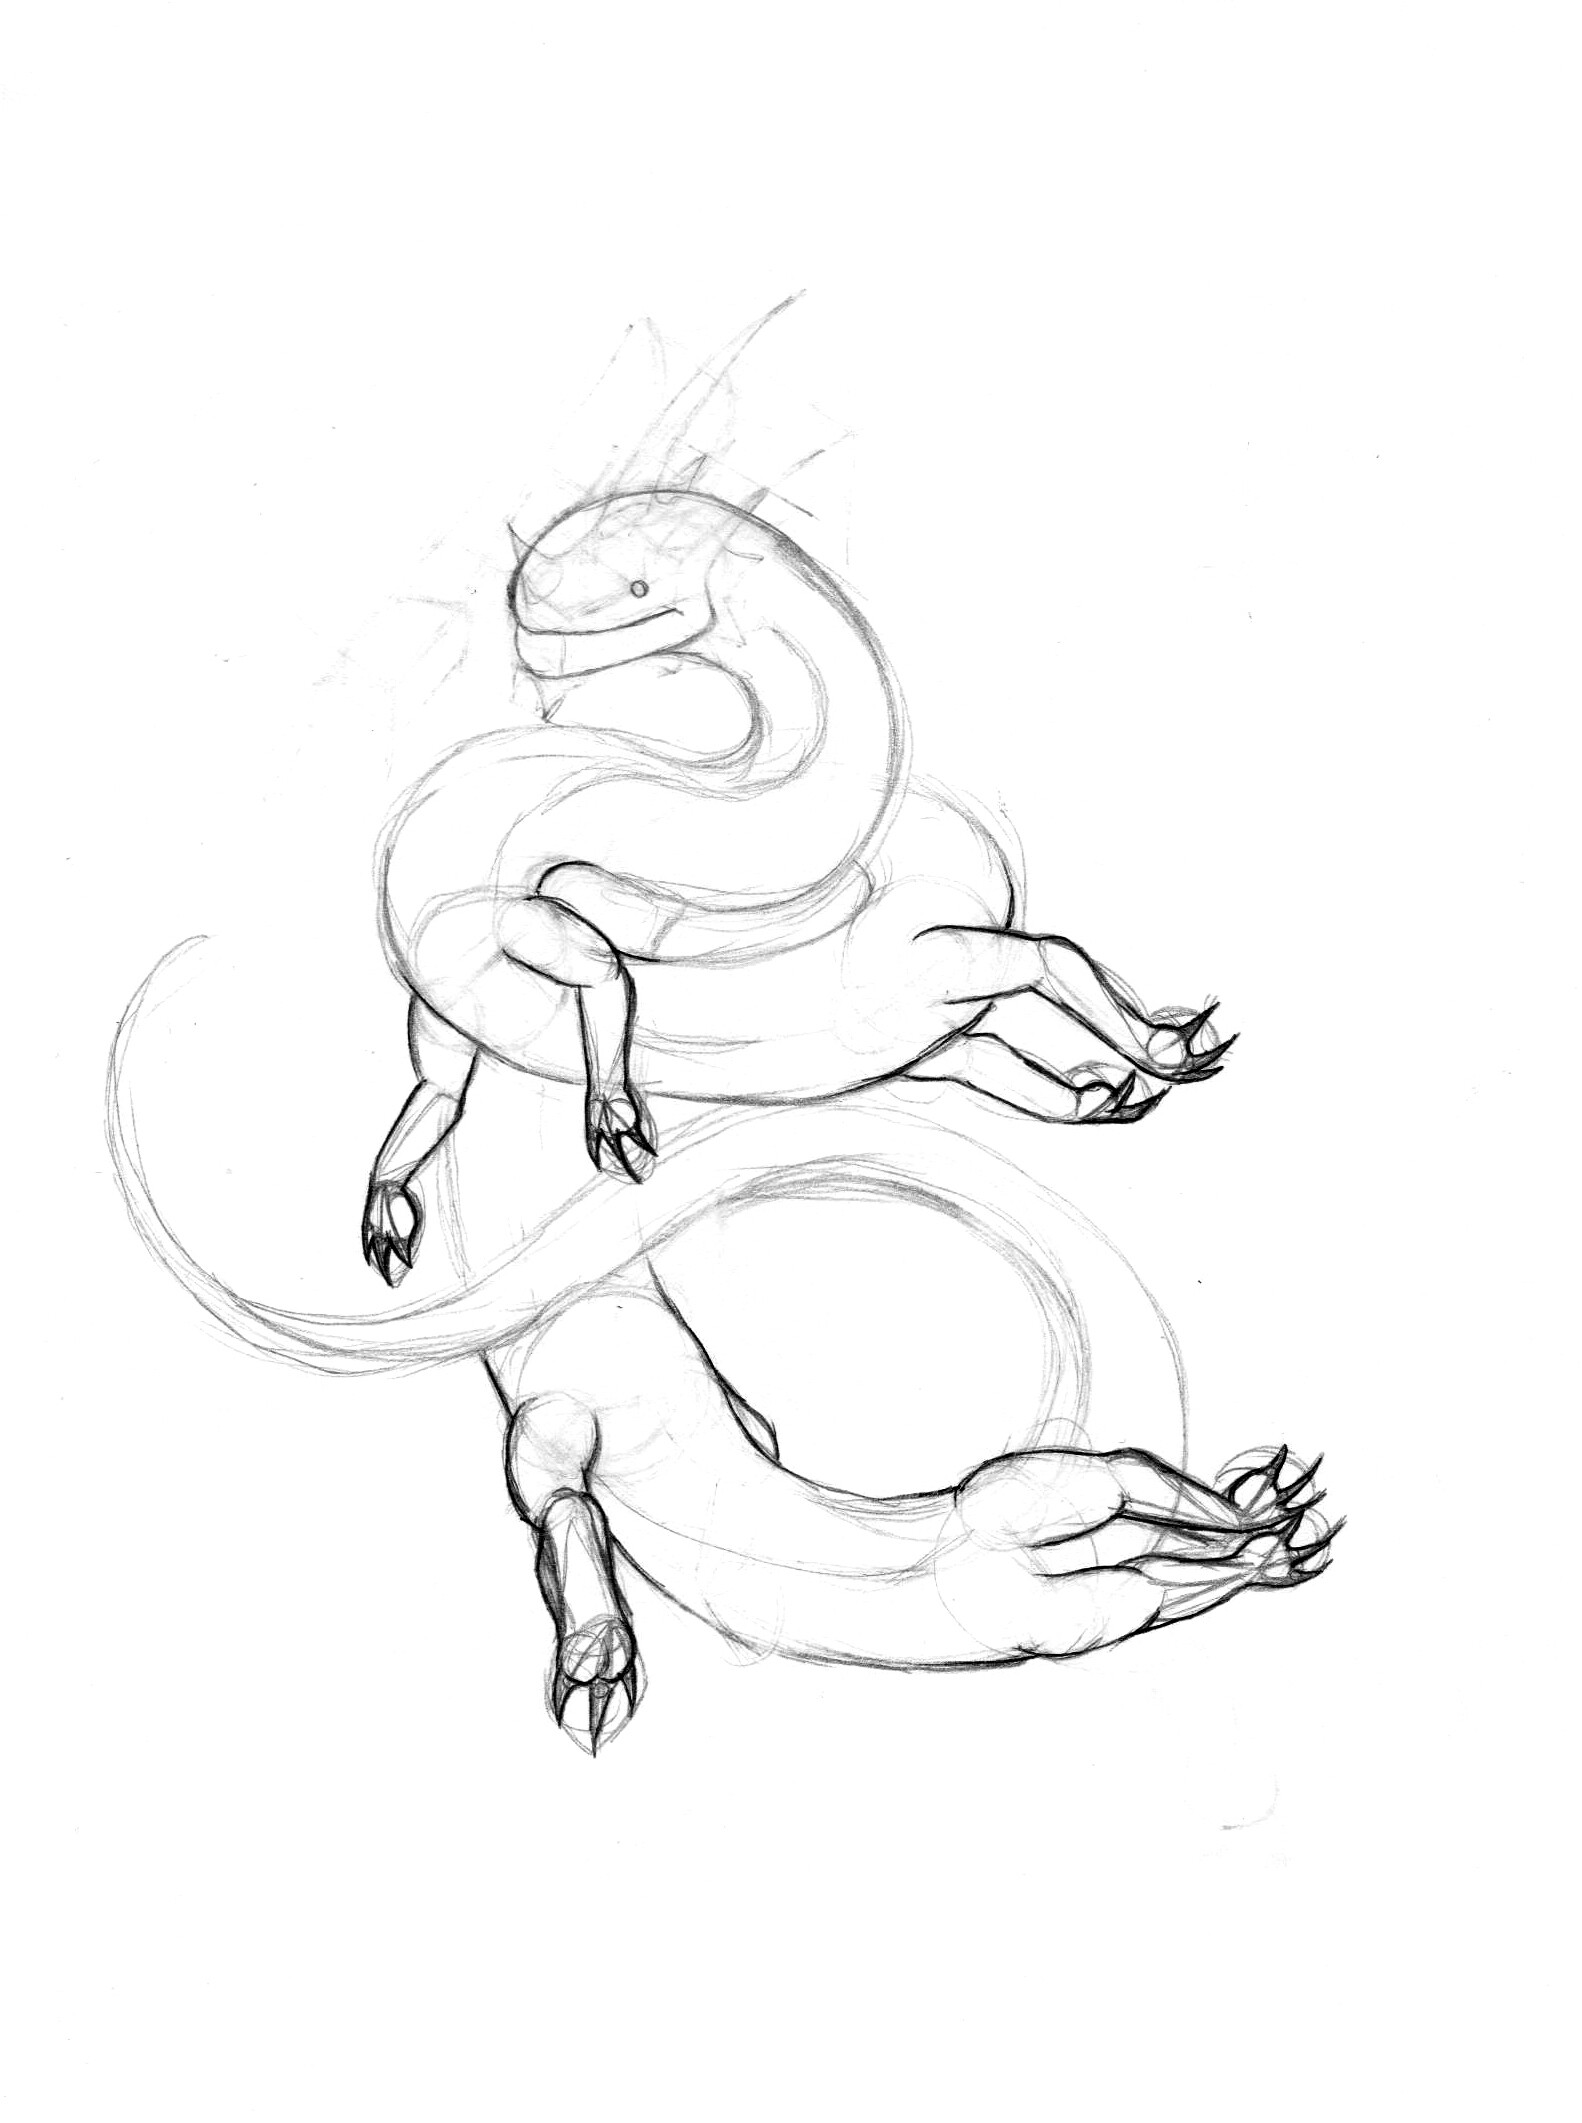
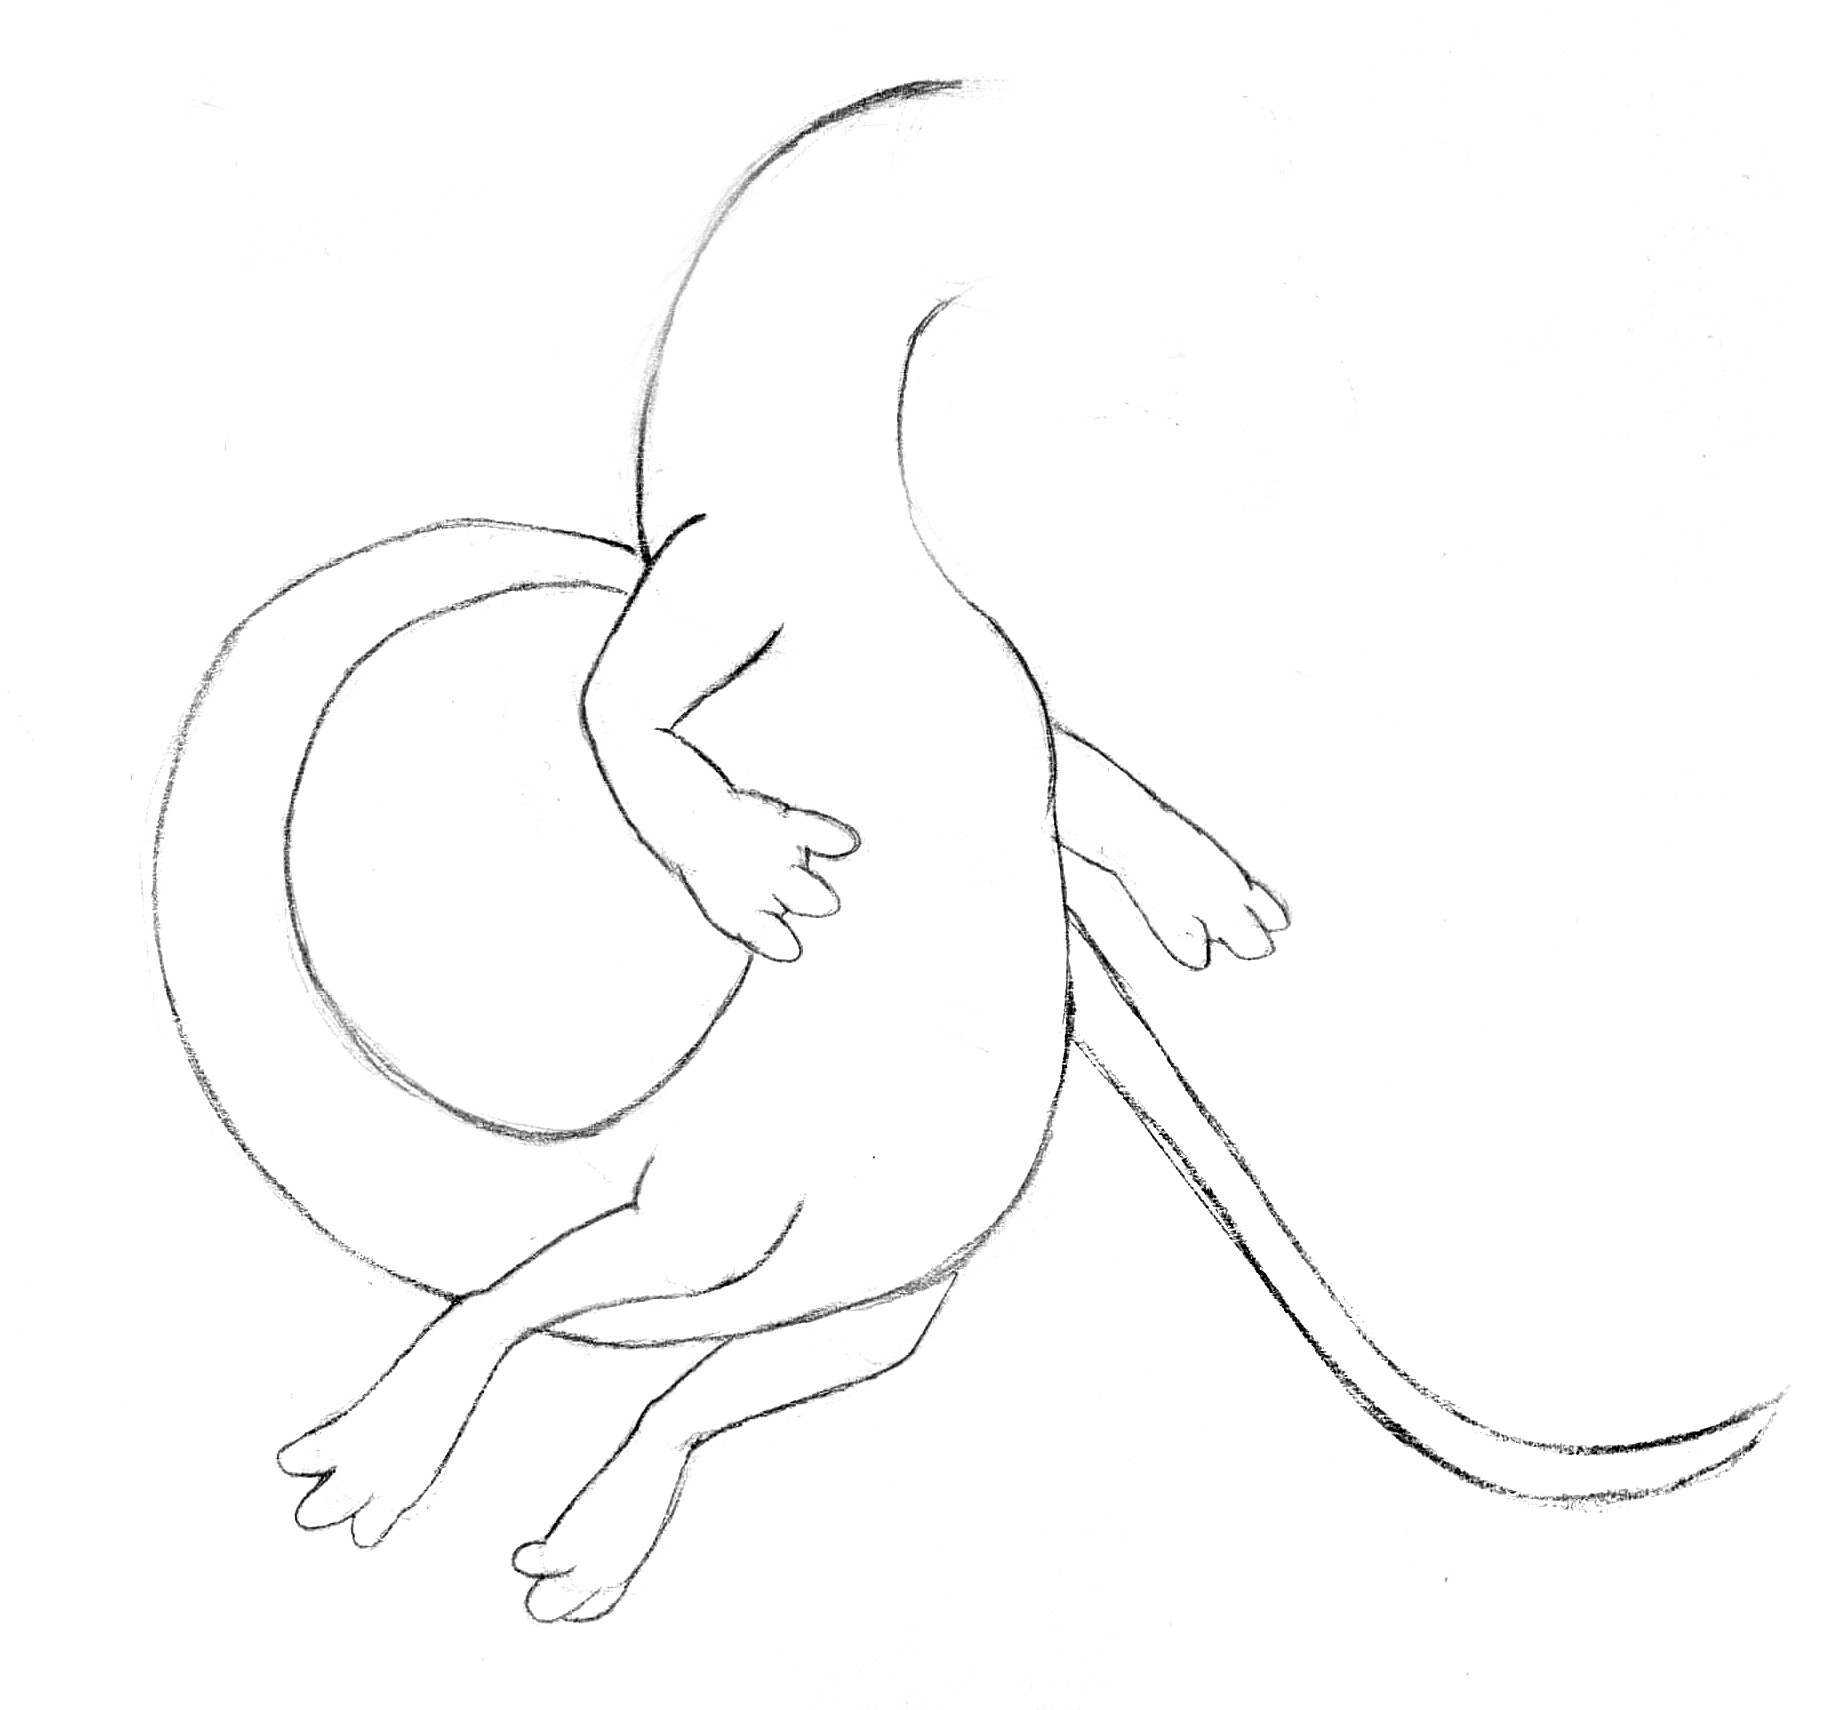
Try to apply our knowledge about perspective on the example of a dragon drawing.
- Define the pose using a line.
- Draw a ball on the head-spot. Drag two lines from it, which will be the broadness/ thickness of our dragon.
- Erase the extra-lines - we don’t need the pose line anymore. Knowing
how volumetric forms are built, I create the dragon’s face box-like. I
made the symmetry axis and parallel lines, which will be my guides for
the further building.
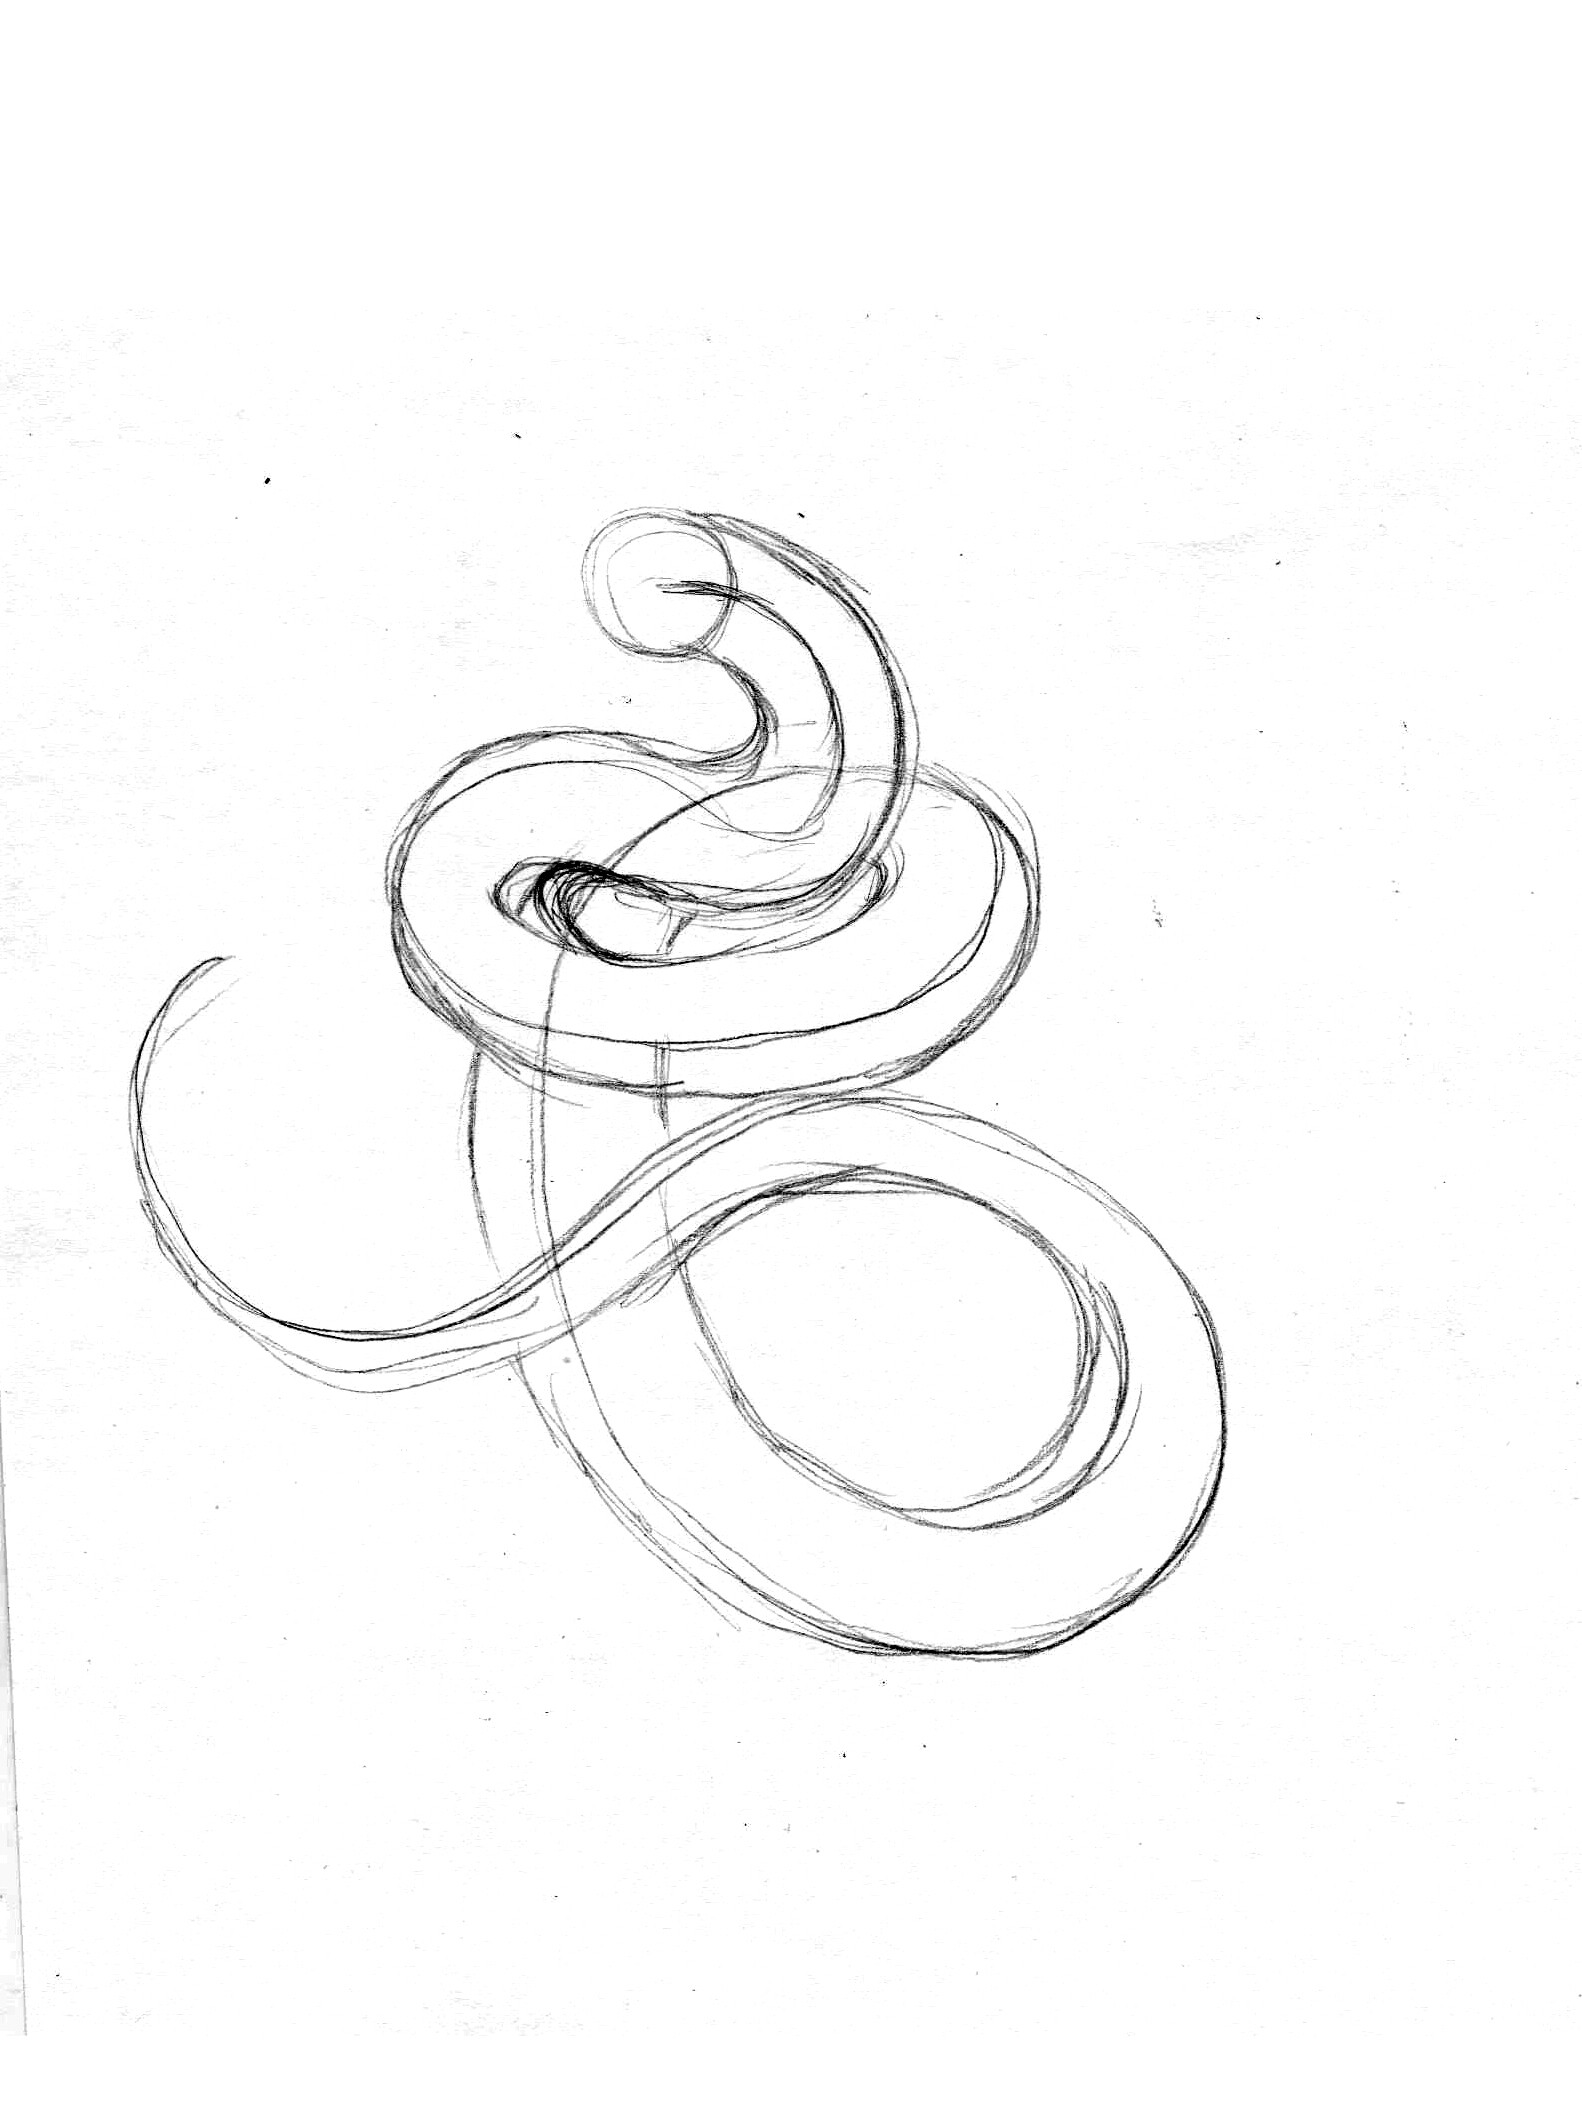
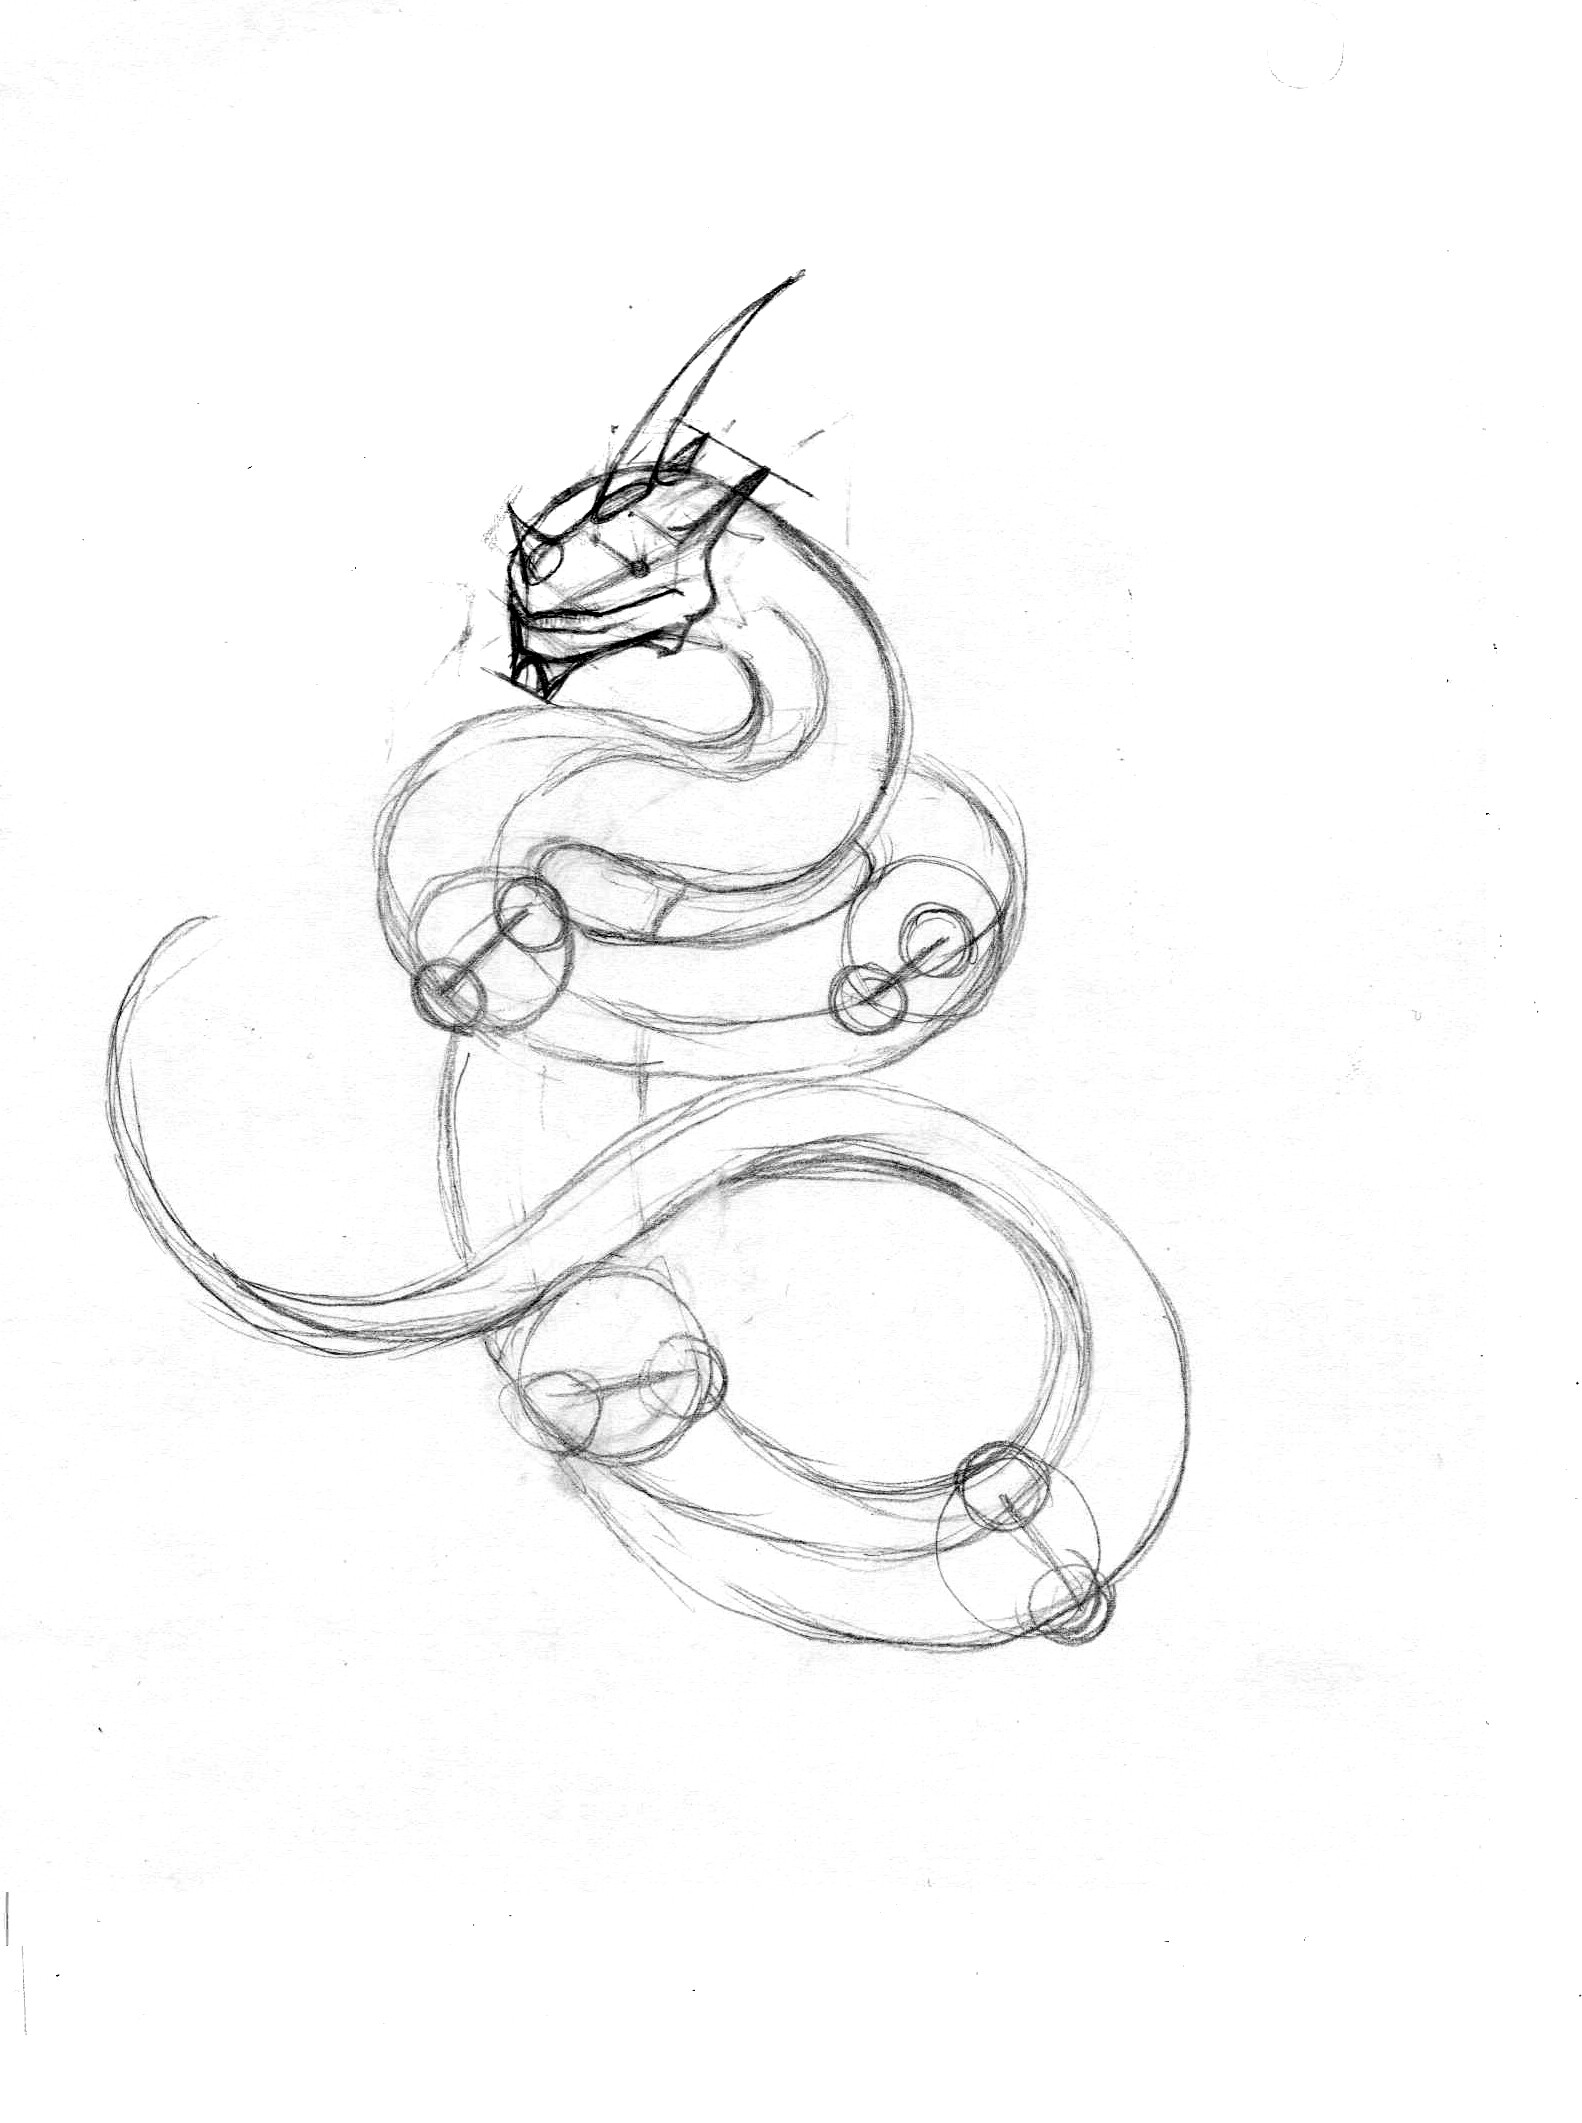
Btw., I could make the whole body in a form of a
long curving box, but I like round shapes most. They are more
convenient to me. Some prefer to use boxes. No matter.
- Now I’ll
mark the belly, for better understanding of how the legs will be placed.
With no belly I could err the legs’ position and anatomy . Now I round
the muzzle.
- Relying on the belly line, I mark the mouth.
- I wanna change the form of the chin. I continue the lines and use them to form a rectangle, in which I will build the chin.
- Make the form of the new chin round again.
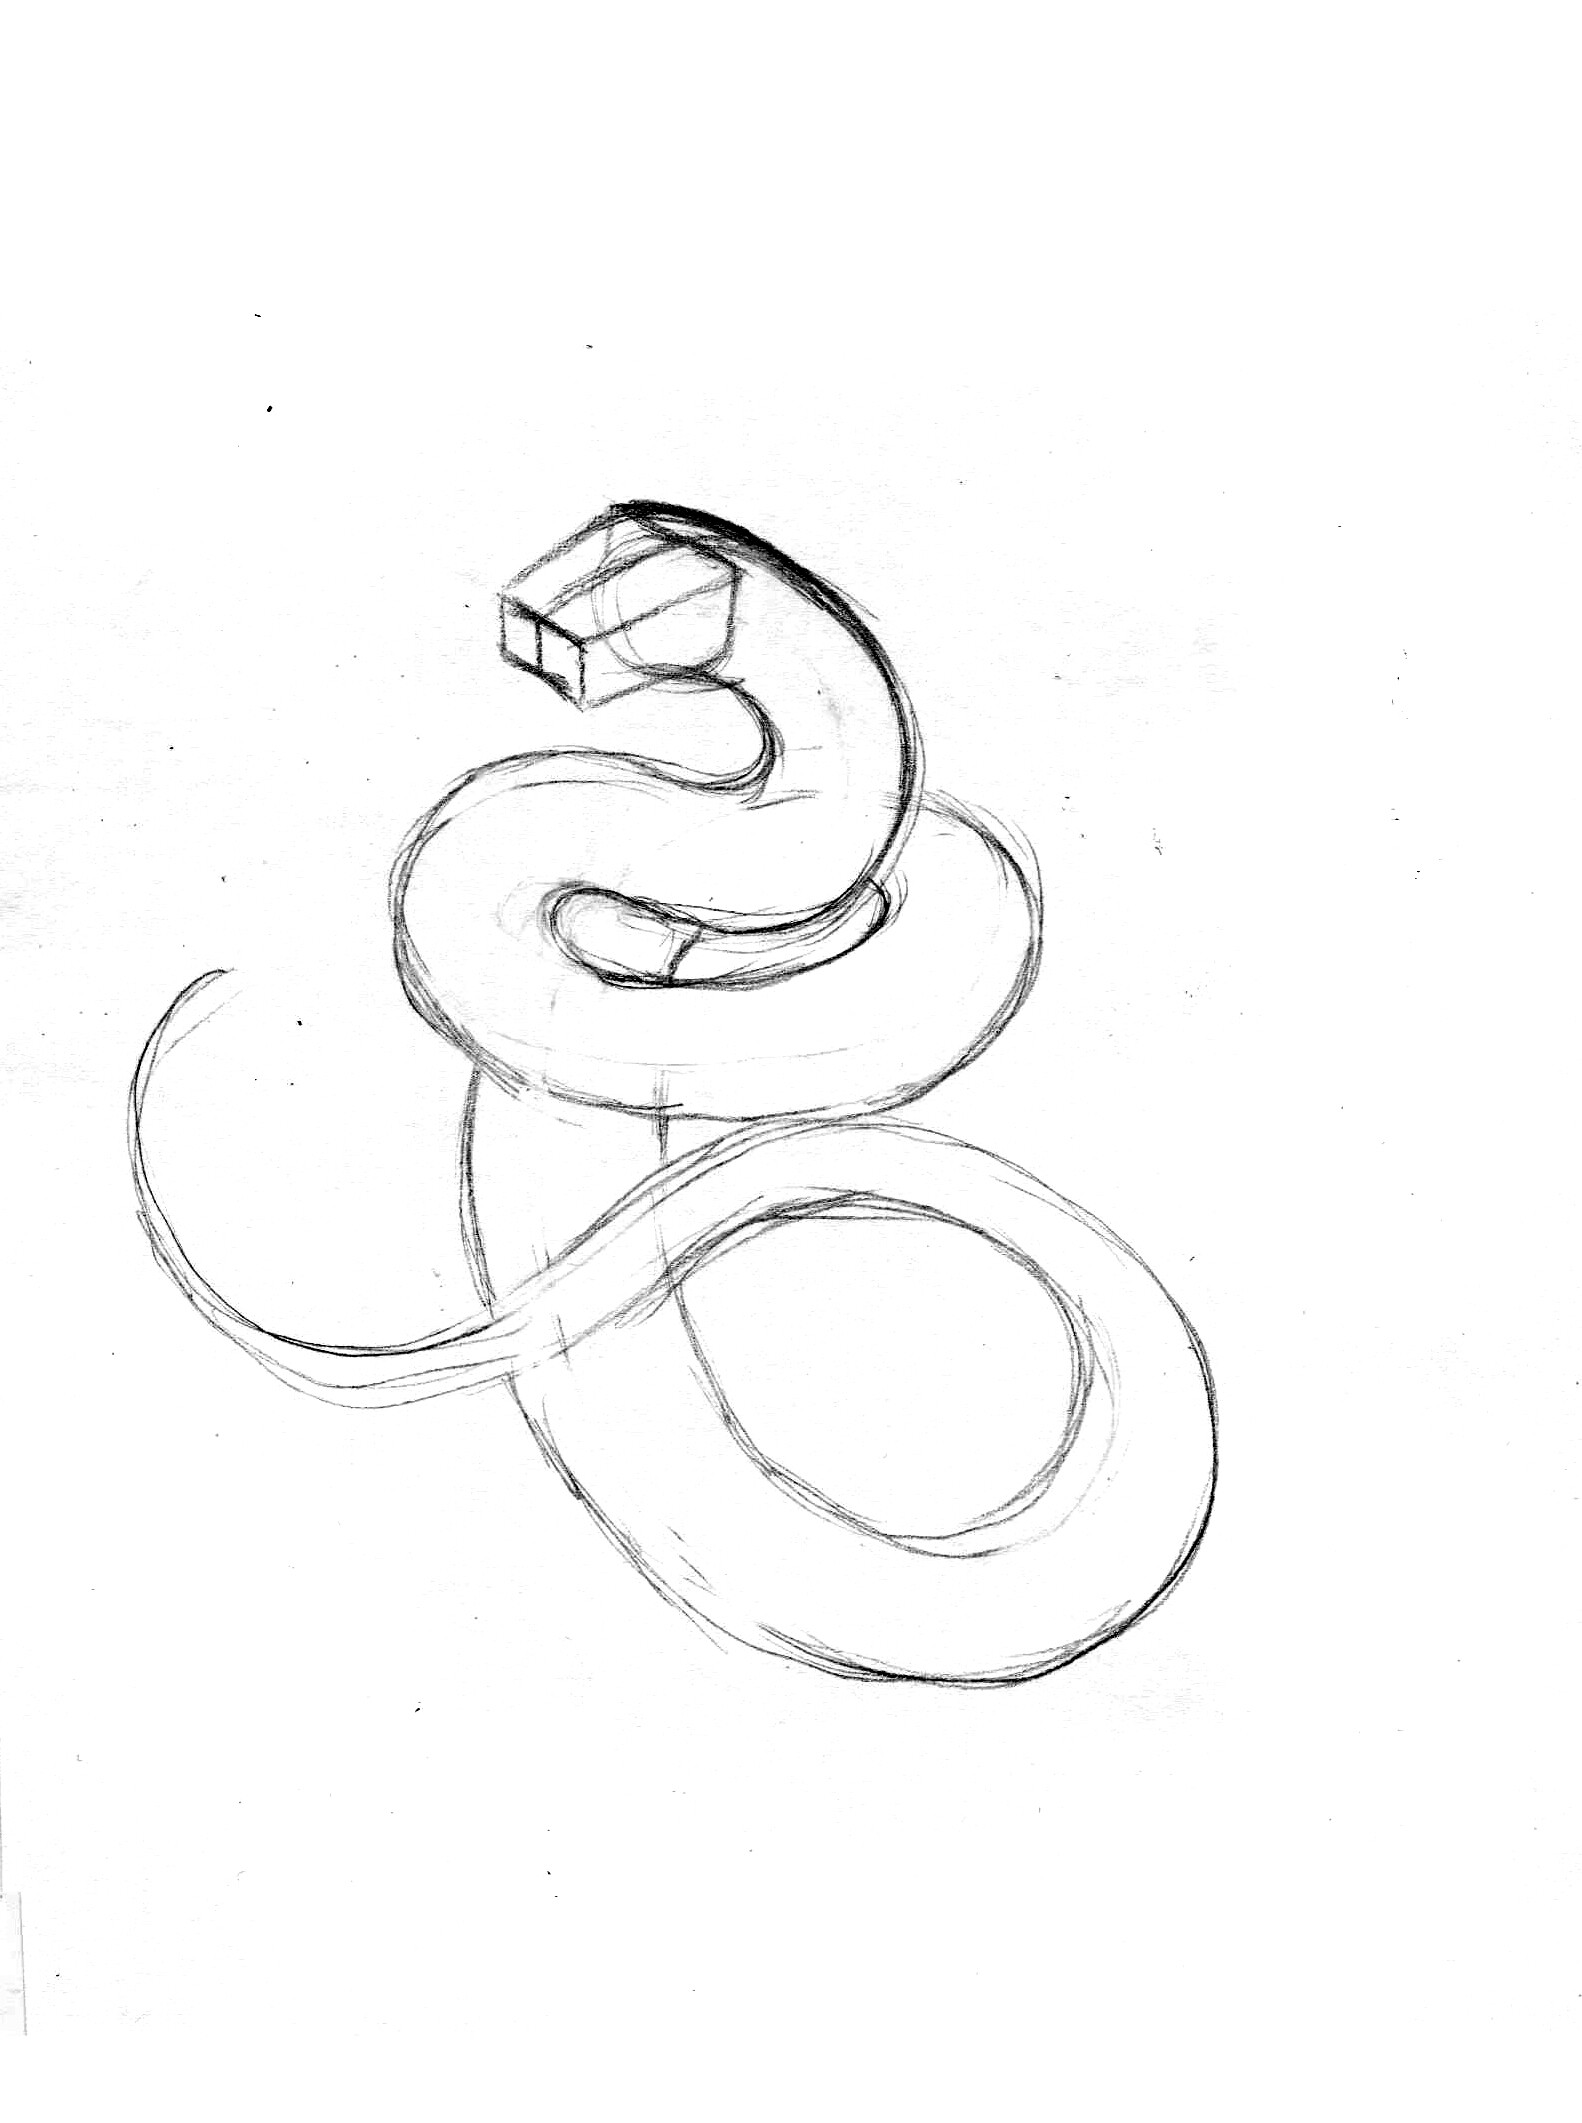
- I draw an eye in any place. How to know, where’s the second one? It’s
easy: I cut out of our box (basic head) forms from the eye. I draw
parallel lines and turn them into complete figures.
- The symmetry axis and applying of the parallel lines will be useful
for the creation of decoration on the head and body of the dragon. The
beauty is in symmetry.
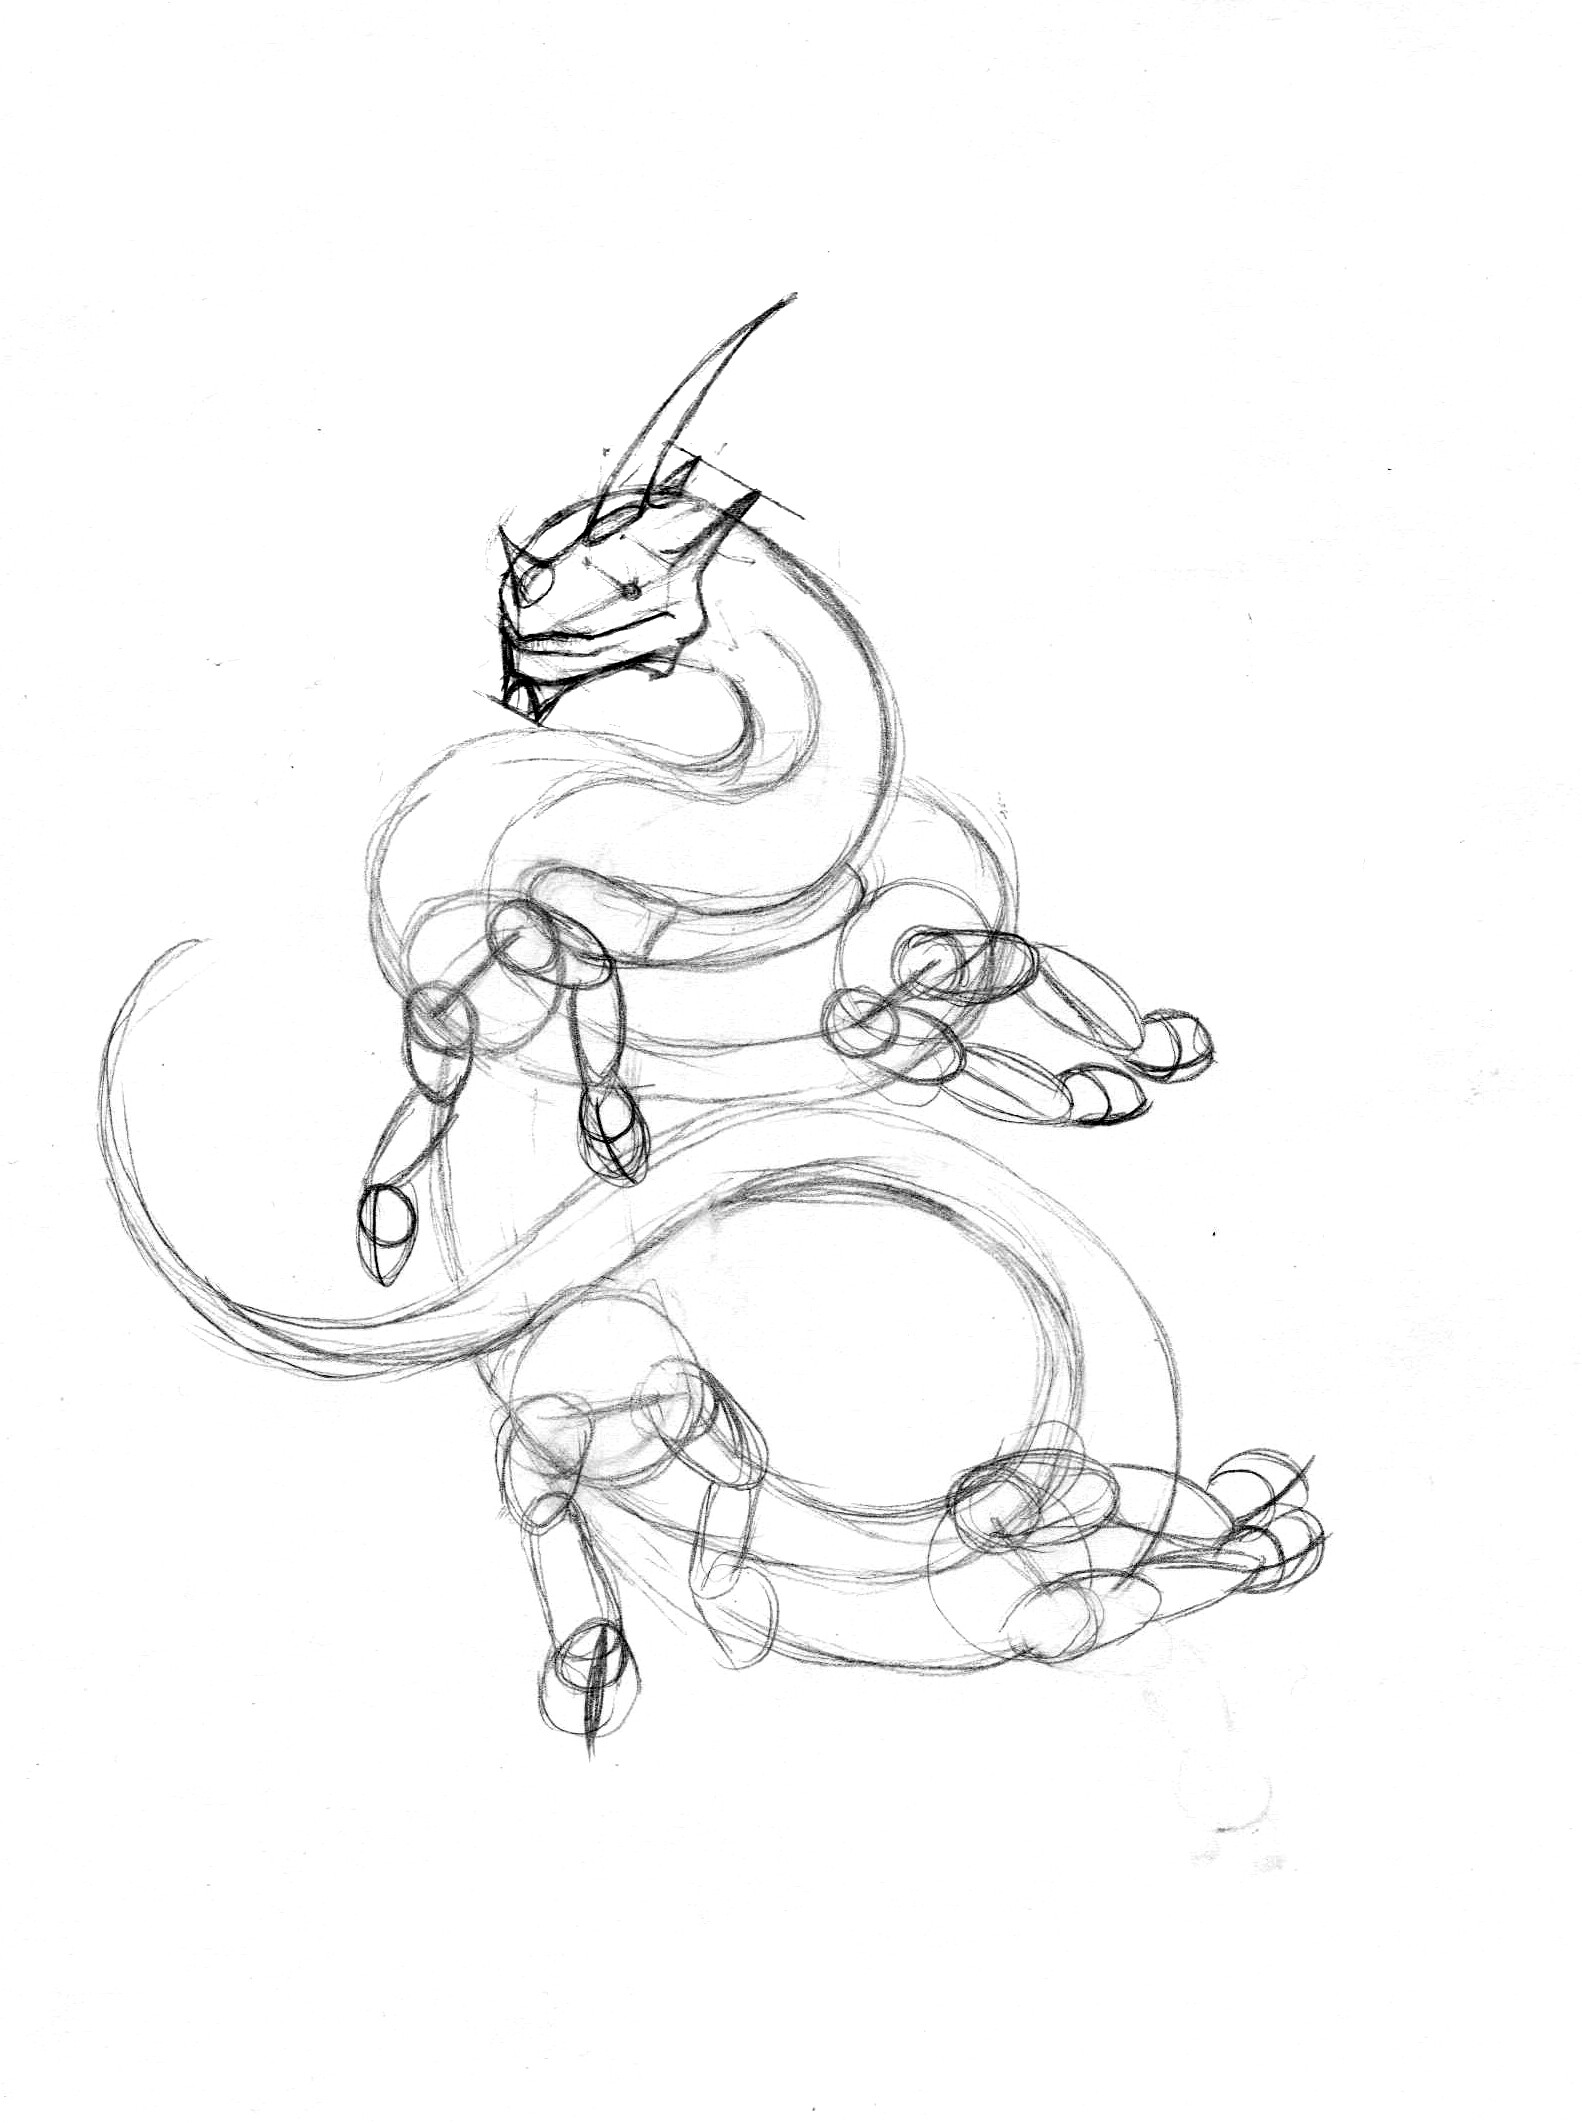
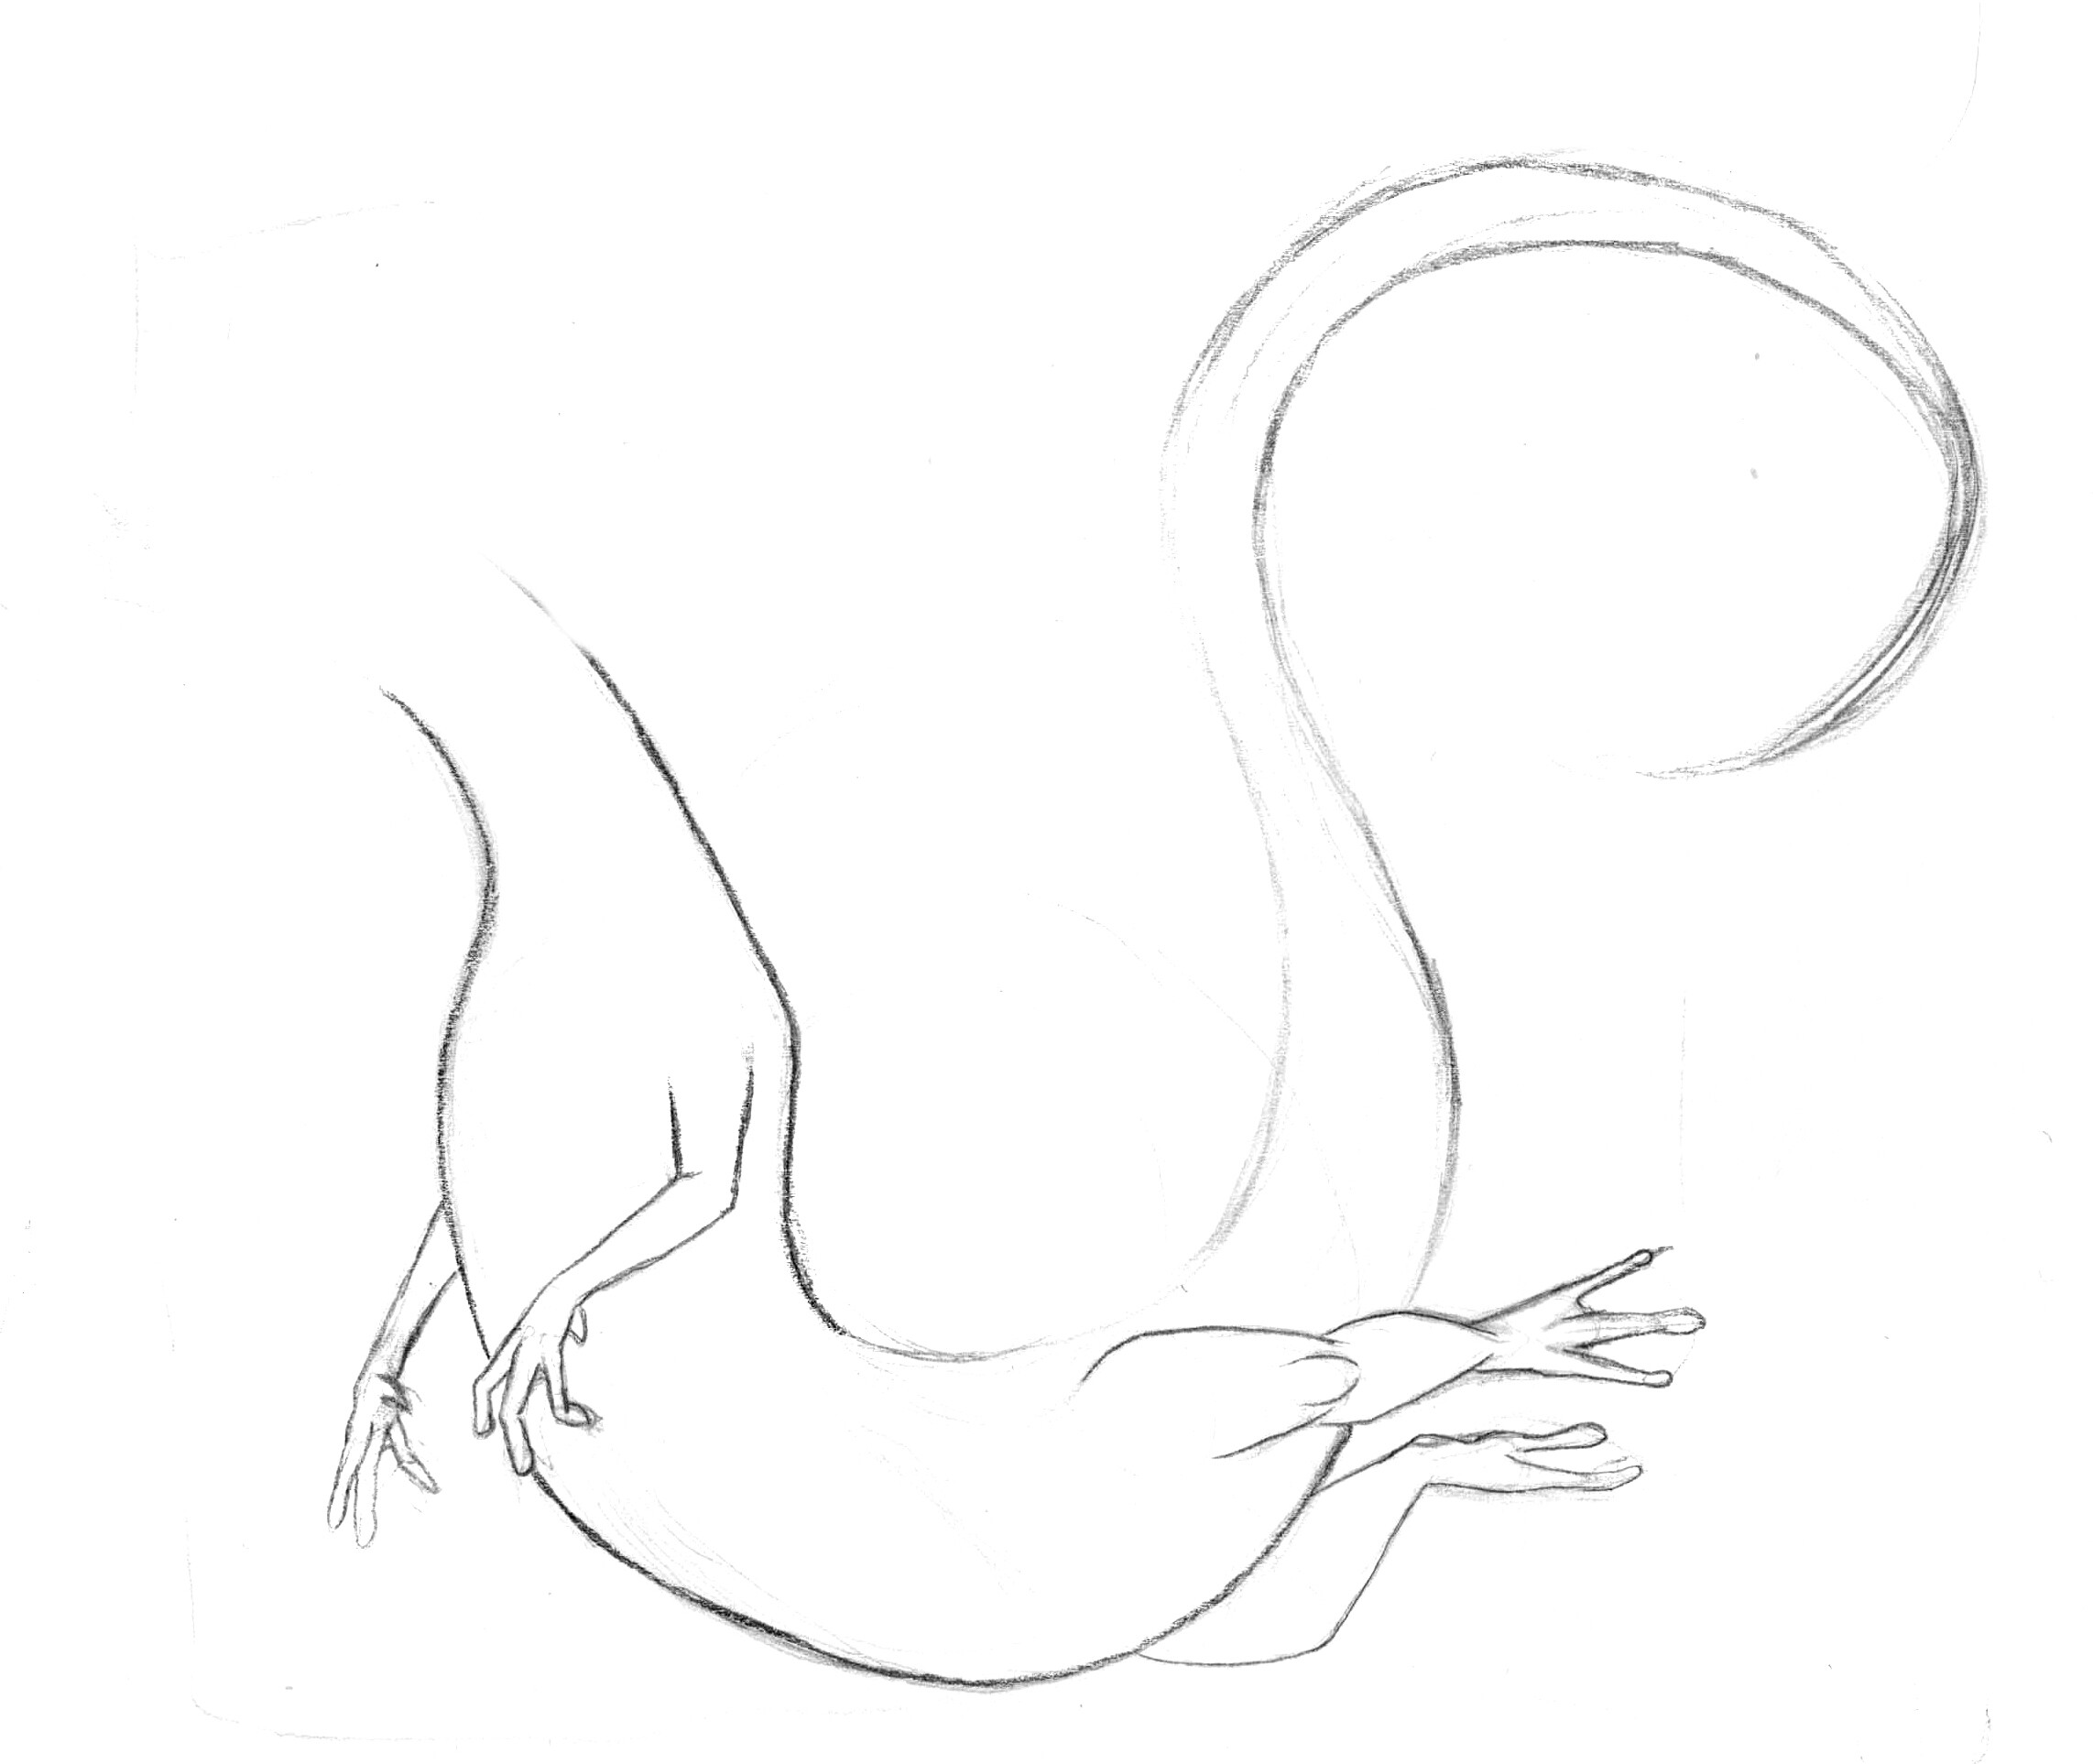
- Let’s move to the belly. Thus I marked the
belly position, it will be easier to understand, how to place the legs.
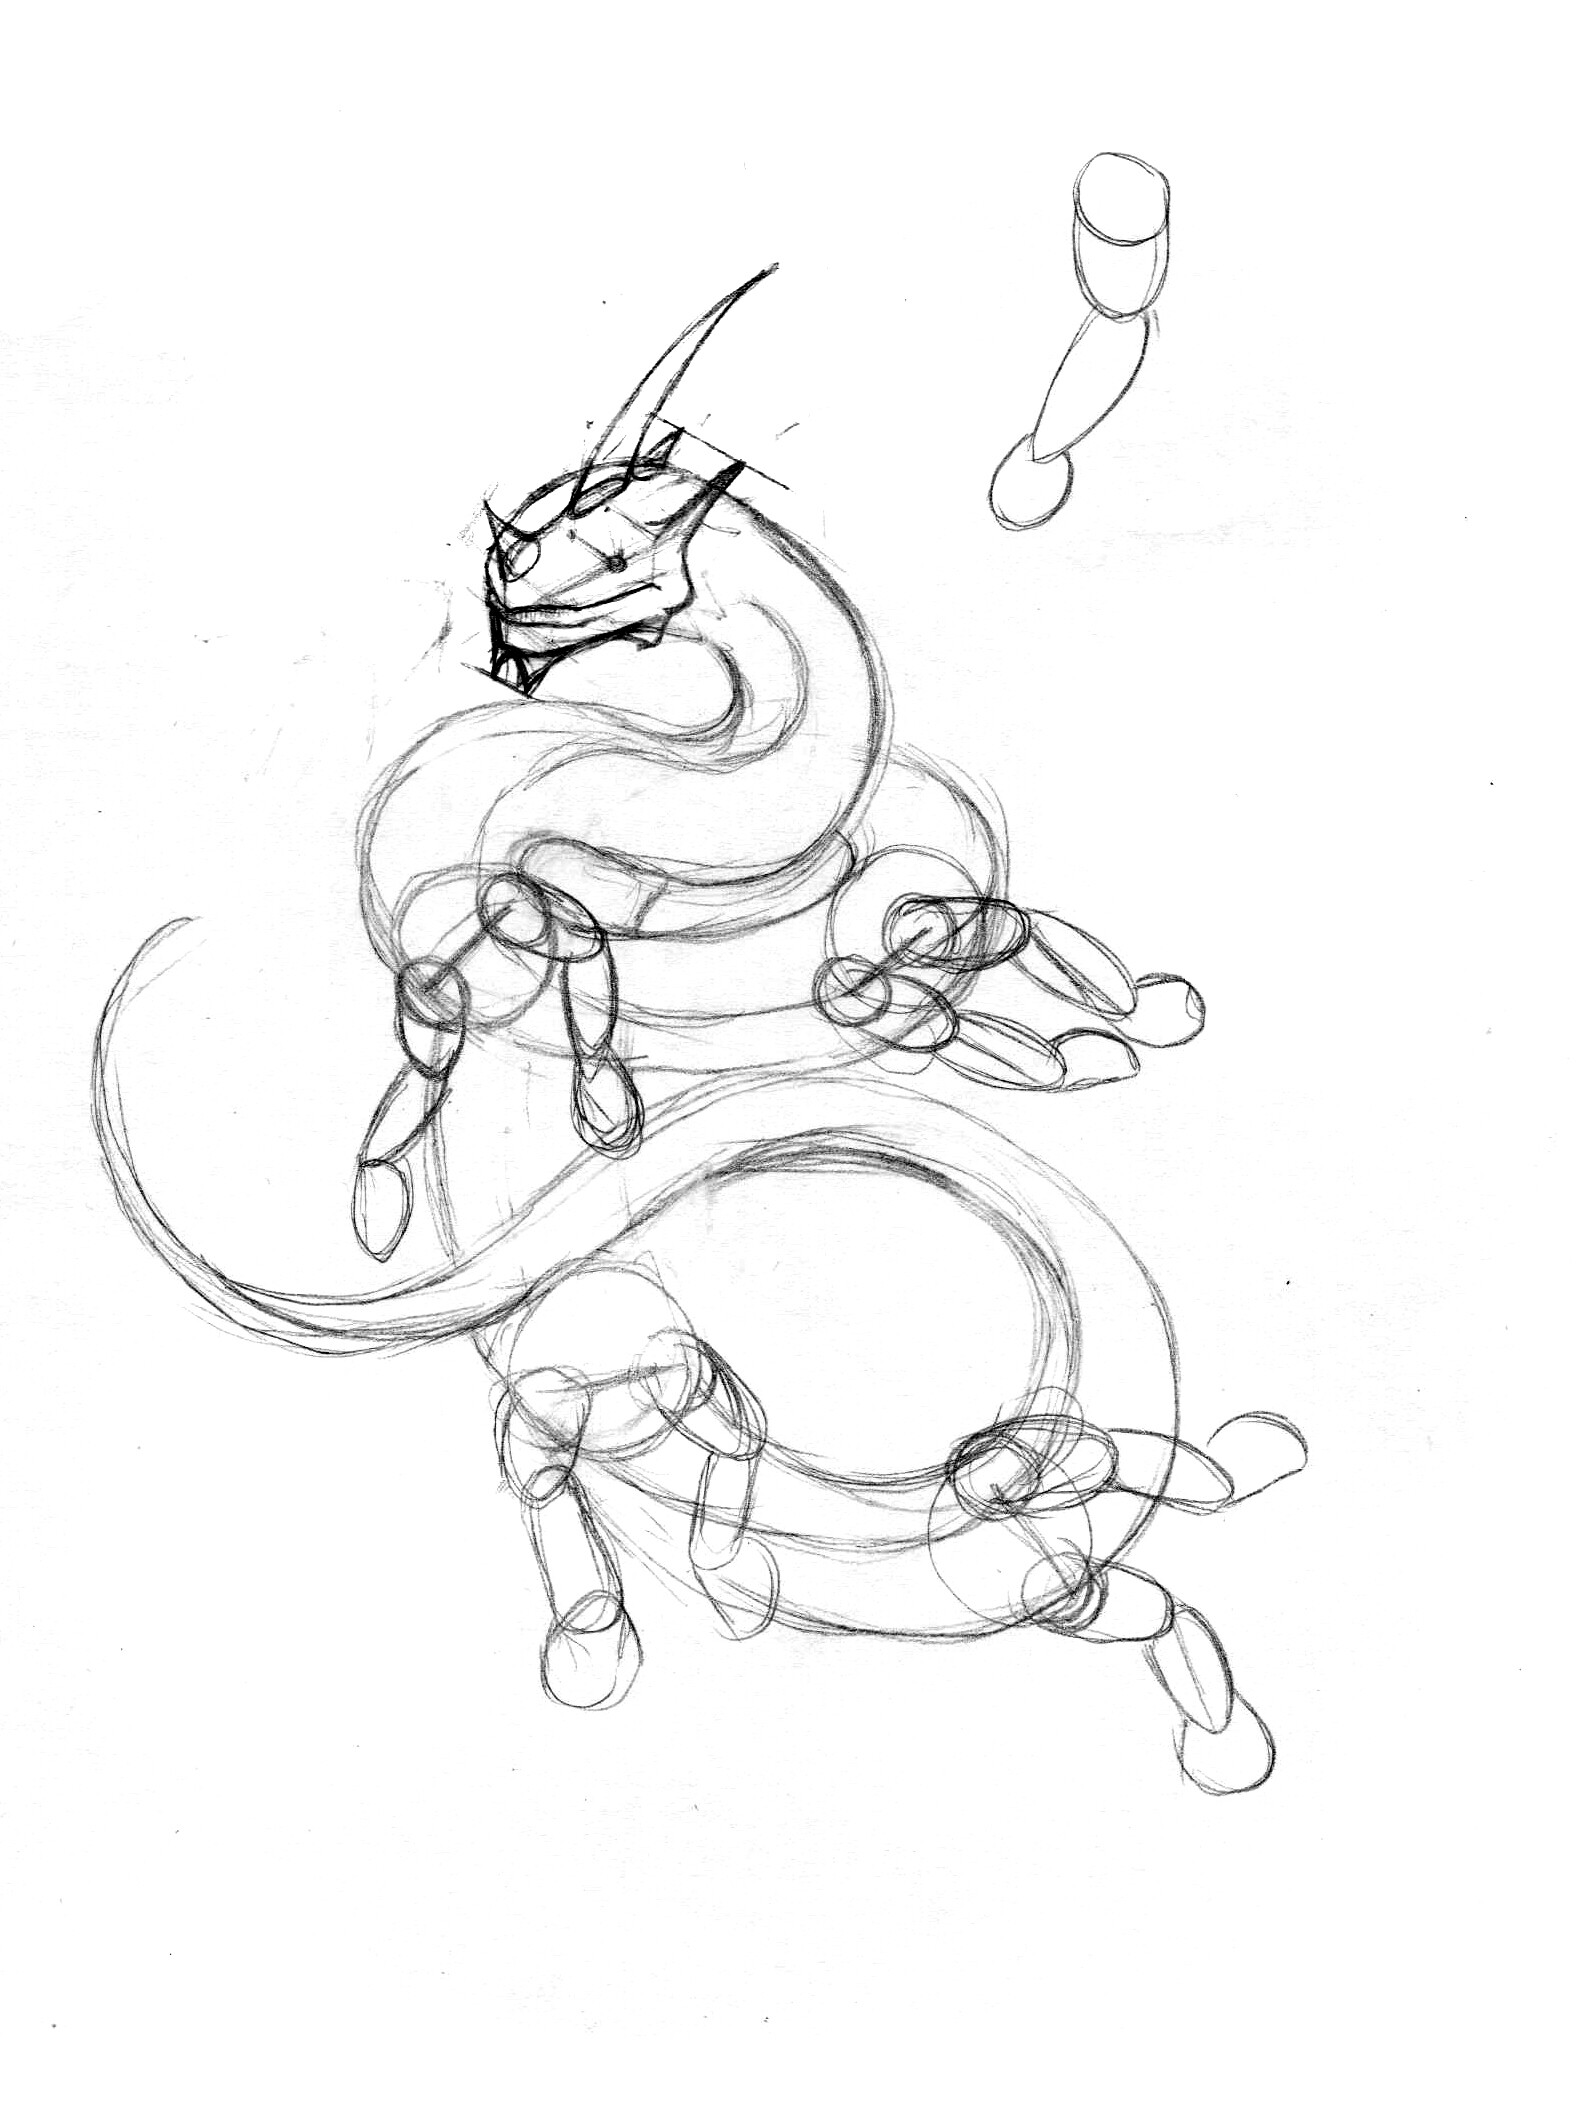
I made many of them, to train drawing them from different views. I
marked visible and invisible lines at once - the second-ones can always
be erased, but now I need them. For the building I use two balls,
connected by a stick. The stick shows us the movement direction of the
body part, which will define the legs positioning. I use the balls as
the shoulder joints.
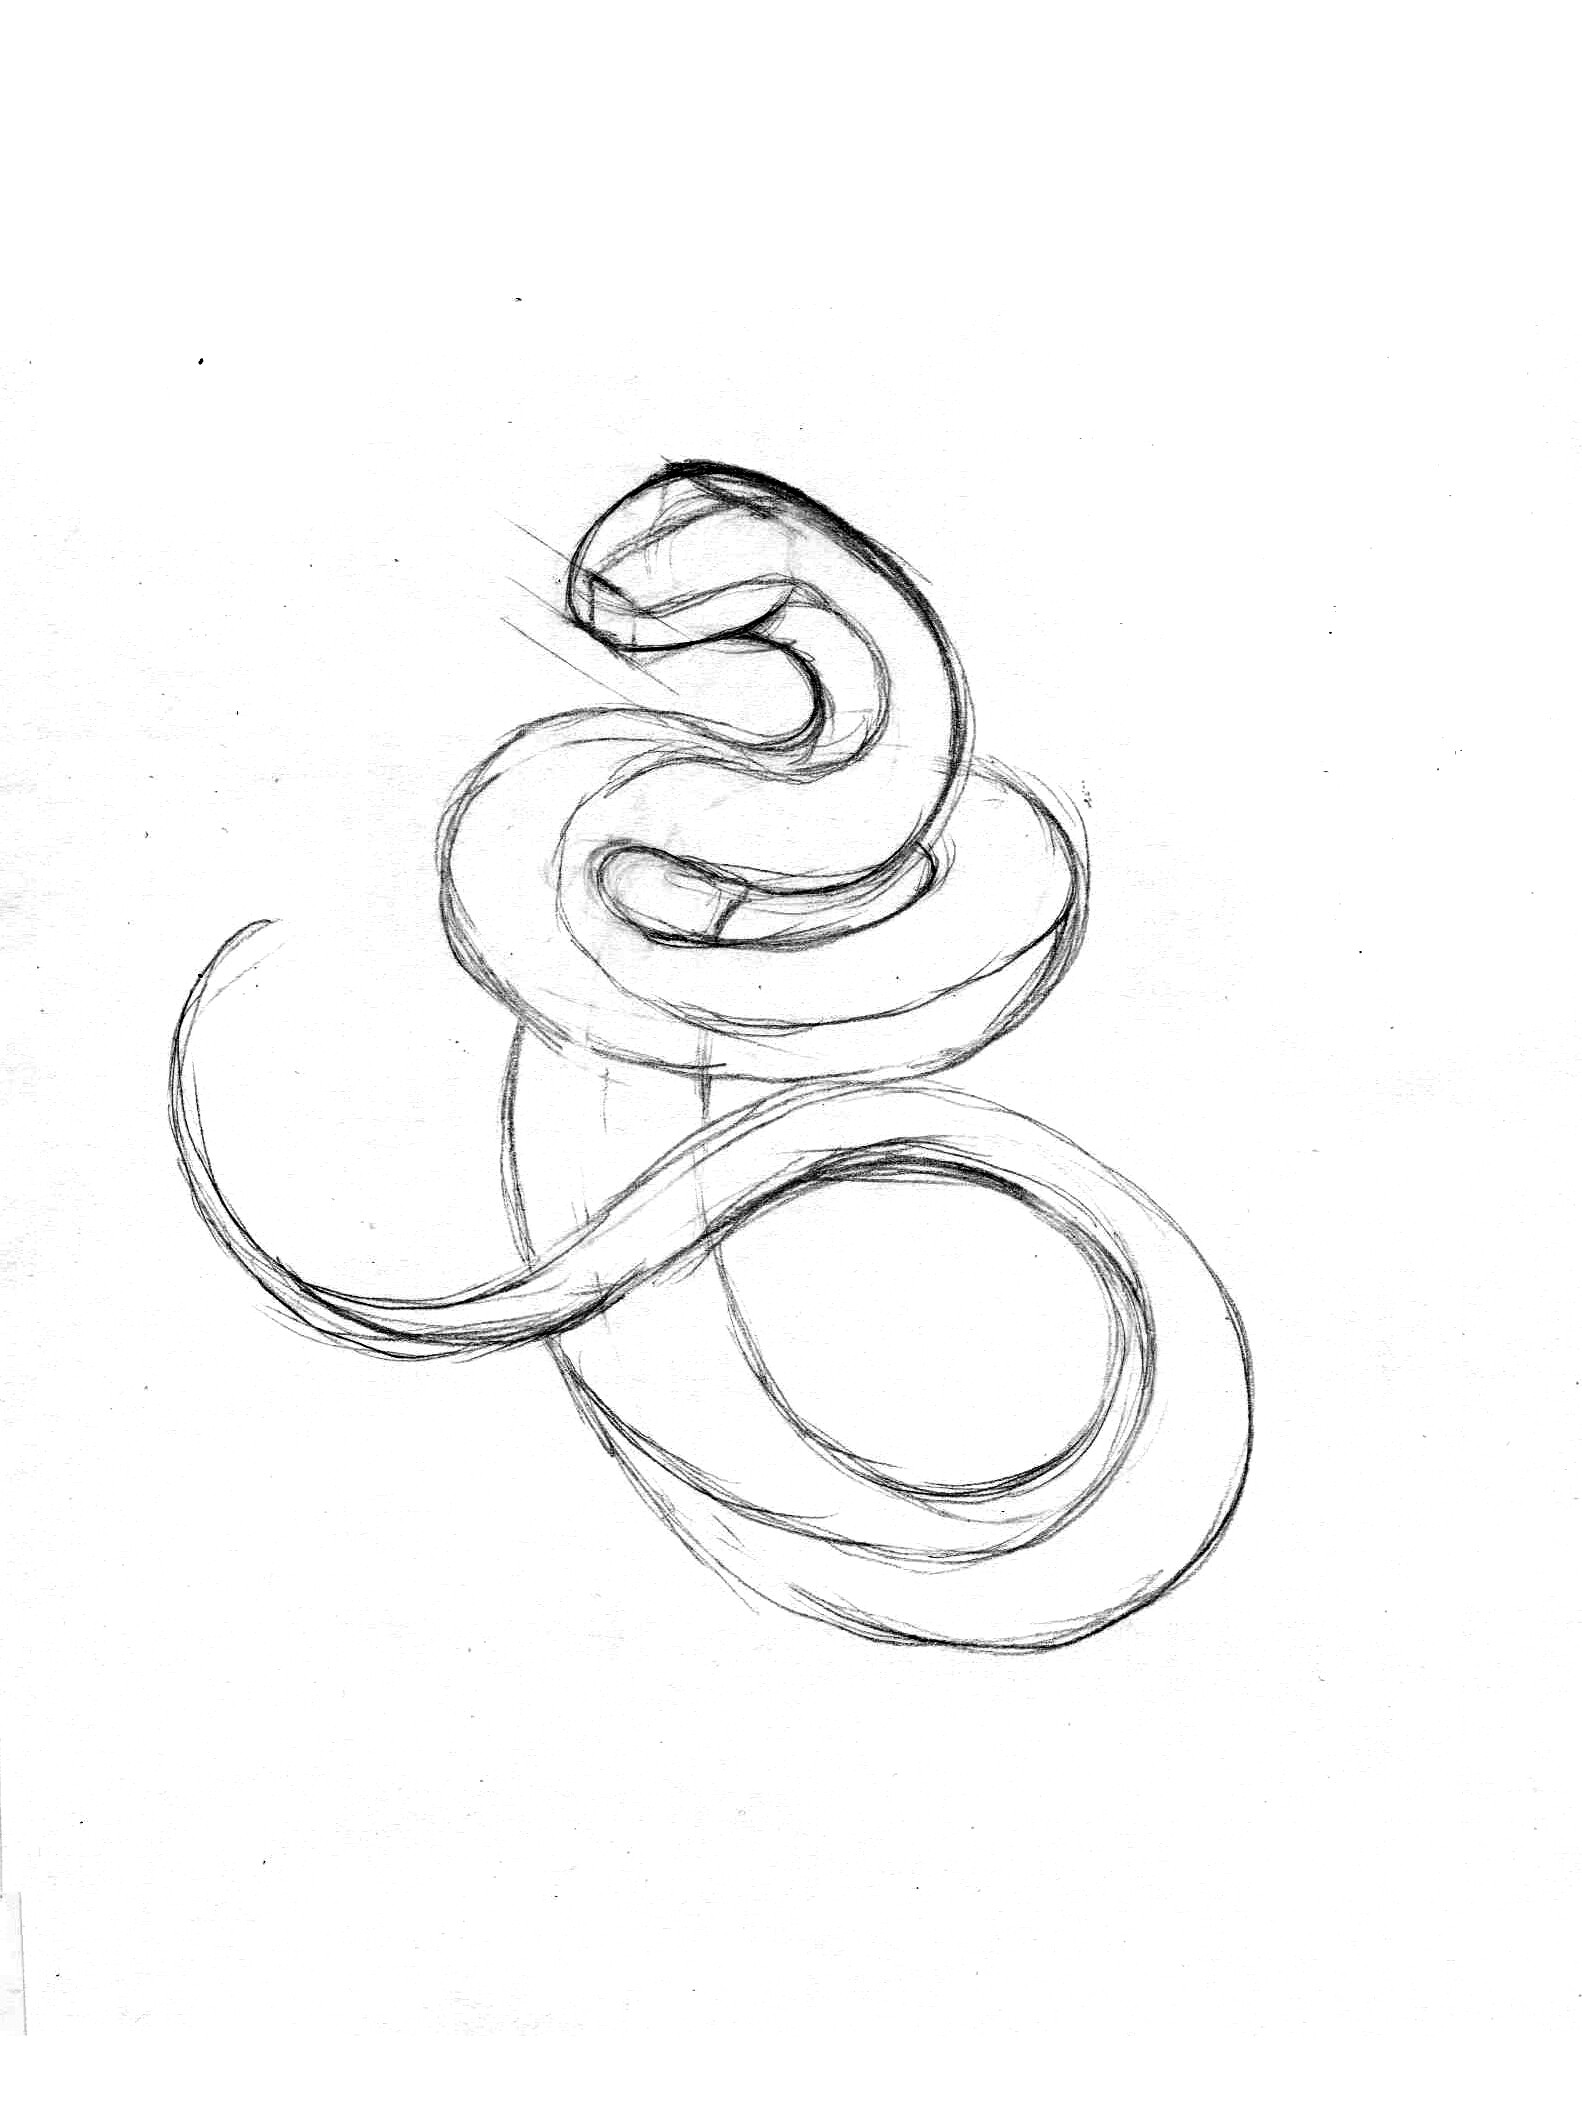
- Front (the 1-st pair) and rear legs (3
pairs) consist of 3 movable parts. How to break a moving form into
parts? Easy - it’s divided by the movable parts: shoulder, forearm and
wrist. You’re not gonna break the firearm into more parts, right?
- It’s not hard to draw the paws. To do that, we need to draw a ball on
each wrist and create a guide-line of the longest (middle) finger. The
rest of the fingers will be placed, according to this-one. It’s more
convenient. I missed a guide-line on one of the paws, because it will
not be visible (behind the body).
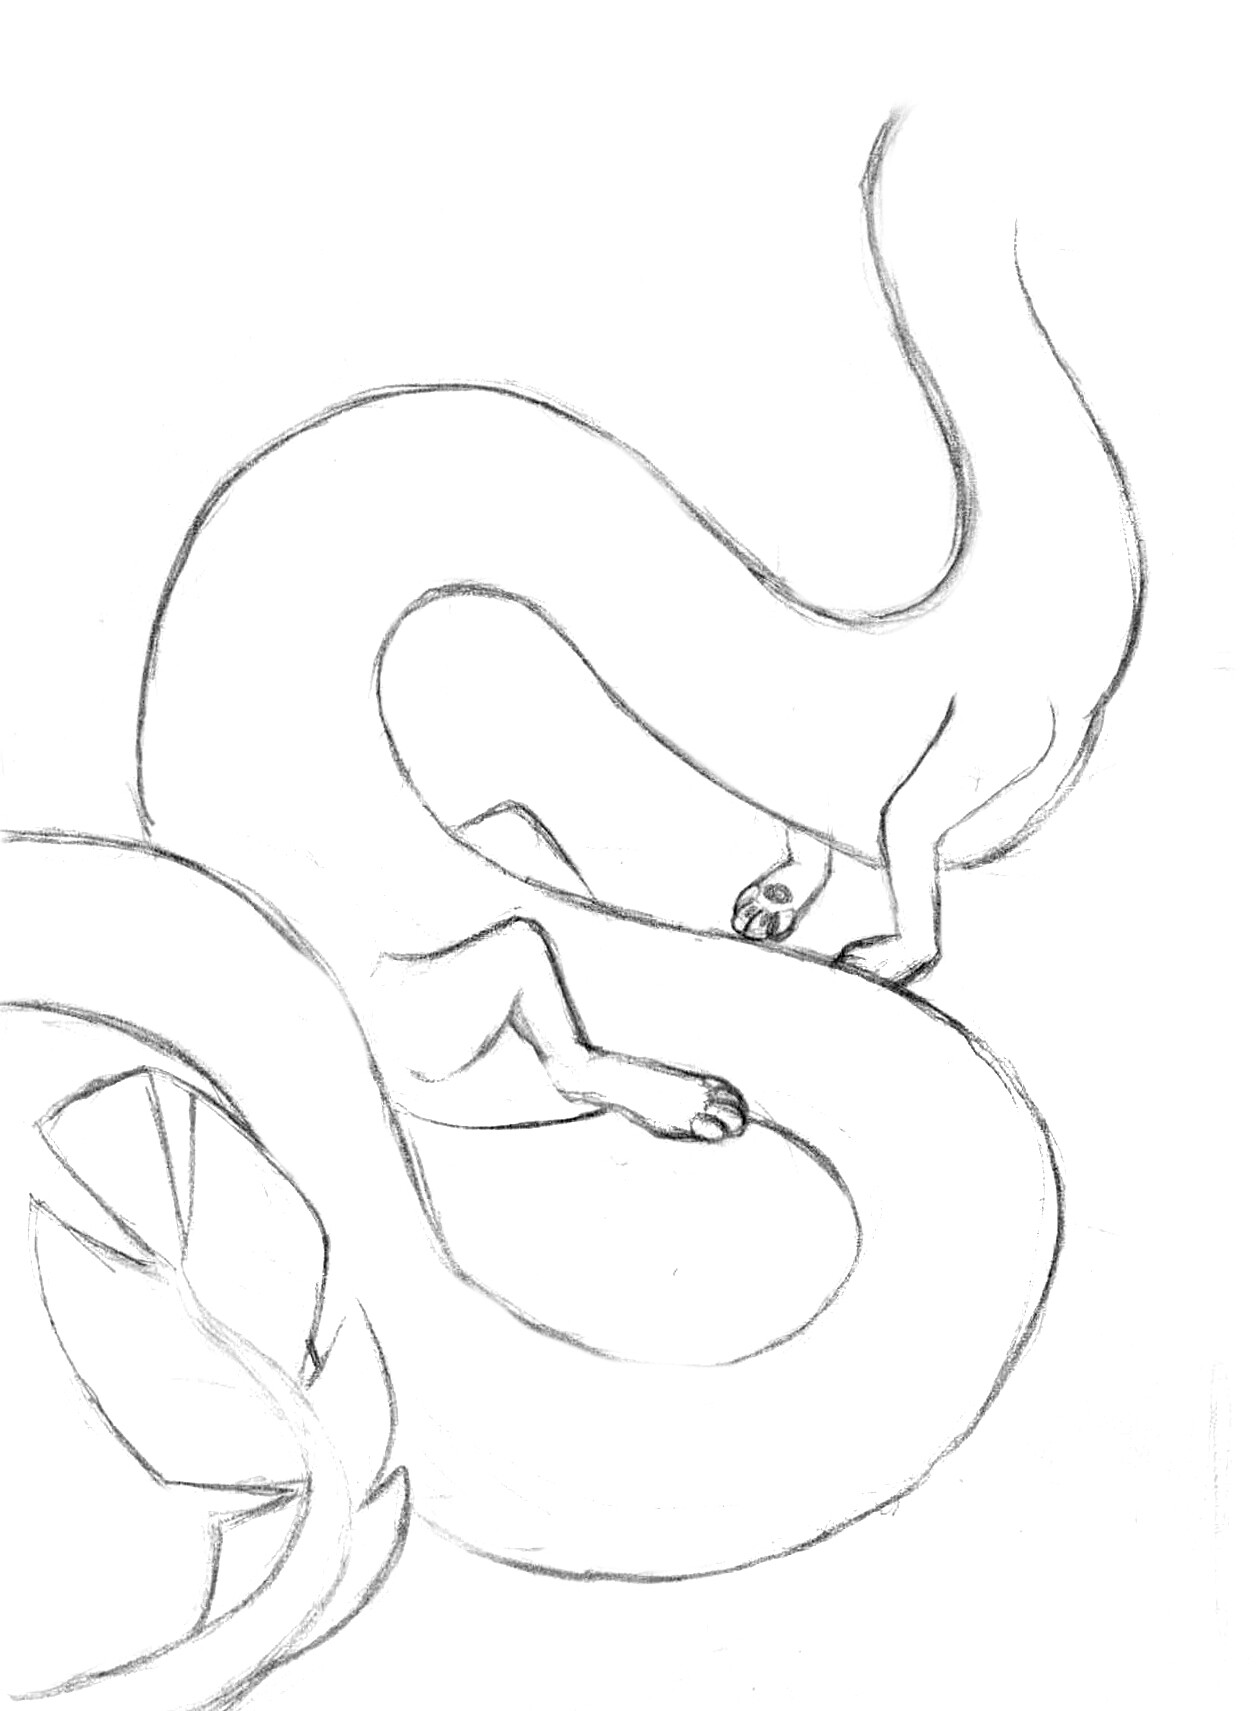
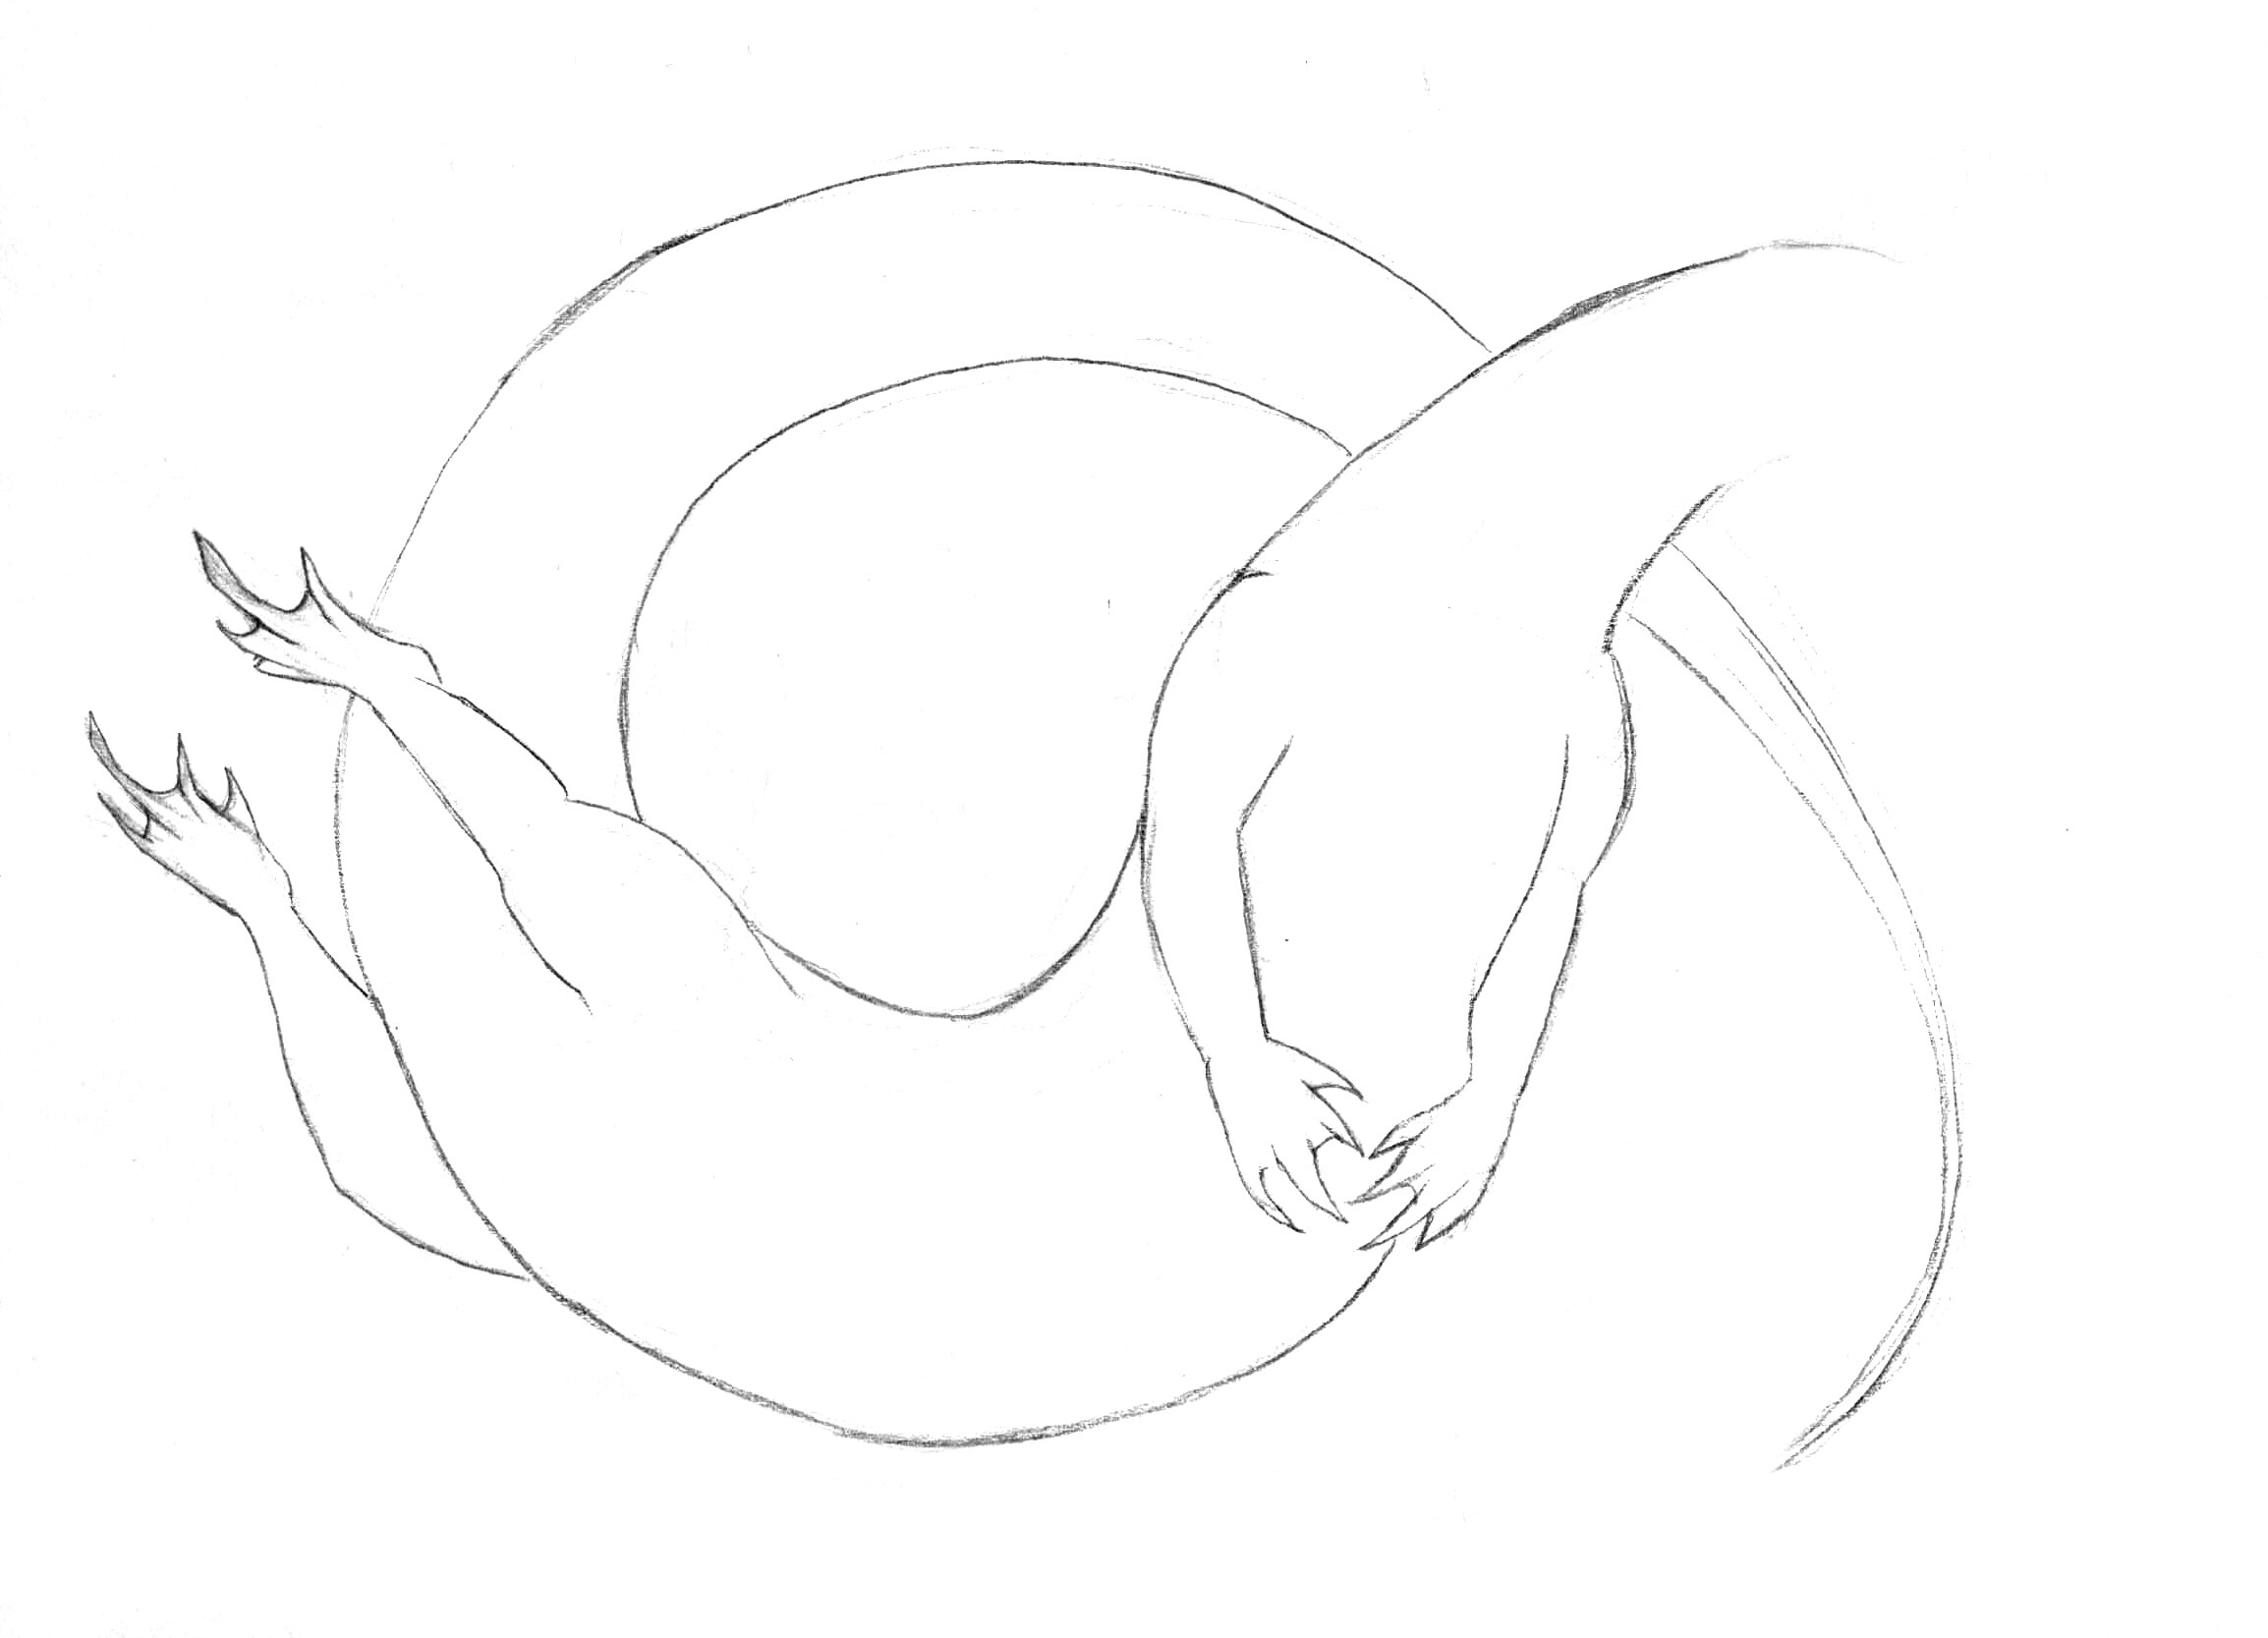
- To the bottom left, there is an example of paw-drawing. Add two more fingers.
- Shape out the fingers.
- Draw two circles inside the palm, where the fingers begin - those are
gonna be the soft pads (like cat’s). According to them, make shape to
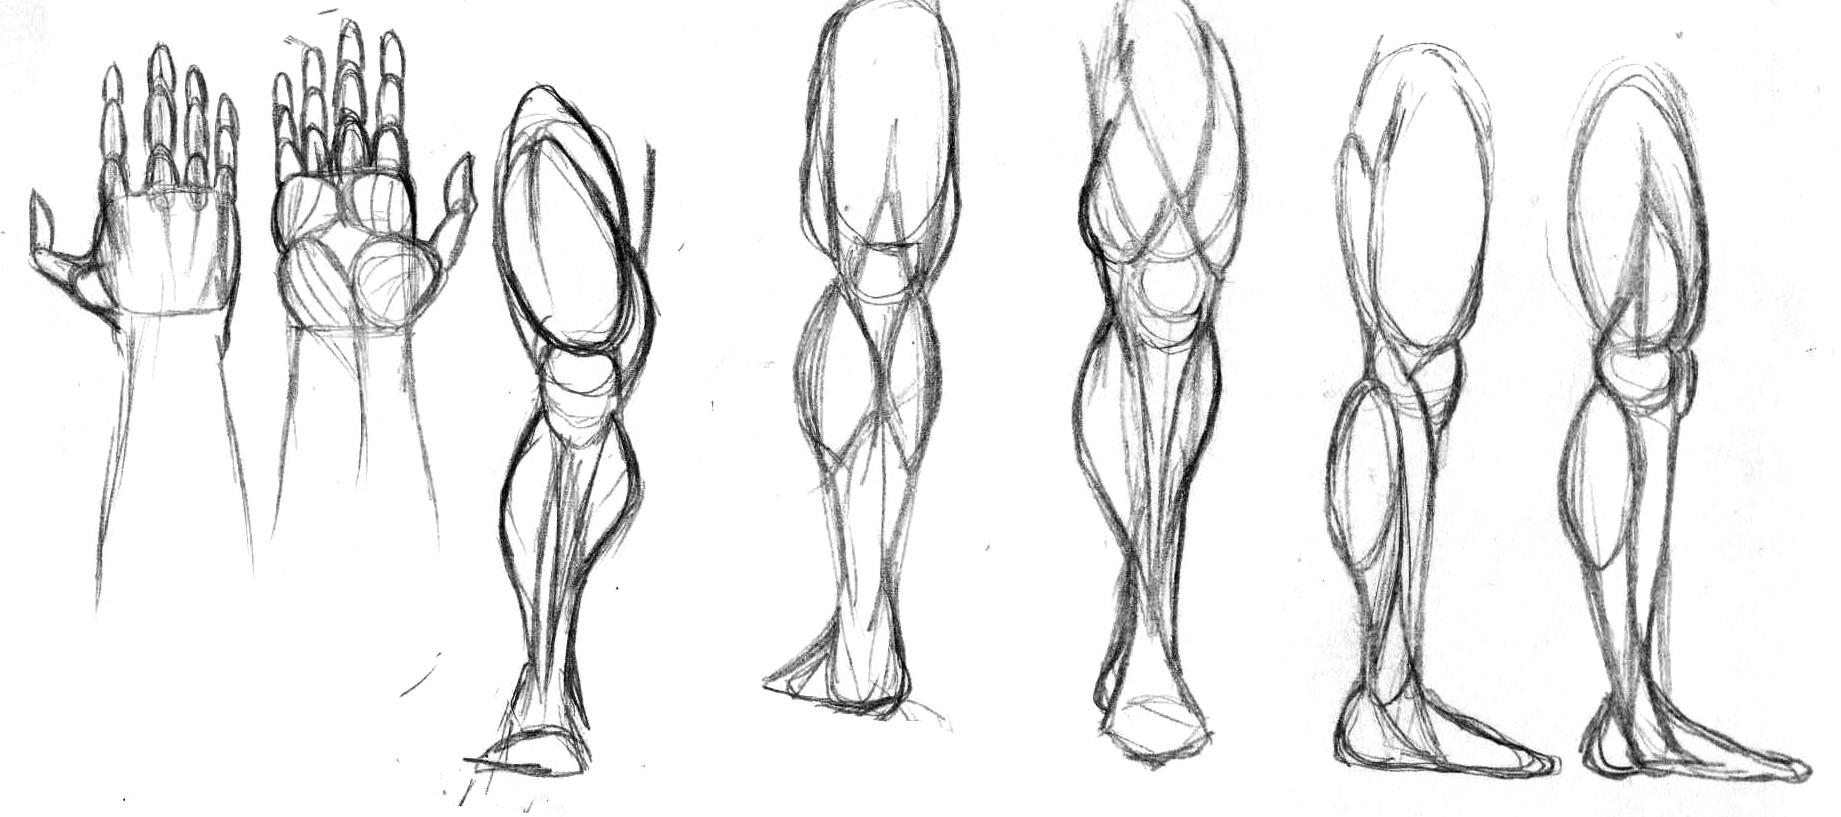
the whole palm. I used the anatomy knowledge for the proper form of the
forearm. I made some sketches of the human hands and legs. Right, I used
human anatomy in this drawing.
- Leave all the needed lines and erase the rest. We get a plain blank of the dragon and can add to it whatever we want.
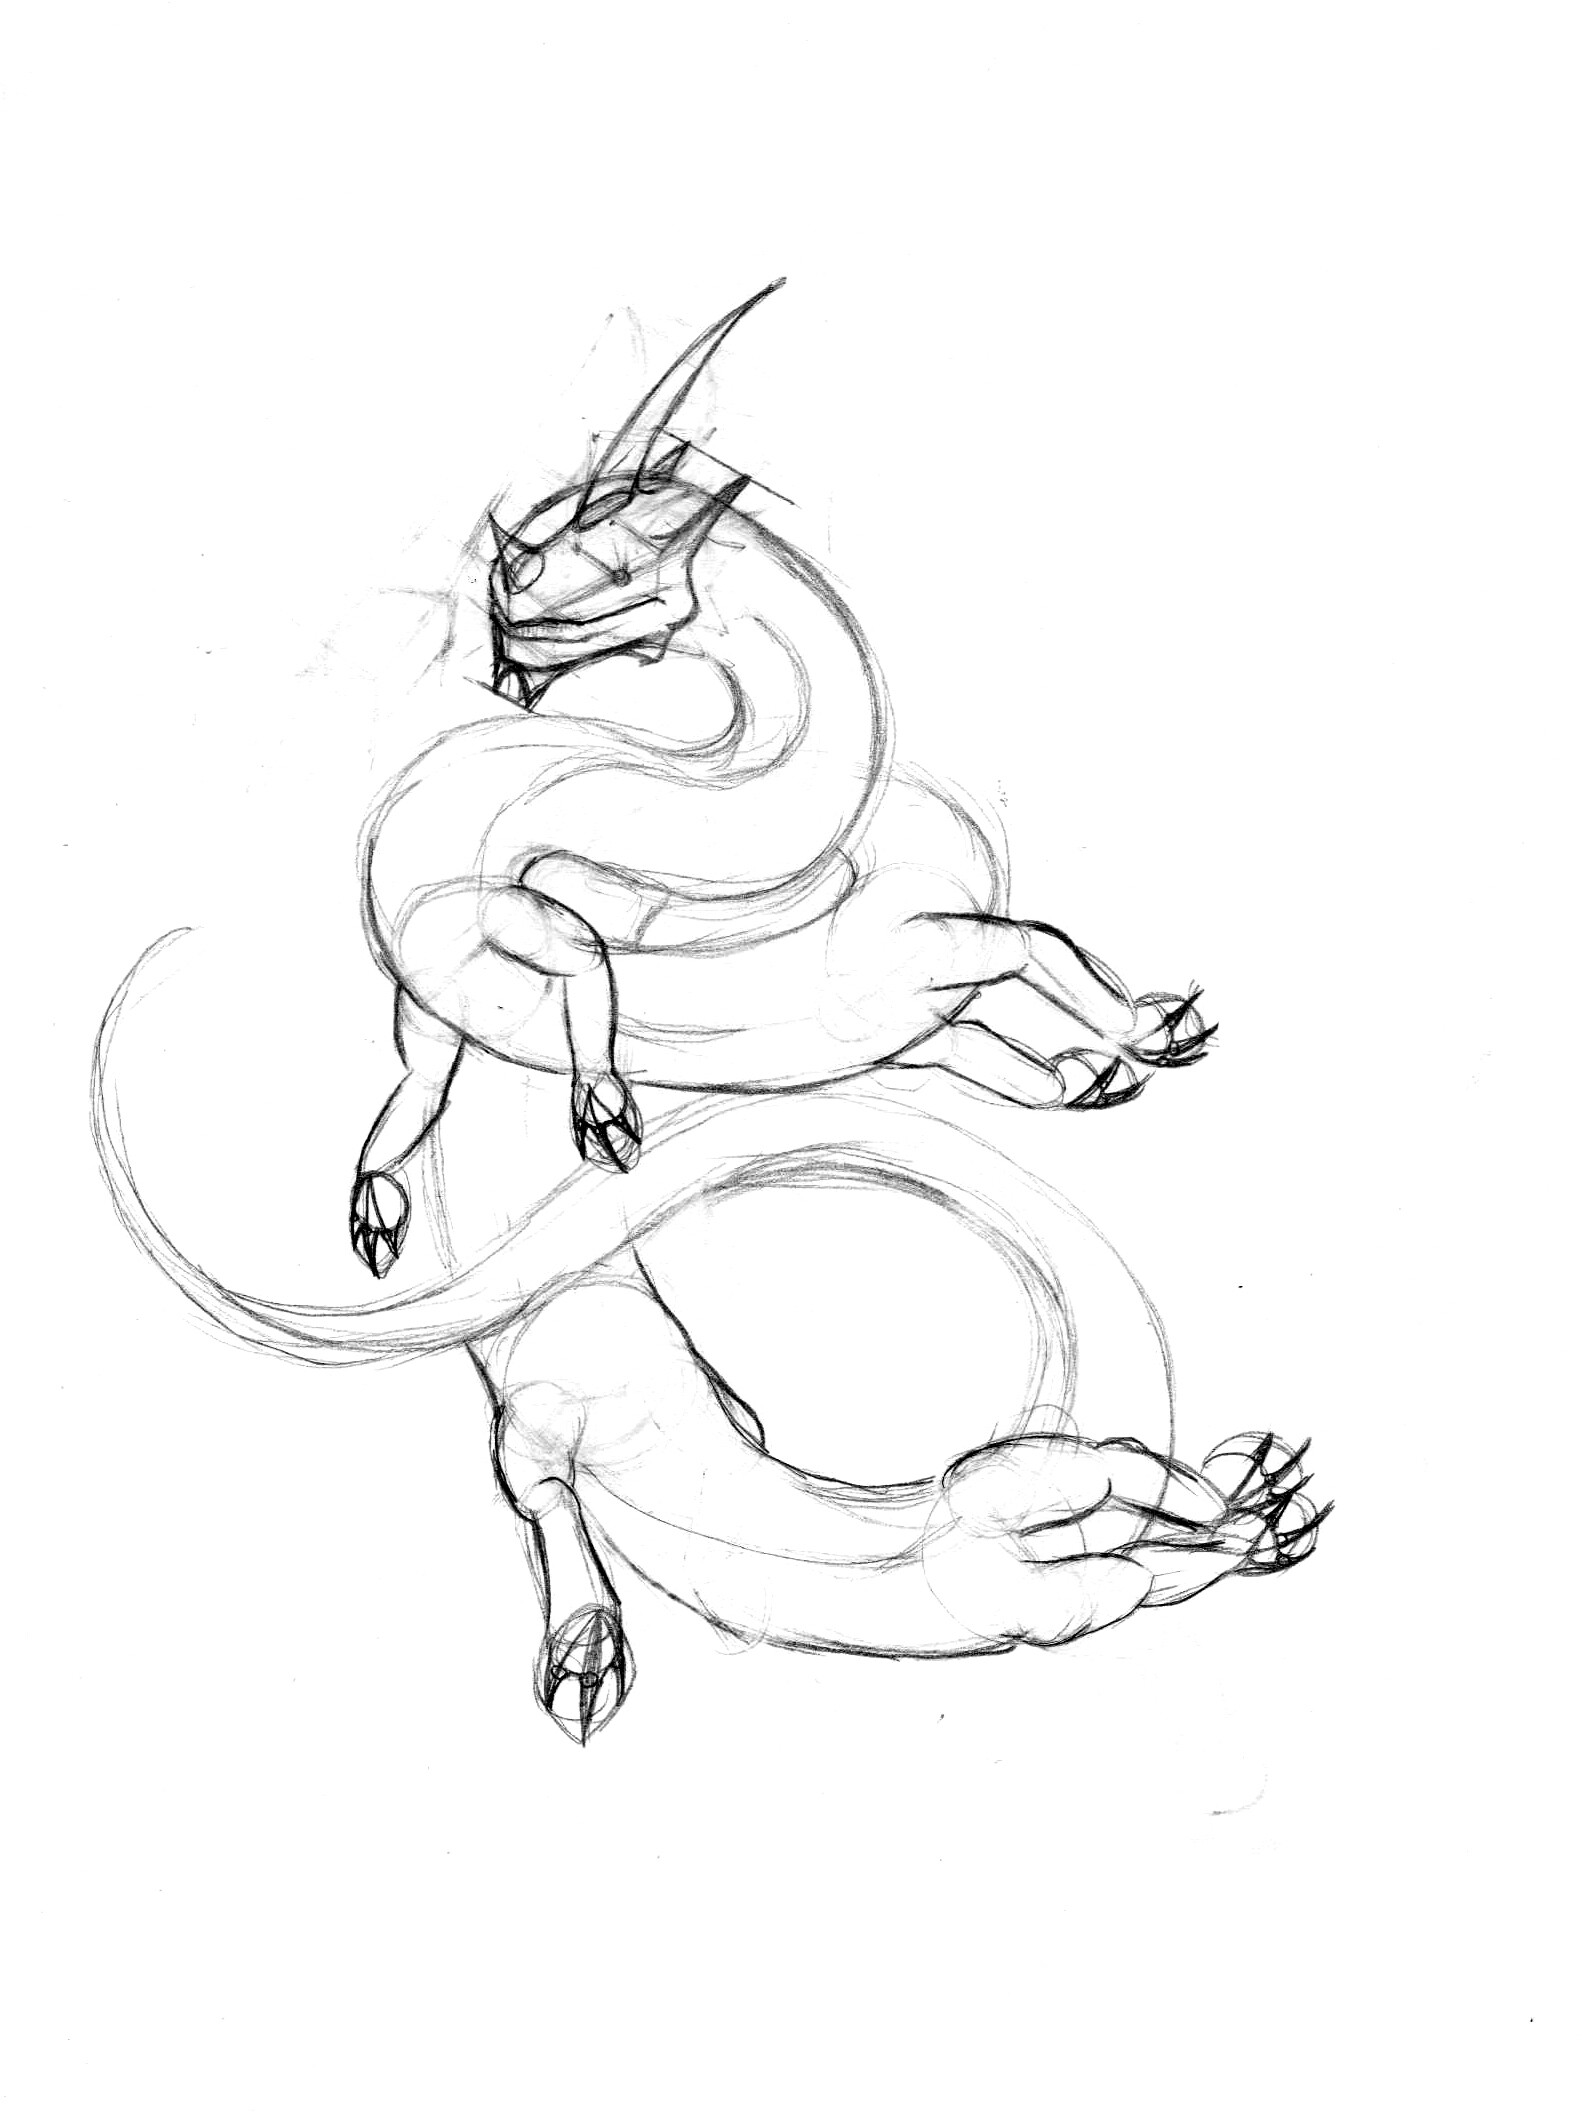
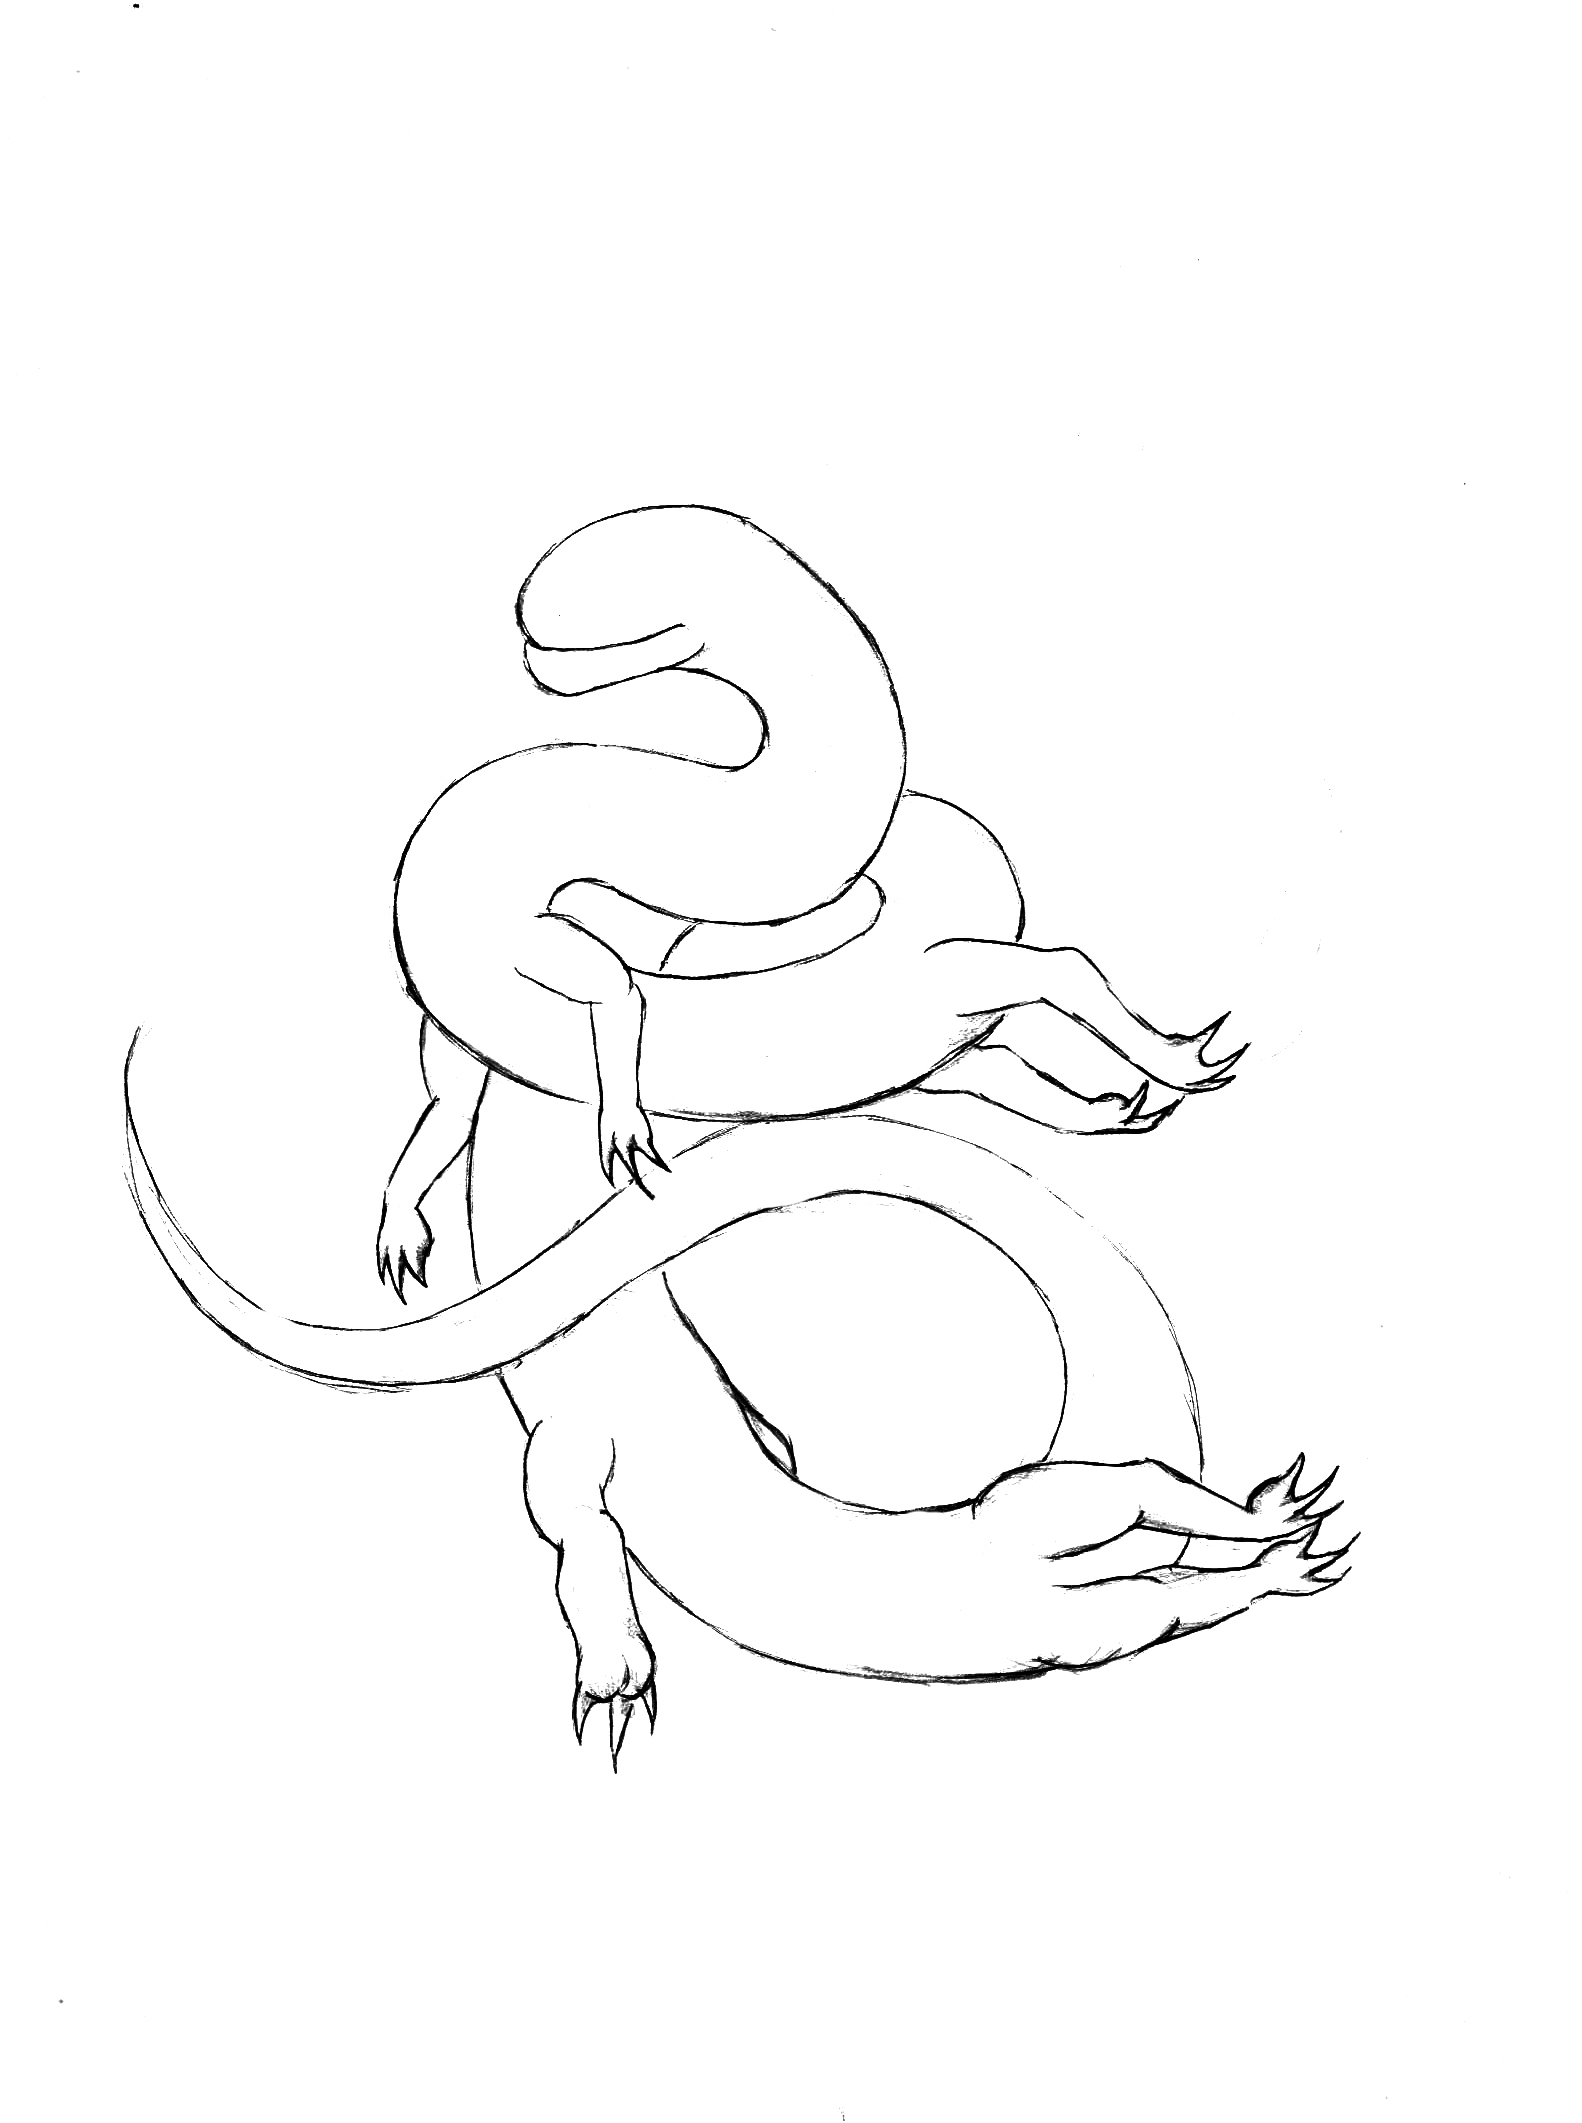
What to add? I don’t know. Propose your ideas here. It’s unnecessary,
that it will be scales or fur. You can order fox or llama and we gonna
have fur of these animals. Maybe, you can say “a spoon”? Spoon-like fur?
Or water-kind fur? Or the ornament in form of a spoon… there is
immense number of options here.
2 Likes
So Awesome!! I surely will try! and practice  !
!
1 Like
isn´t @coon an artist first row?!
https://smellybeagle.files.wordpress.com/2013/05/20130512-164635.jpg?w=640
a Q: how did you as artist draw? do ya need any kinda helping lines? Or is it “all in ya head”?
lol you mb like the gorillaz, Coon?
2 Likes
Lol
I do a sketch. Sometimes in my head I see the finished work with a lot details. Sometimes I come up with the details at the time of drawing. I like to use the eraser-gum (knetgummi art eraser)
http://file2.answcdn.com/answ-cld/image/upload/h_320,c_fill,g_face:center,q_60,f_jpg/v1400910908/mp8aypwiik3cqim8oo1v.jpg
If you roll it on the image, art will be very light, as the sketch. It is convenient to work out the details. It helps not to get lost in the details.
And eraser-gum don`t damage the paper, as an ordinary eraser.
I use the guide lines (so as not to get lost in space)
1 Like
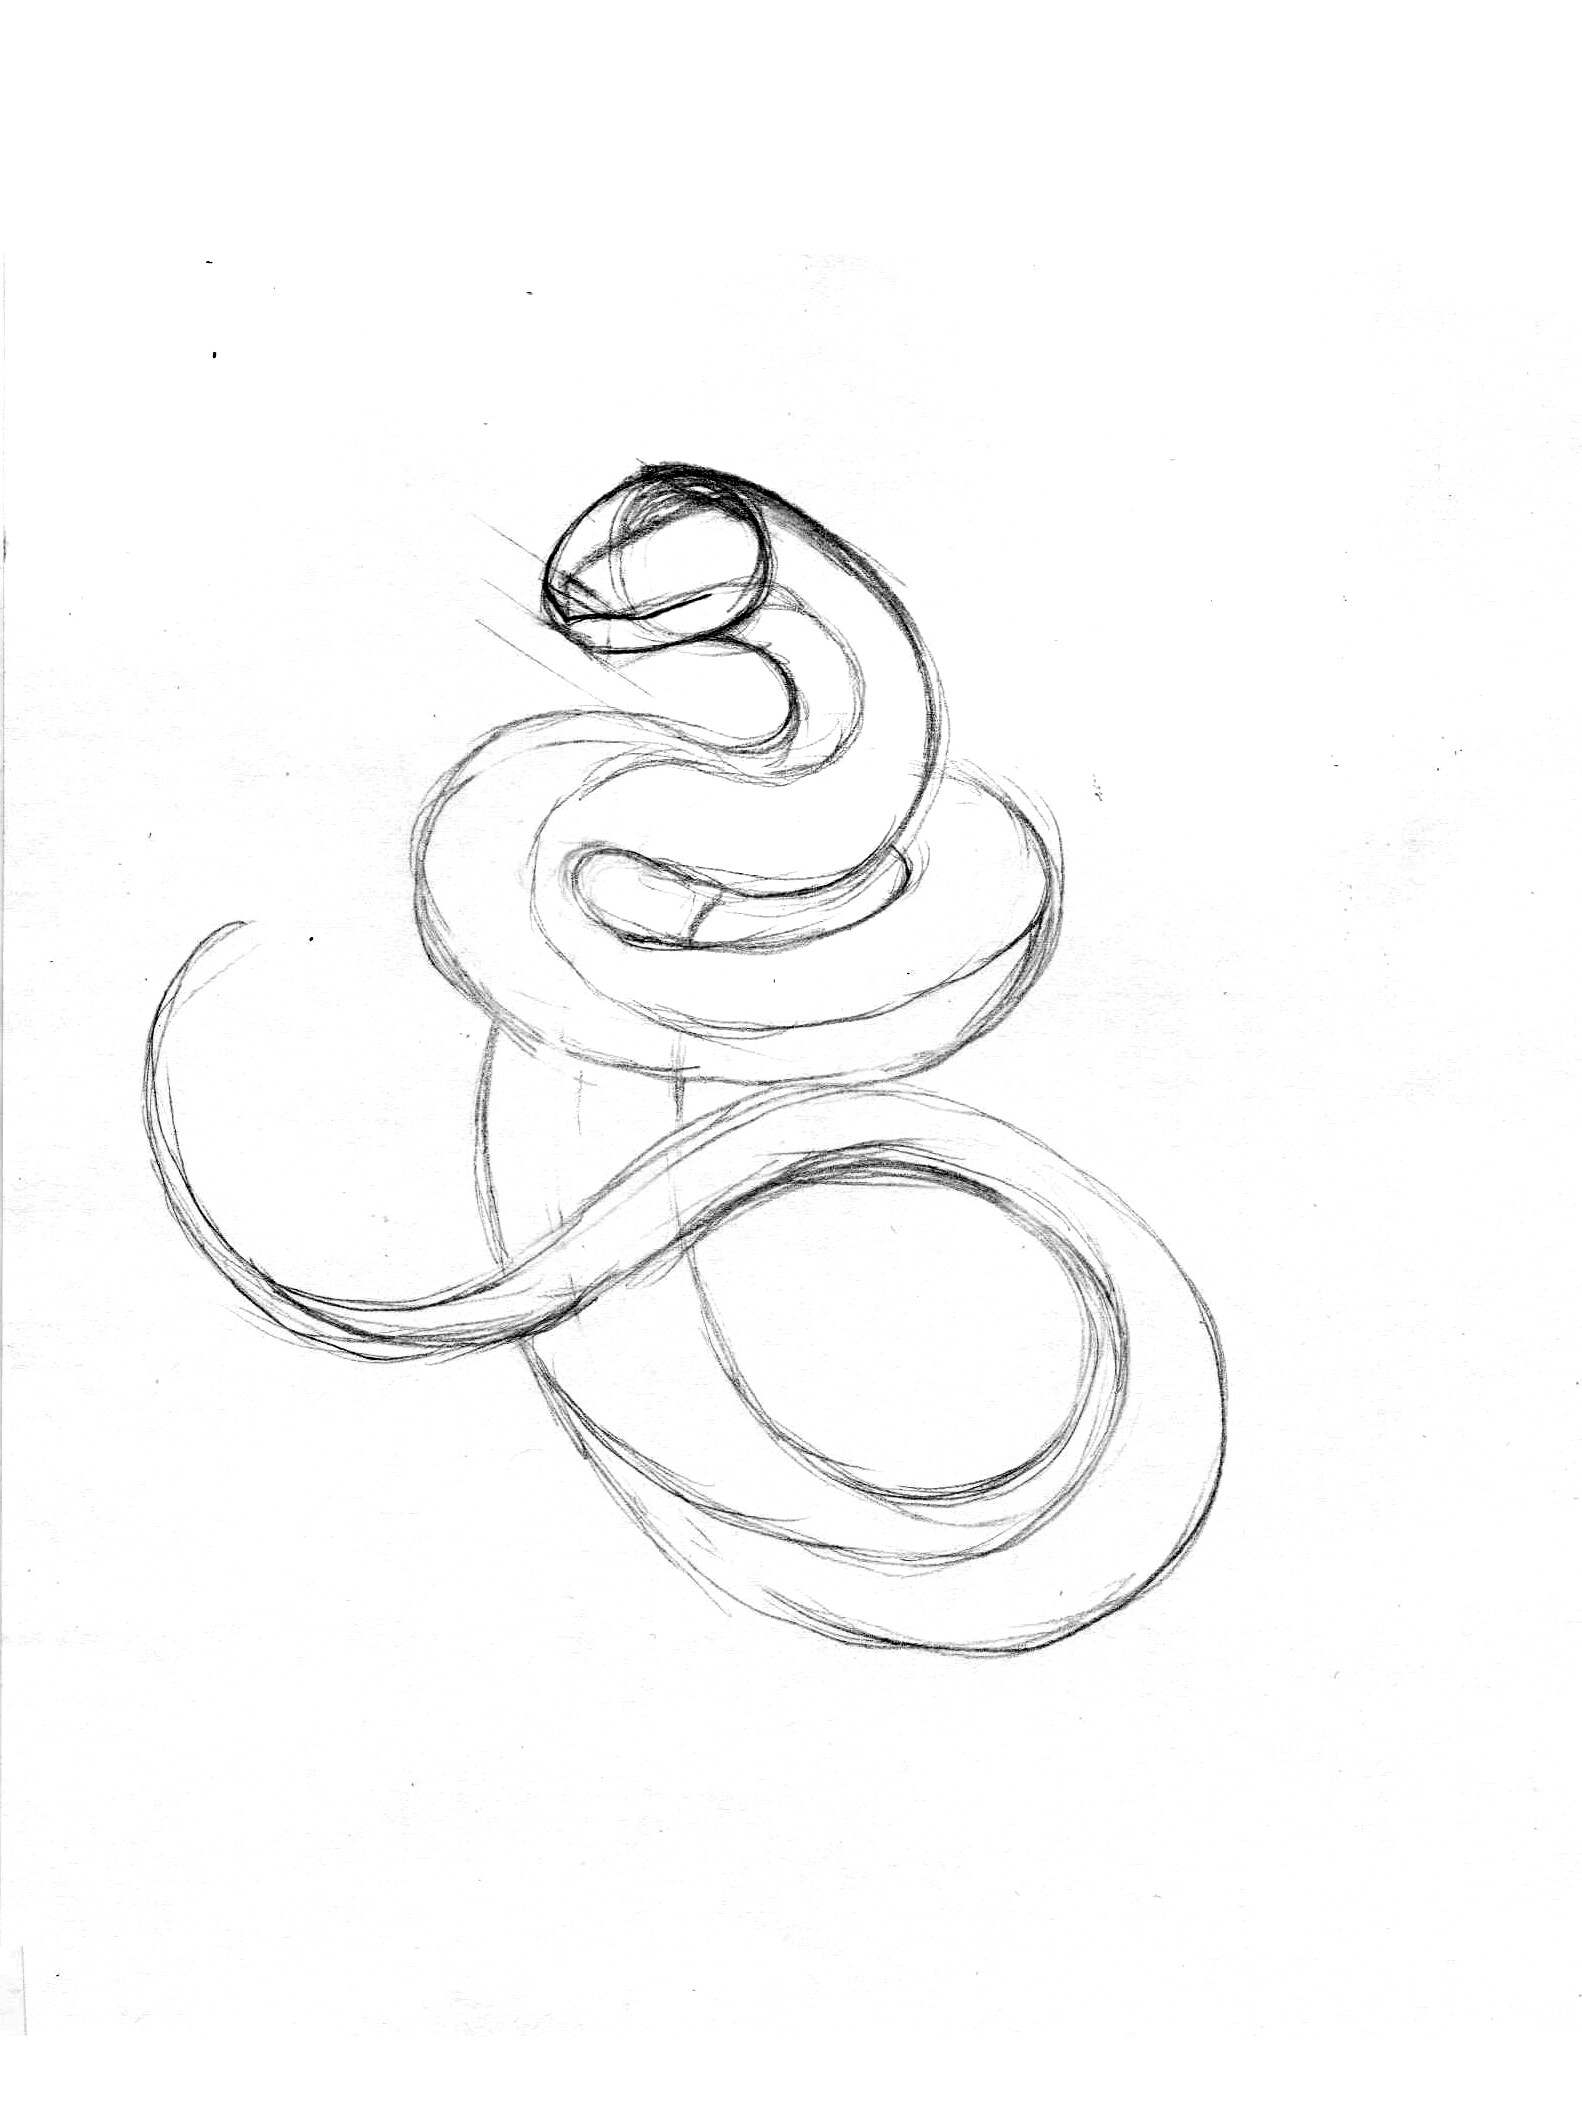
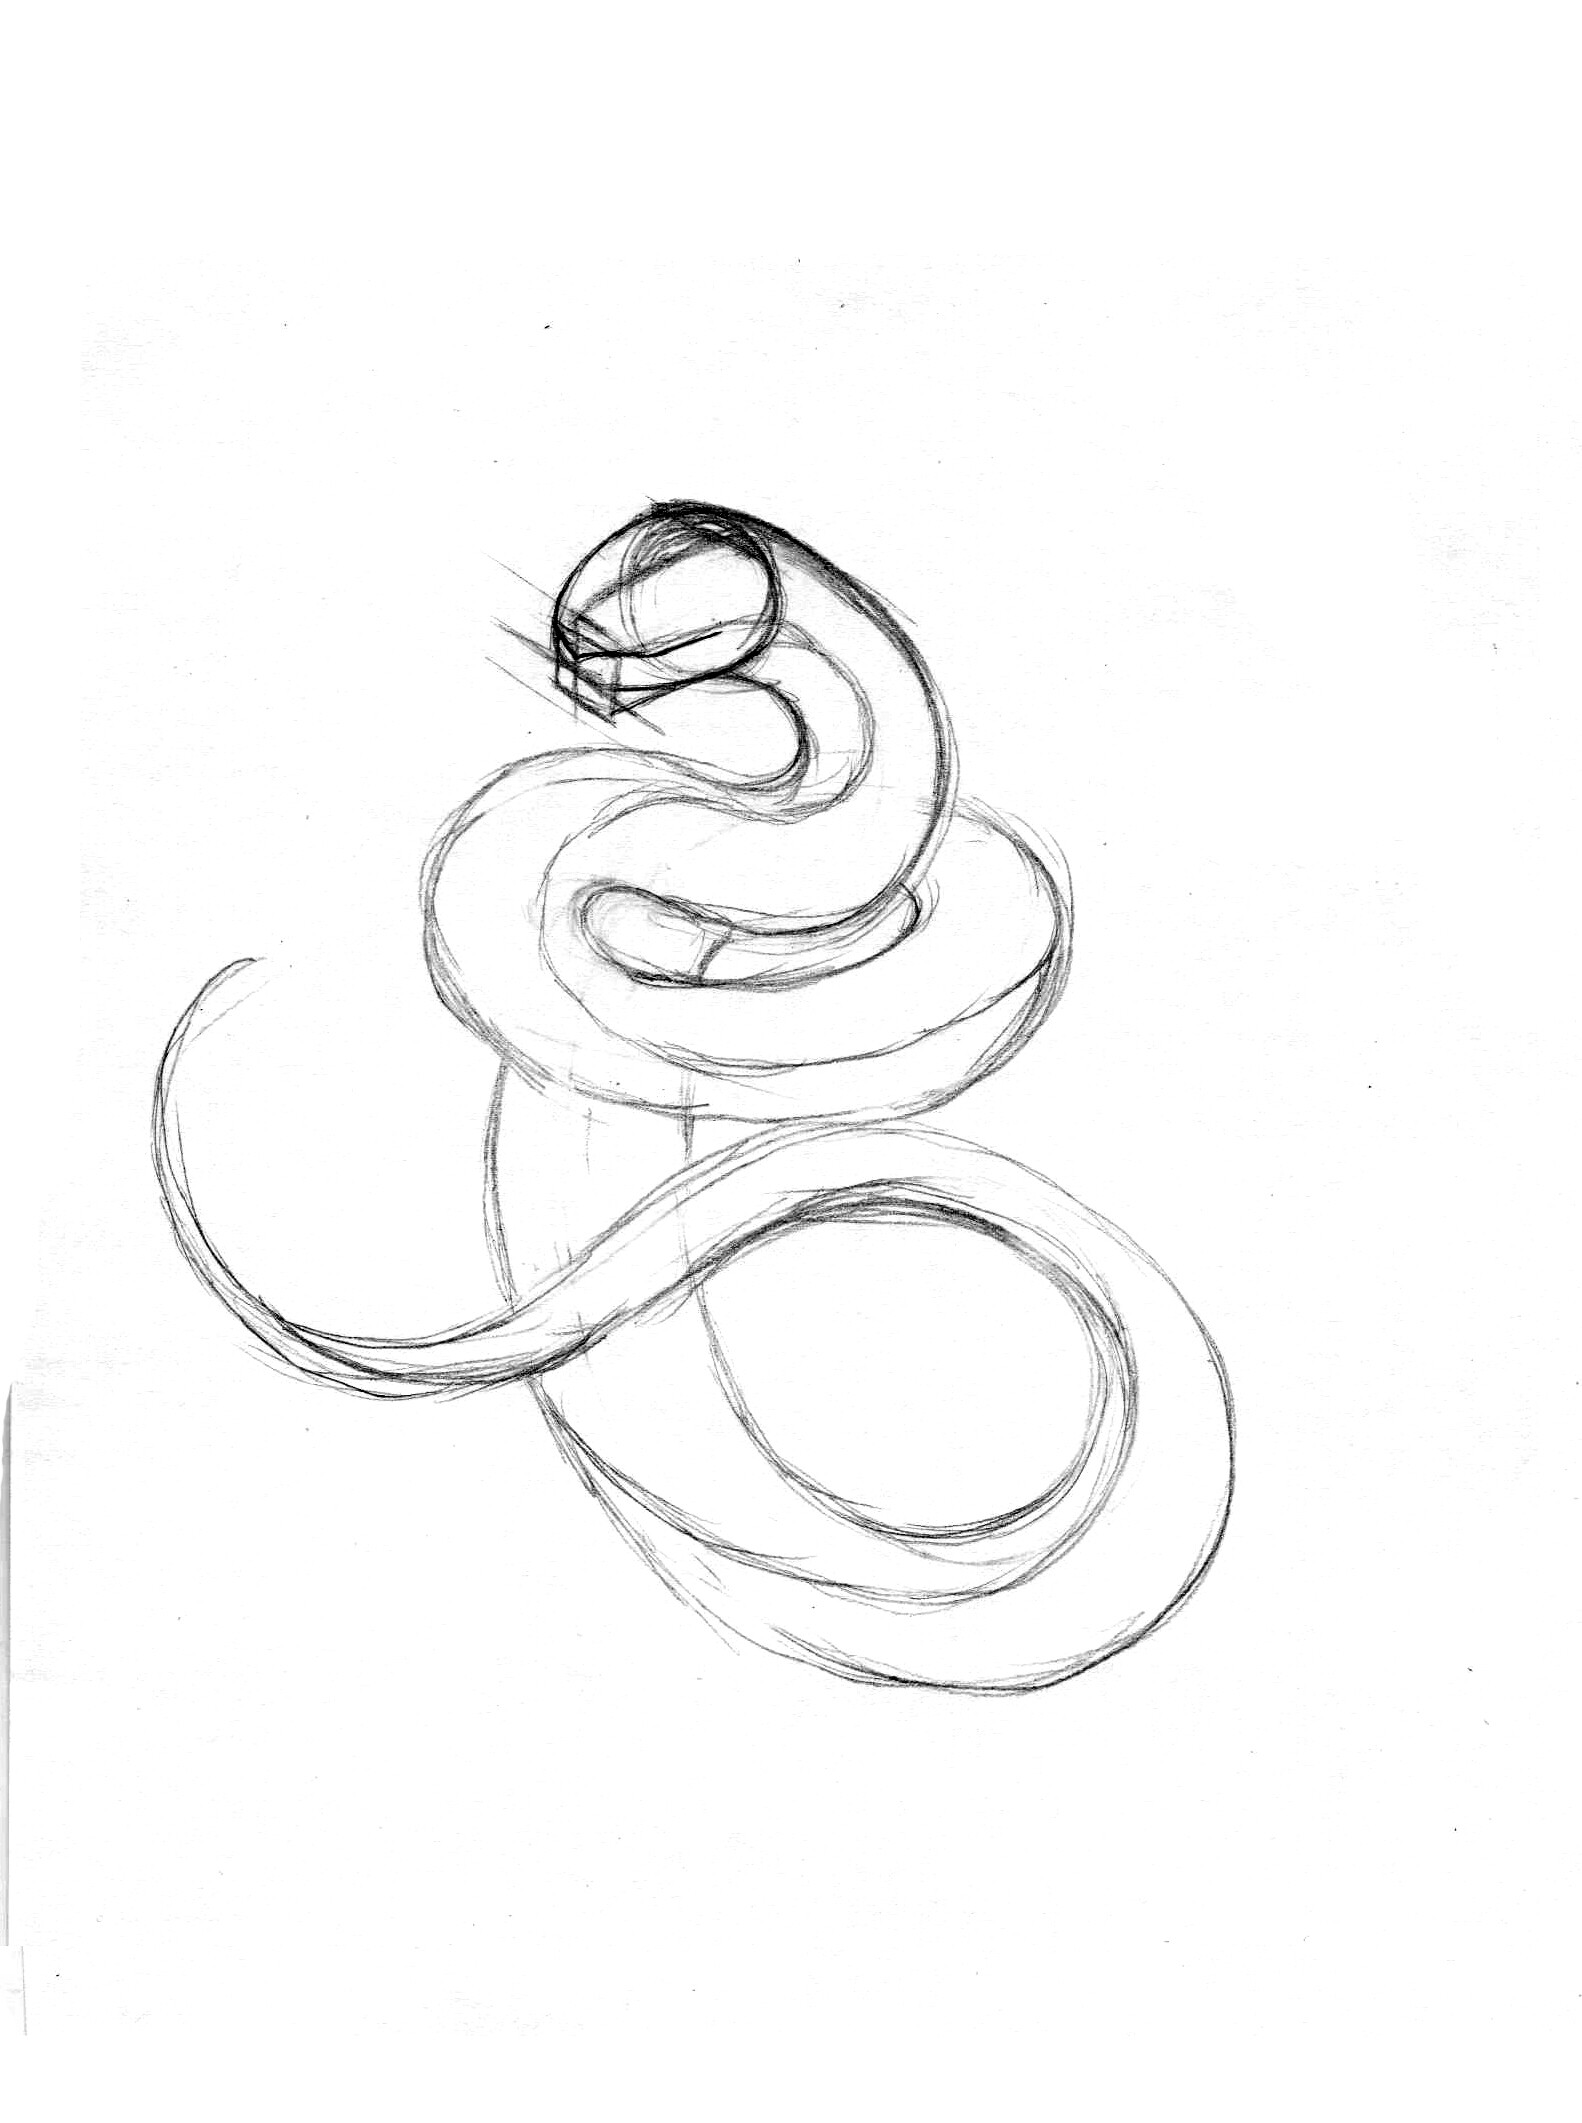
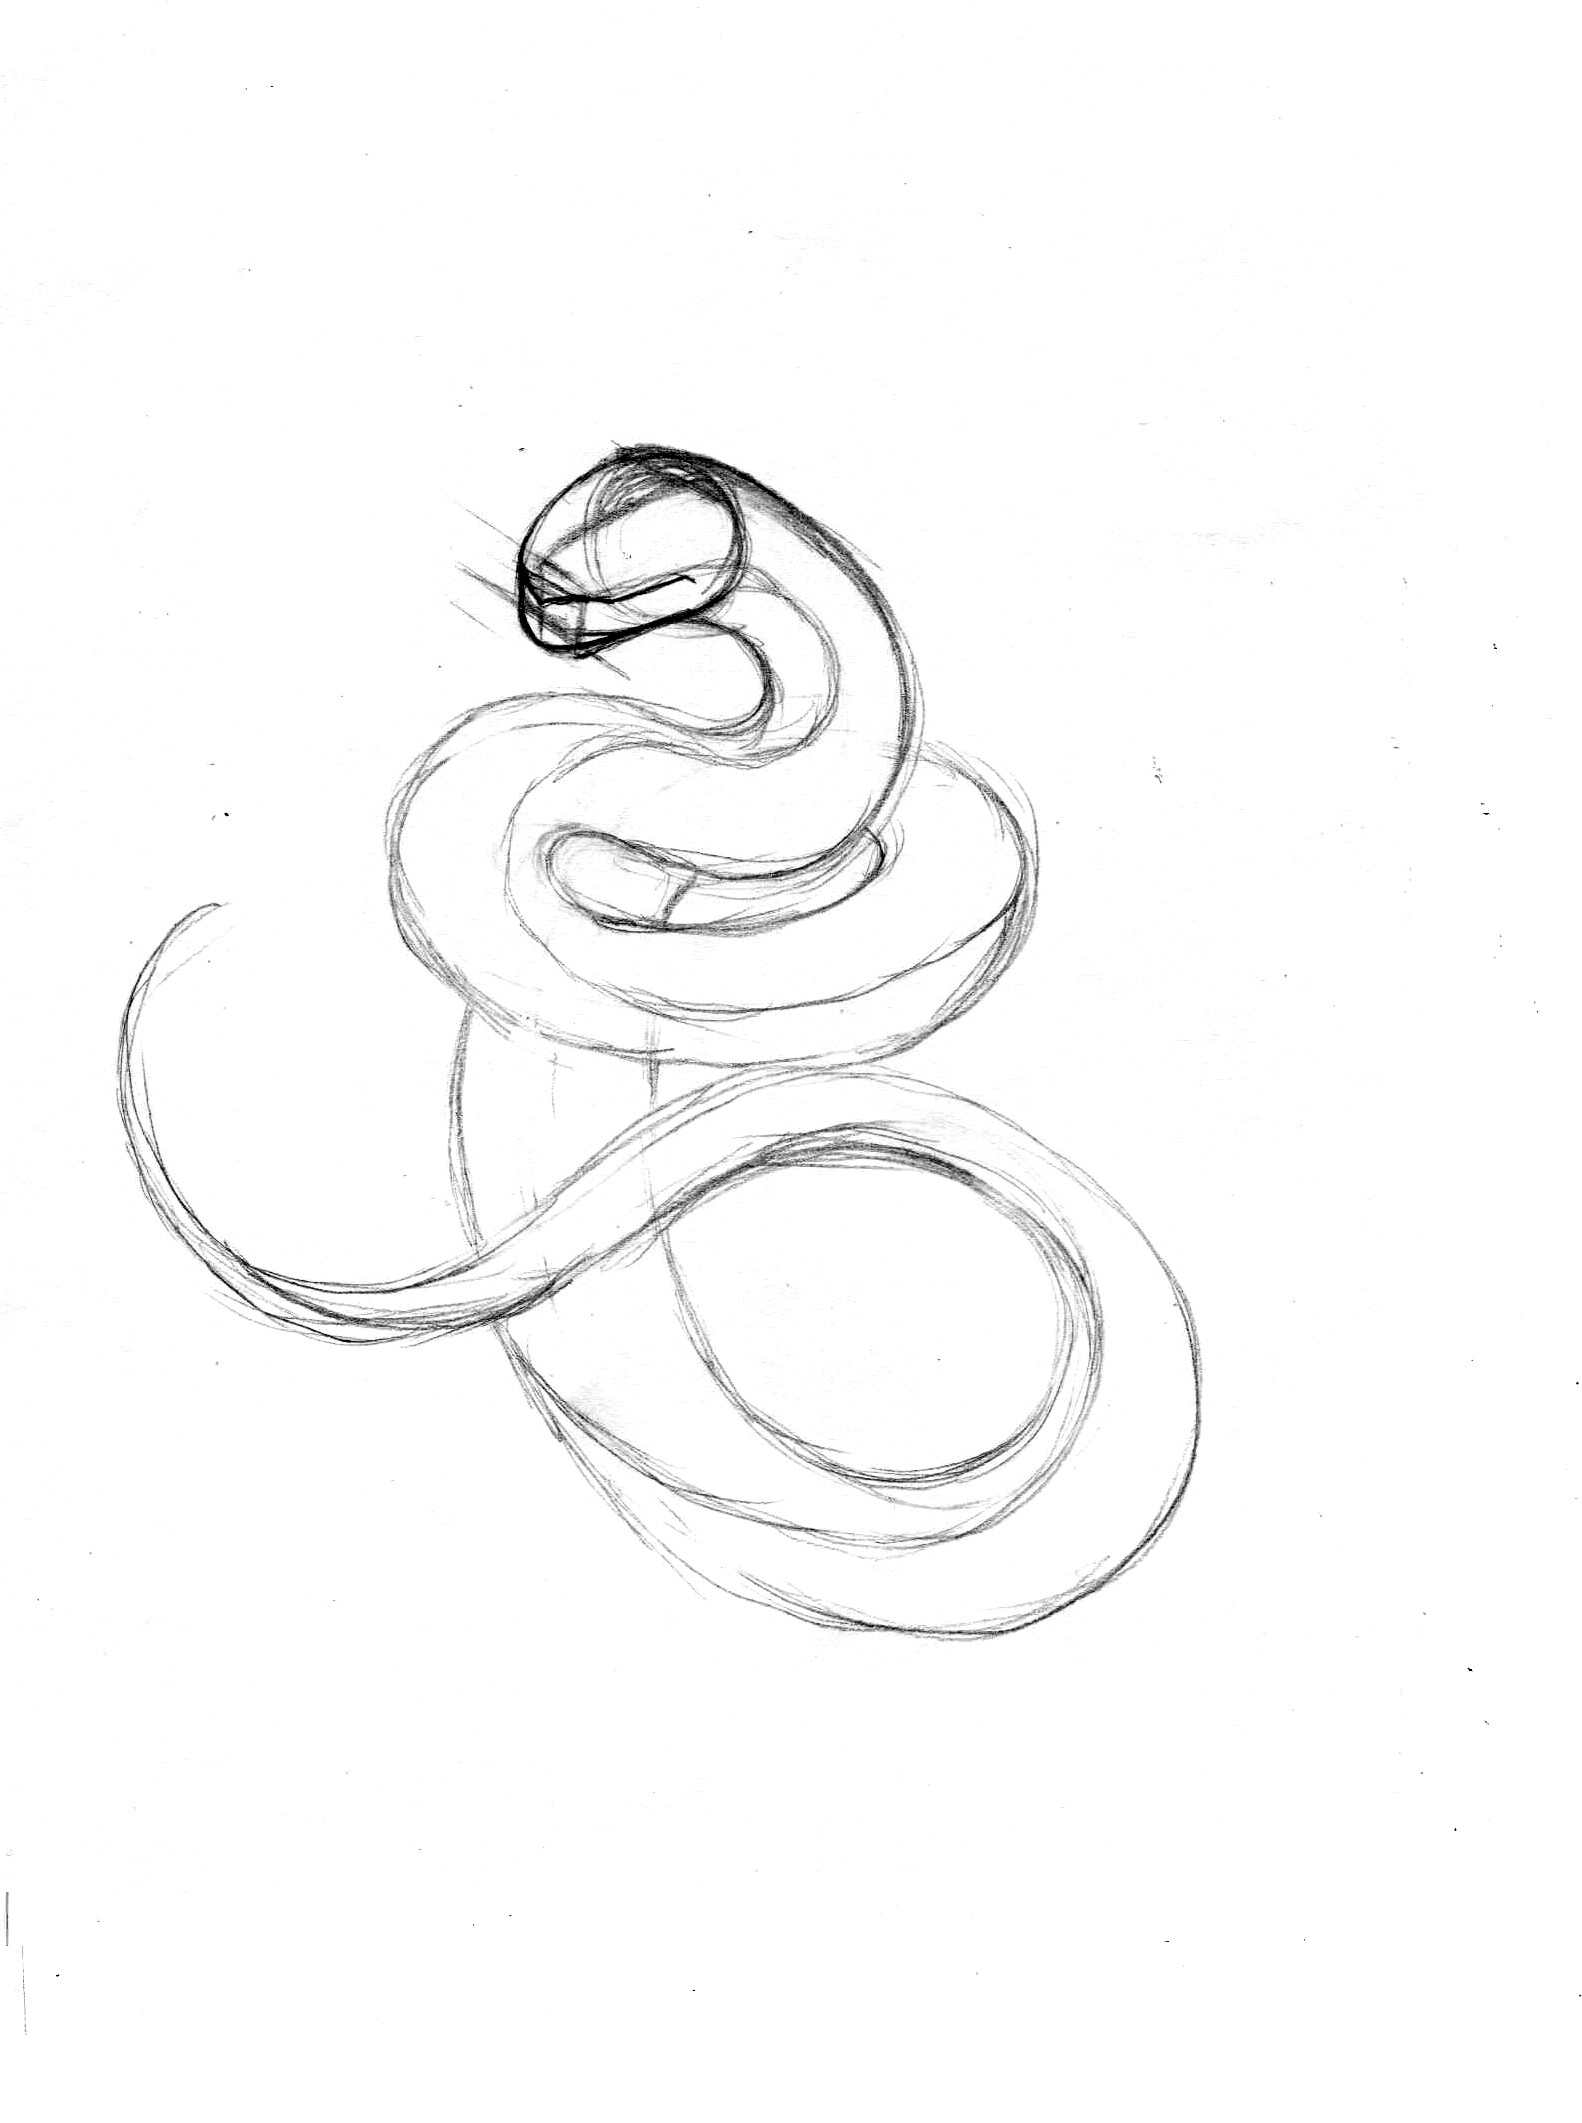
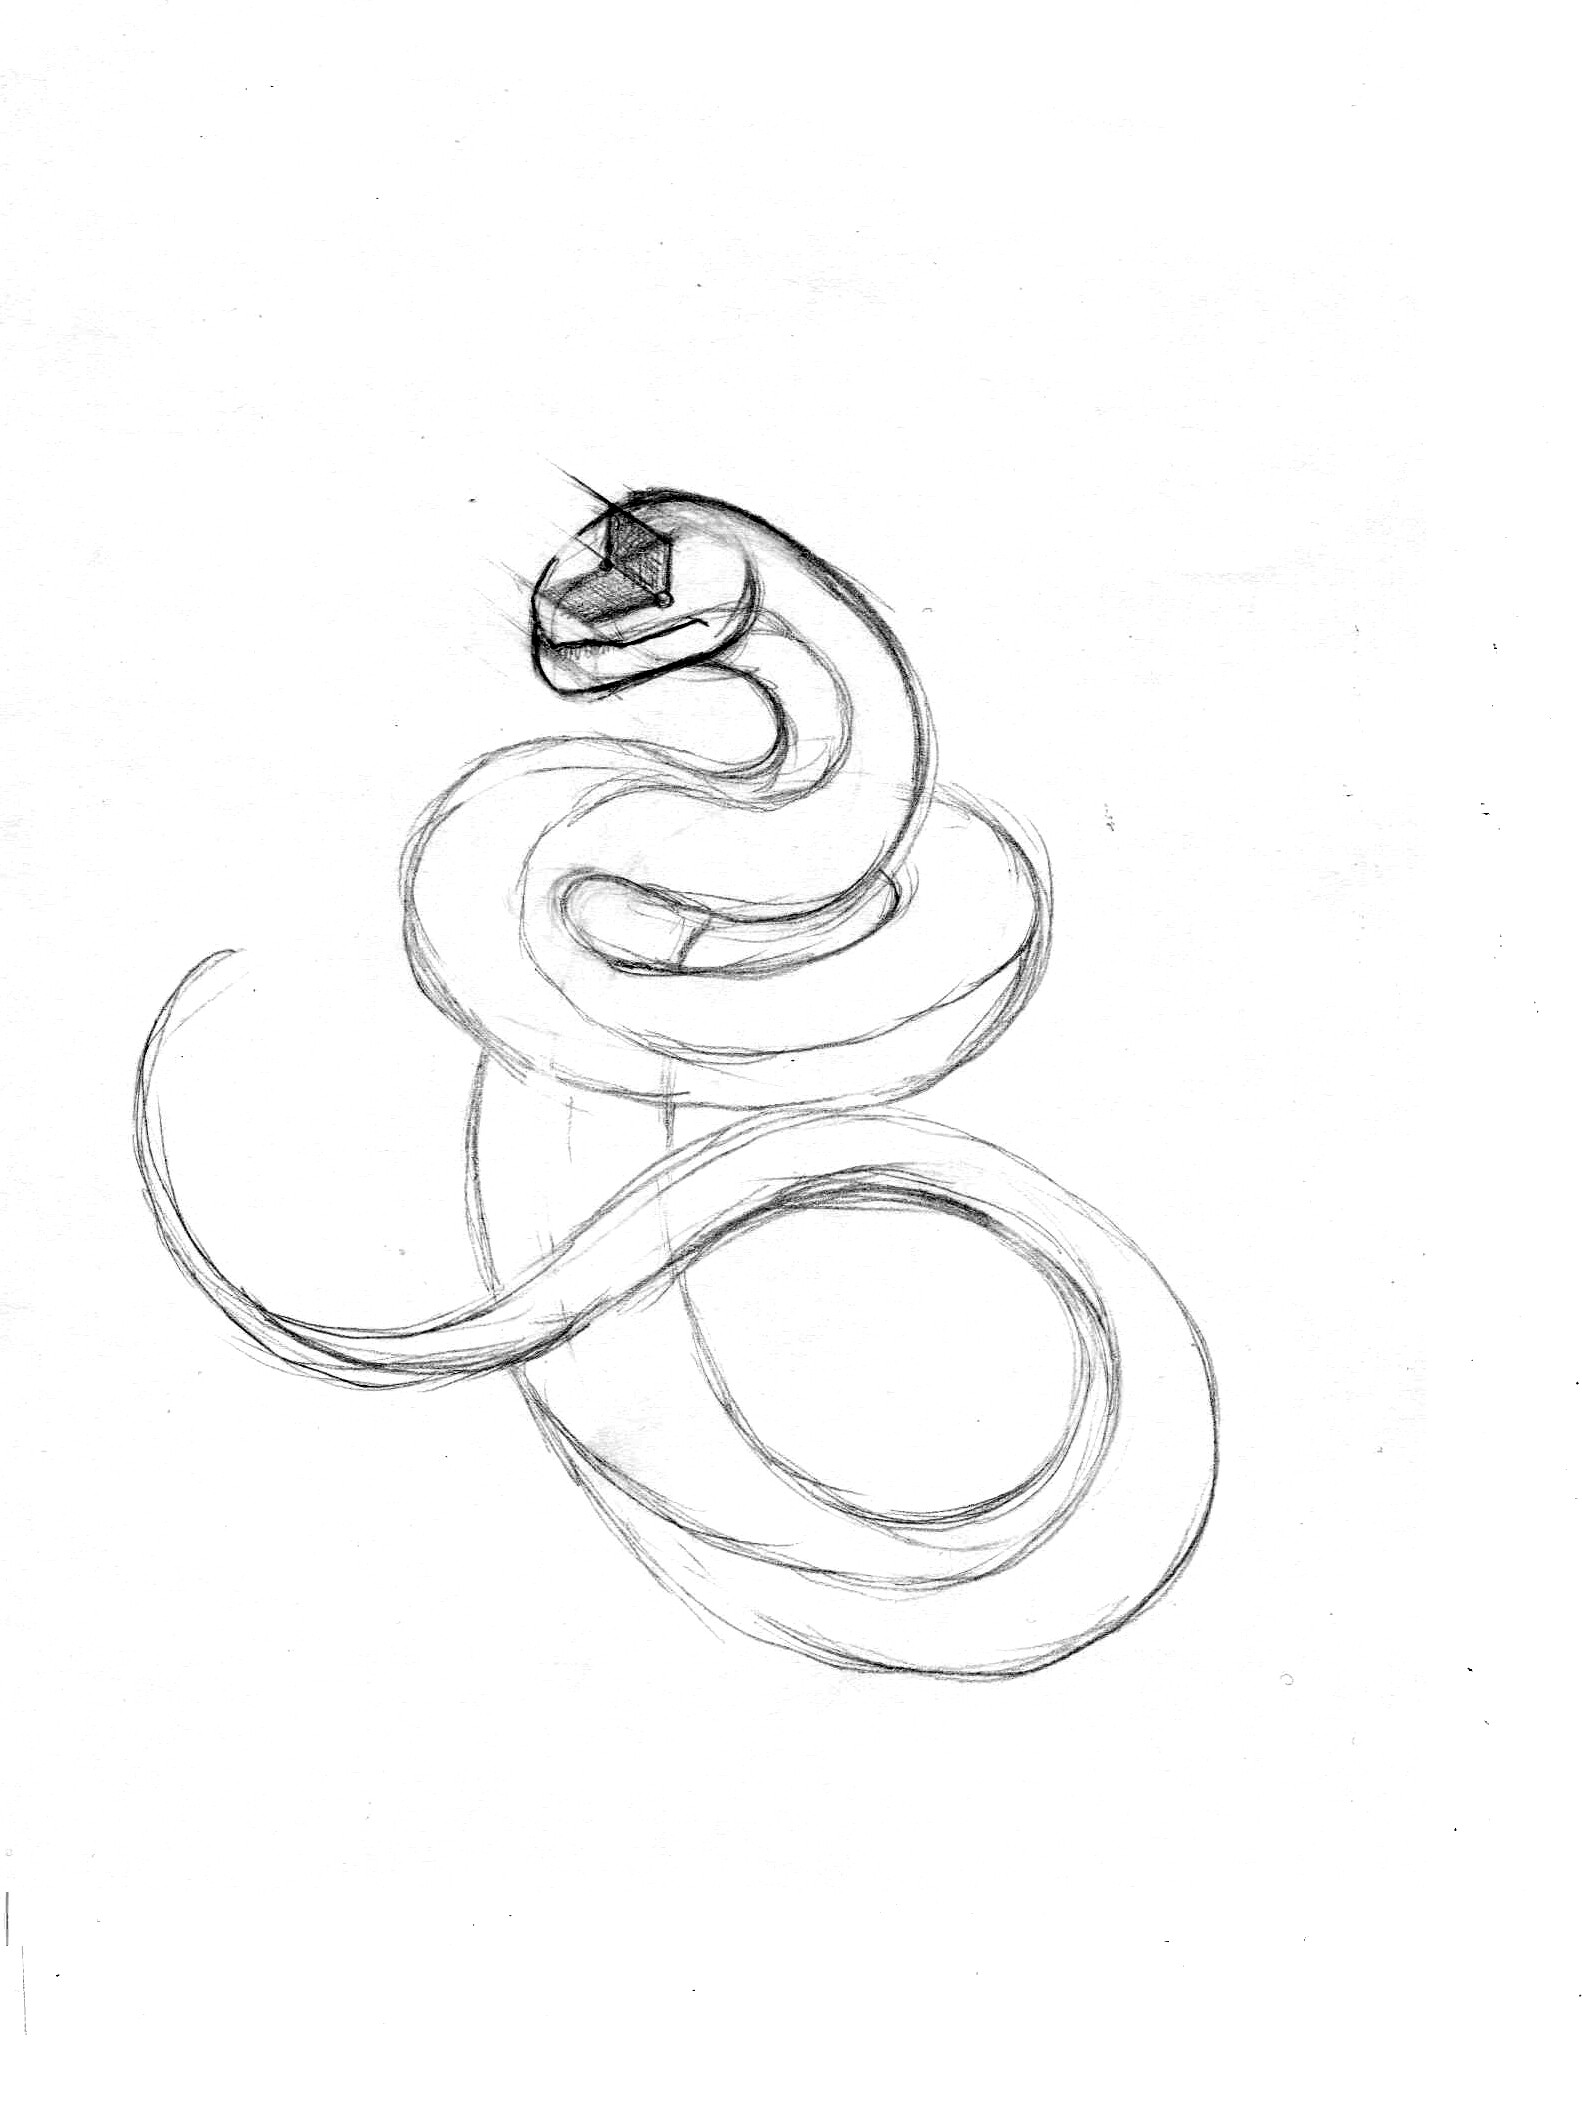
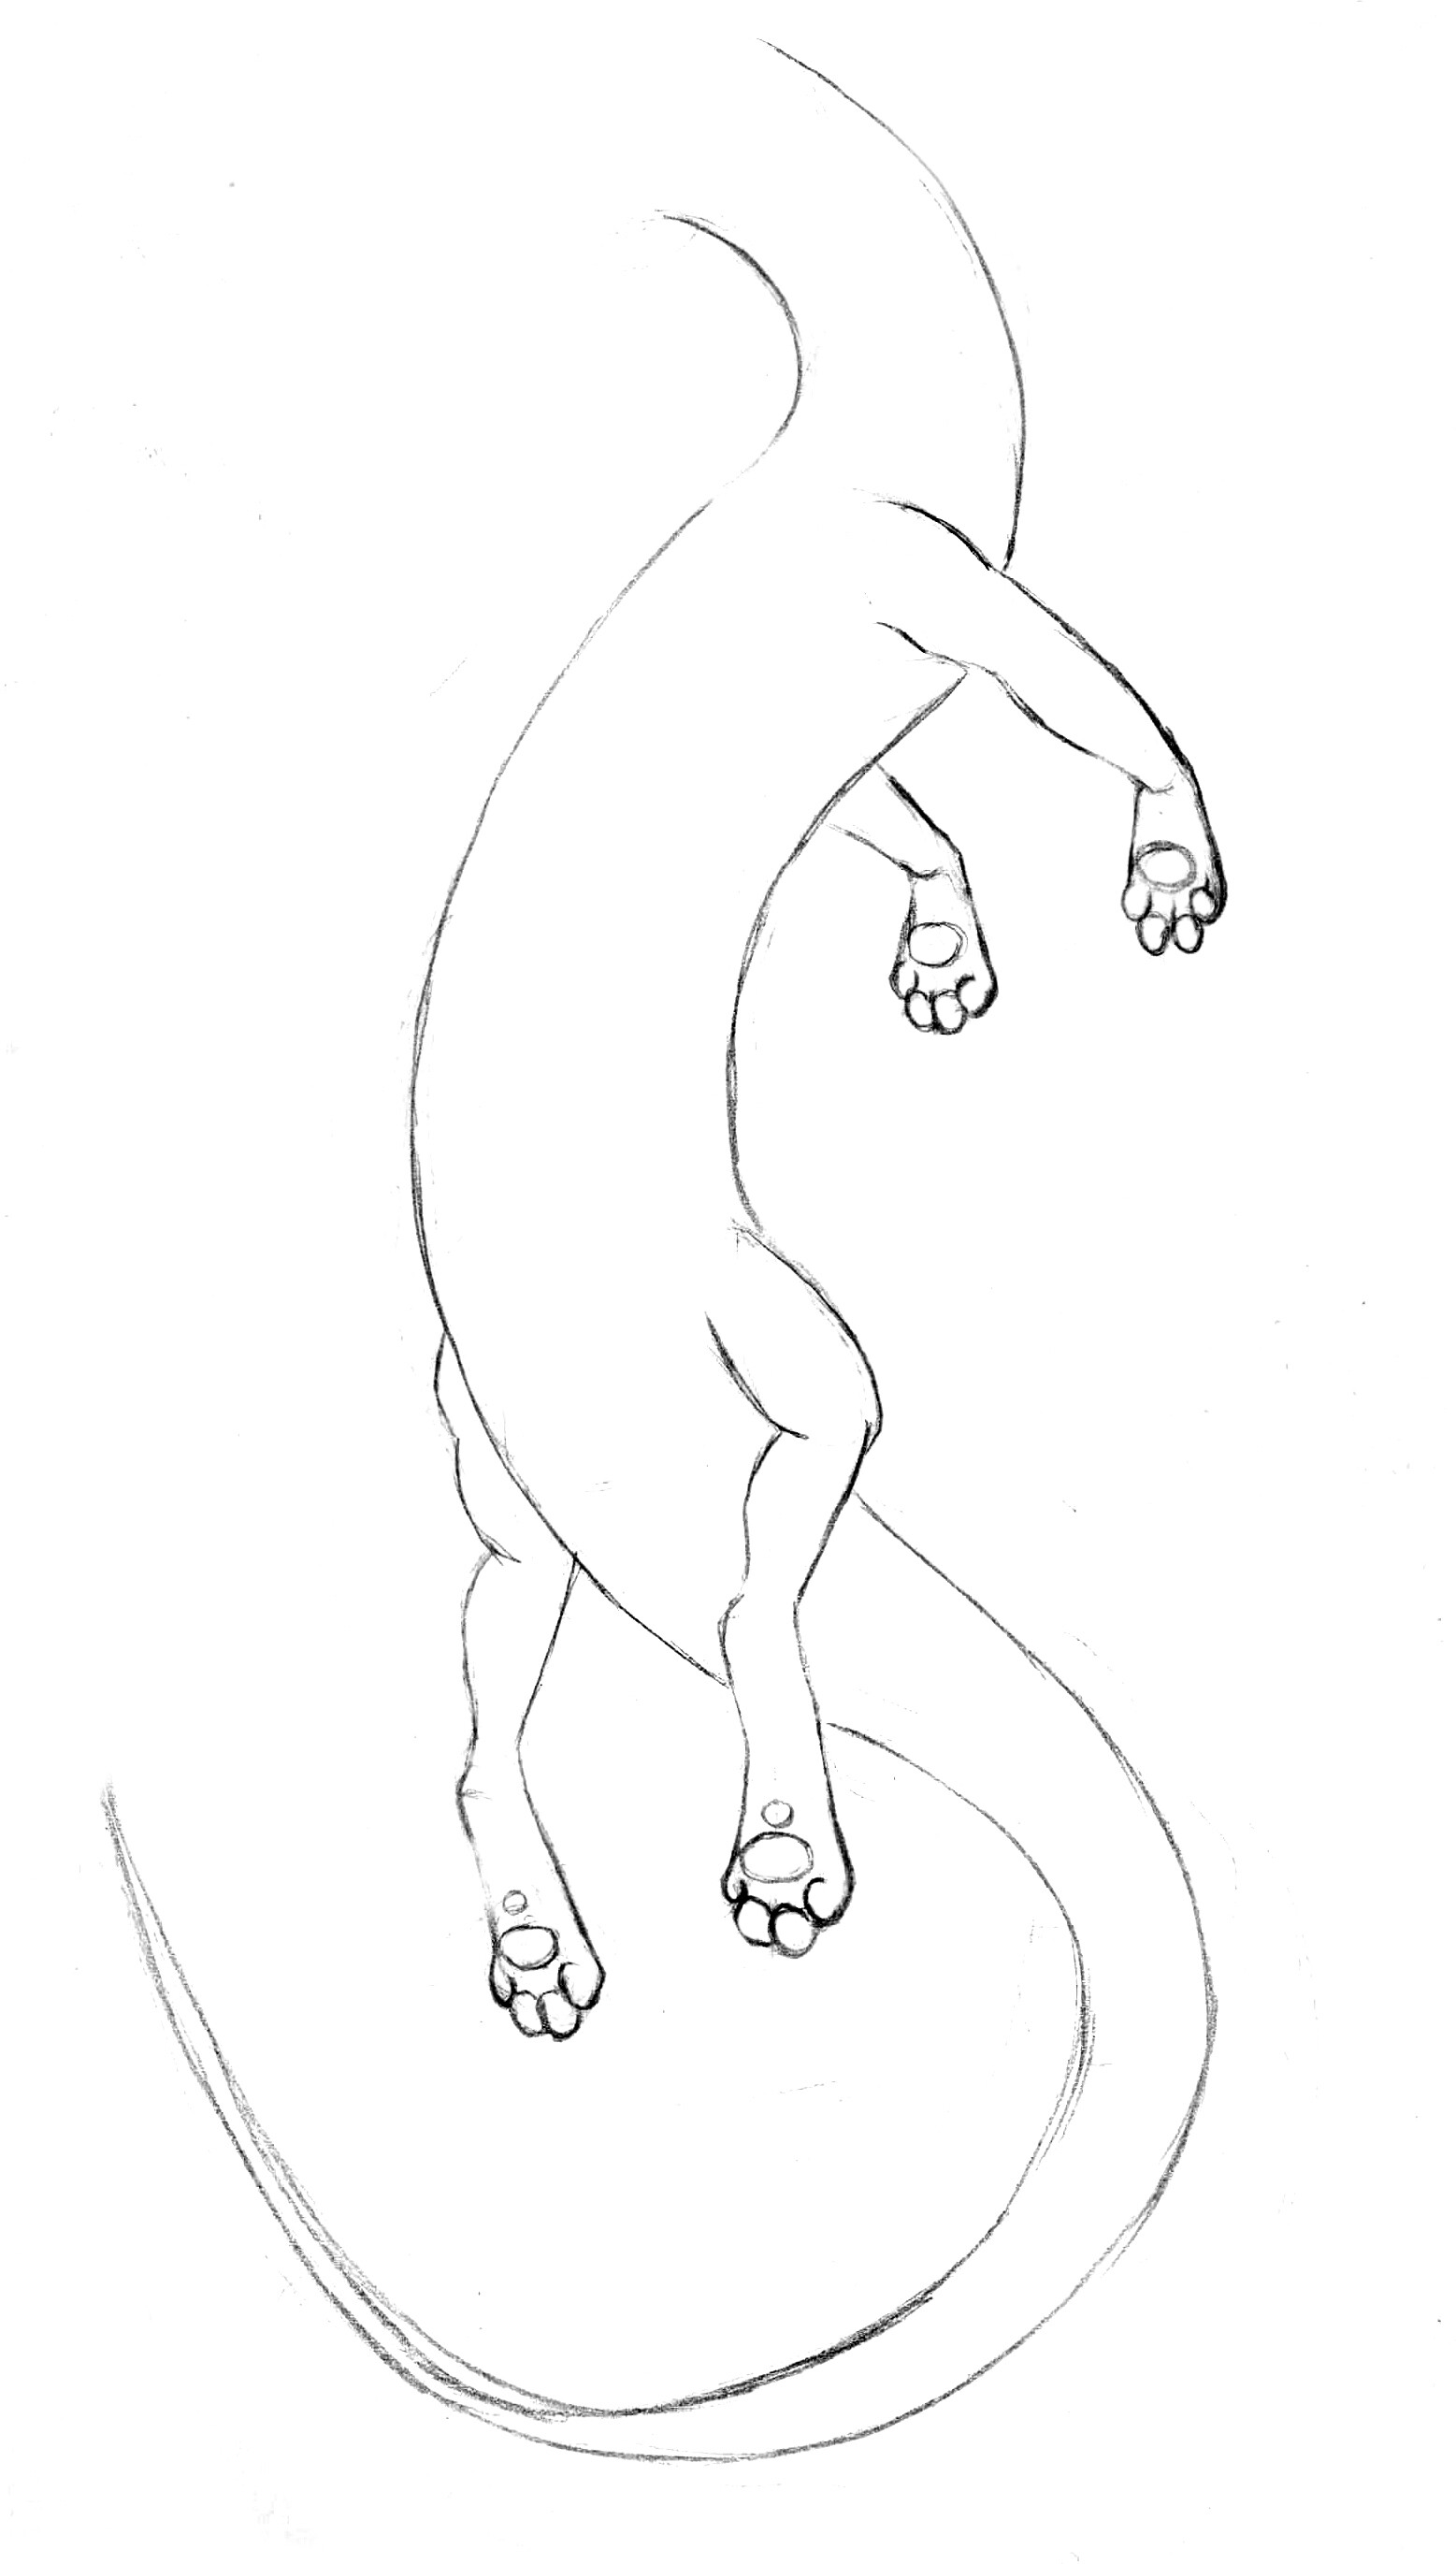
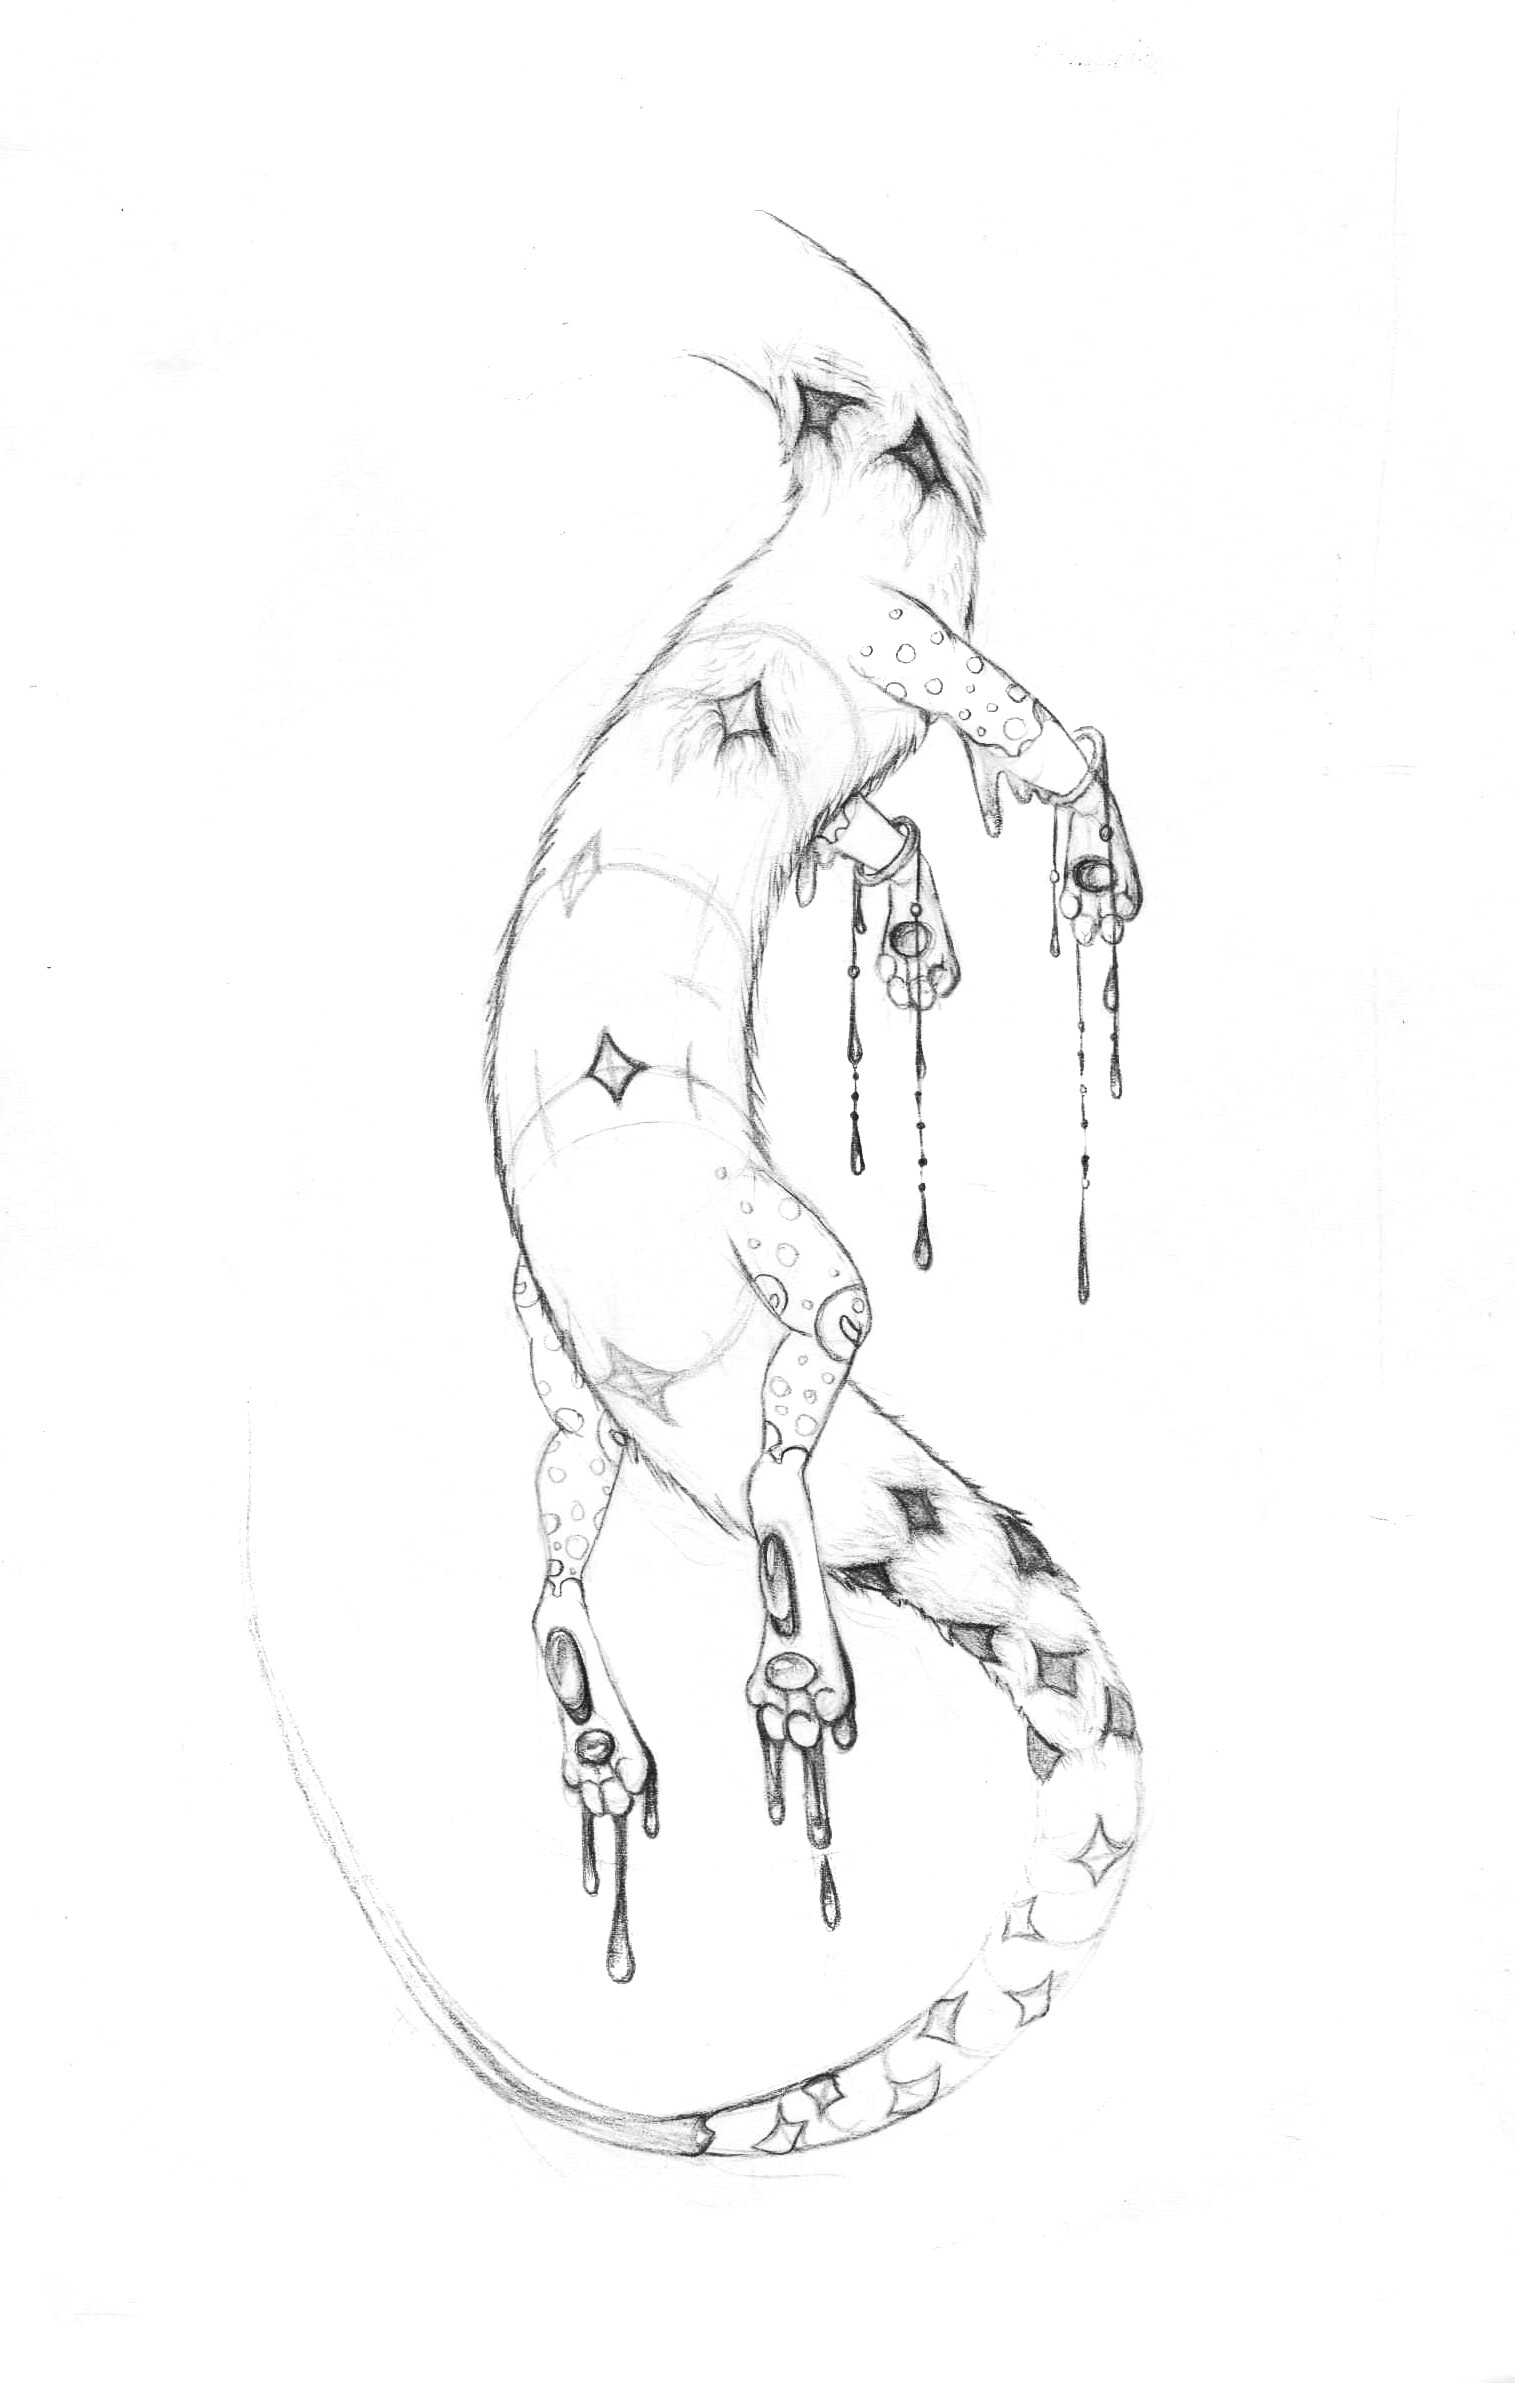
Hi people! Today I made a few line-art for our joint art work Some of them reminded me of Pokemon. it is strange …
#1
#2
#3
#4
#5
OK, write your ideas! I propose to make the fur with stars for #5 sketch
1 Like
the “thing” seems to have fun so my idea: add a smiling face and mb some water?
1 Like
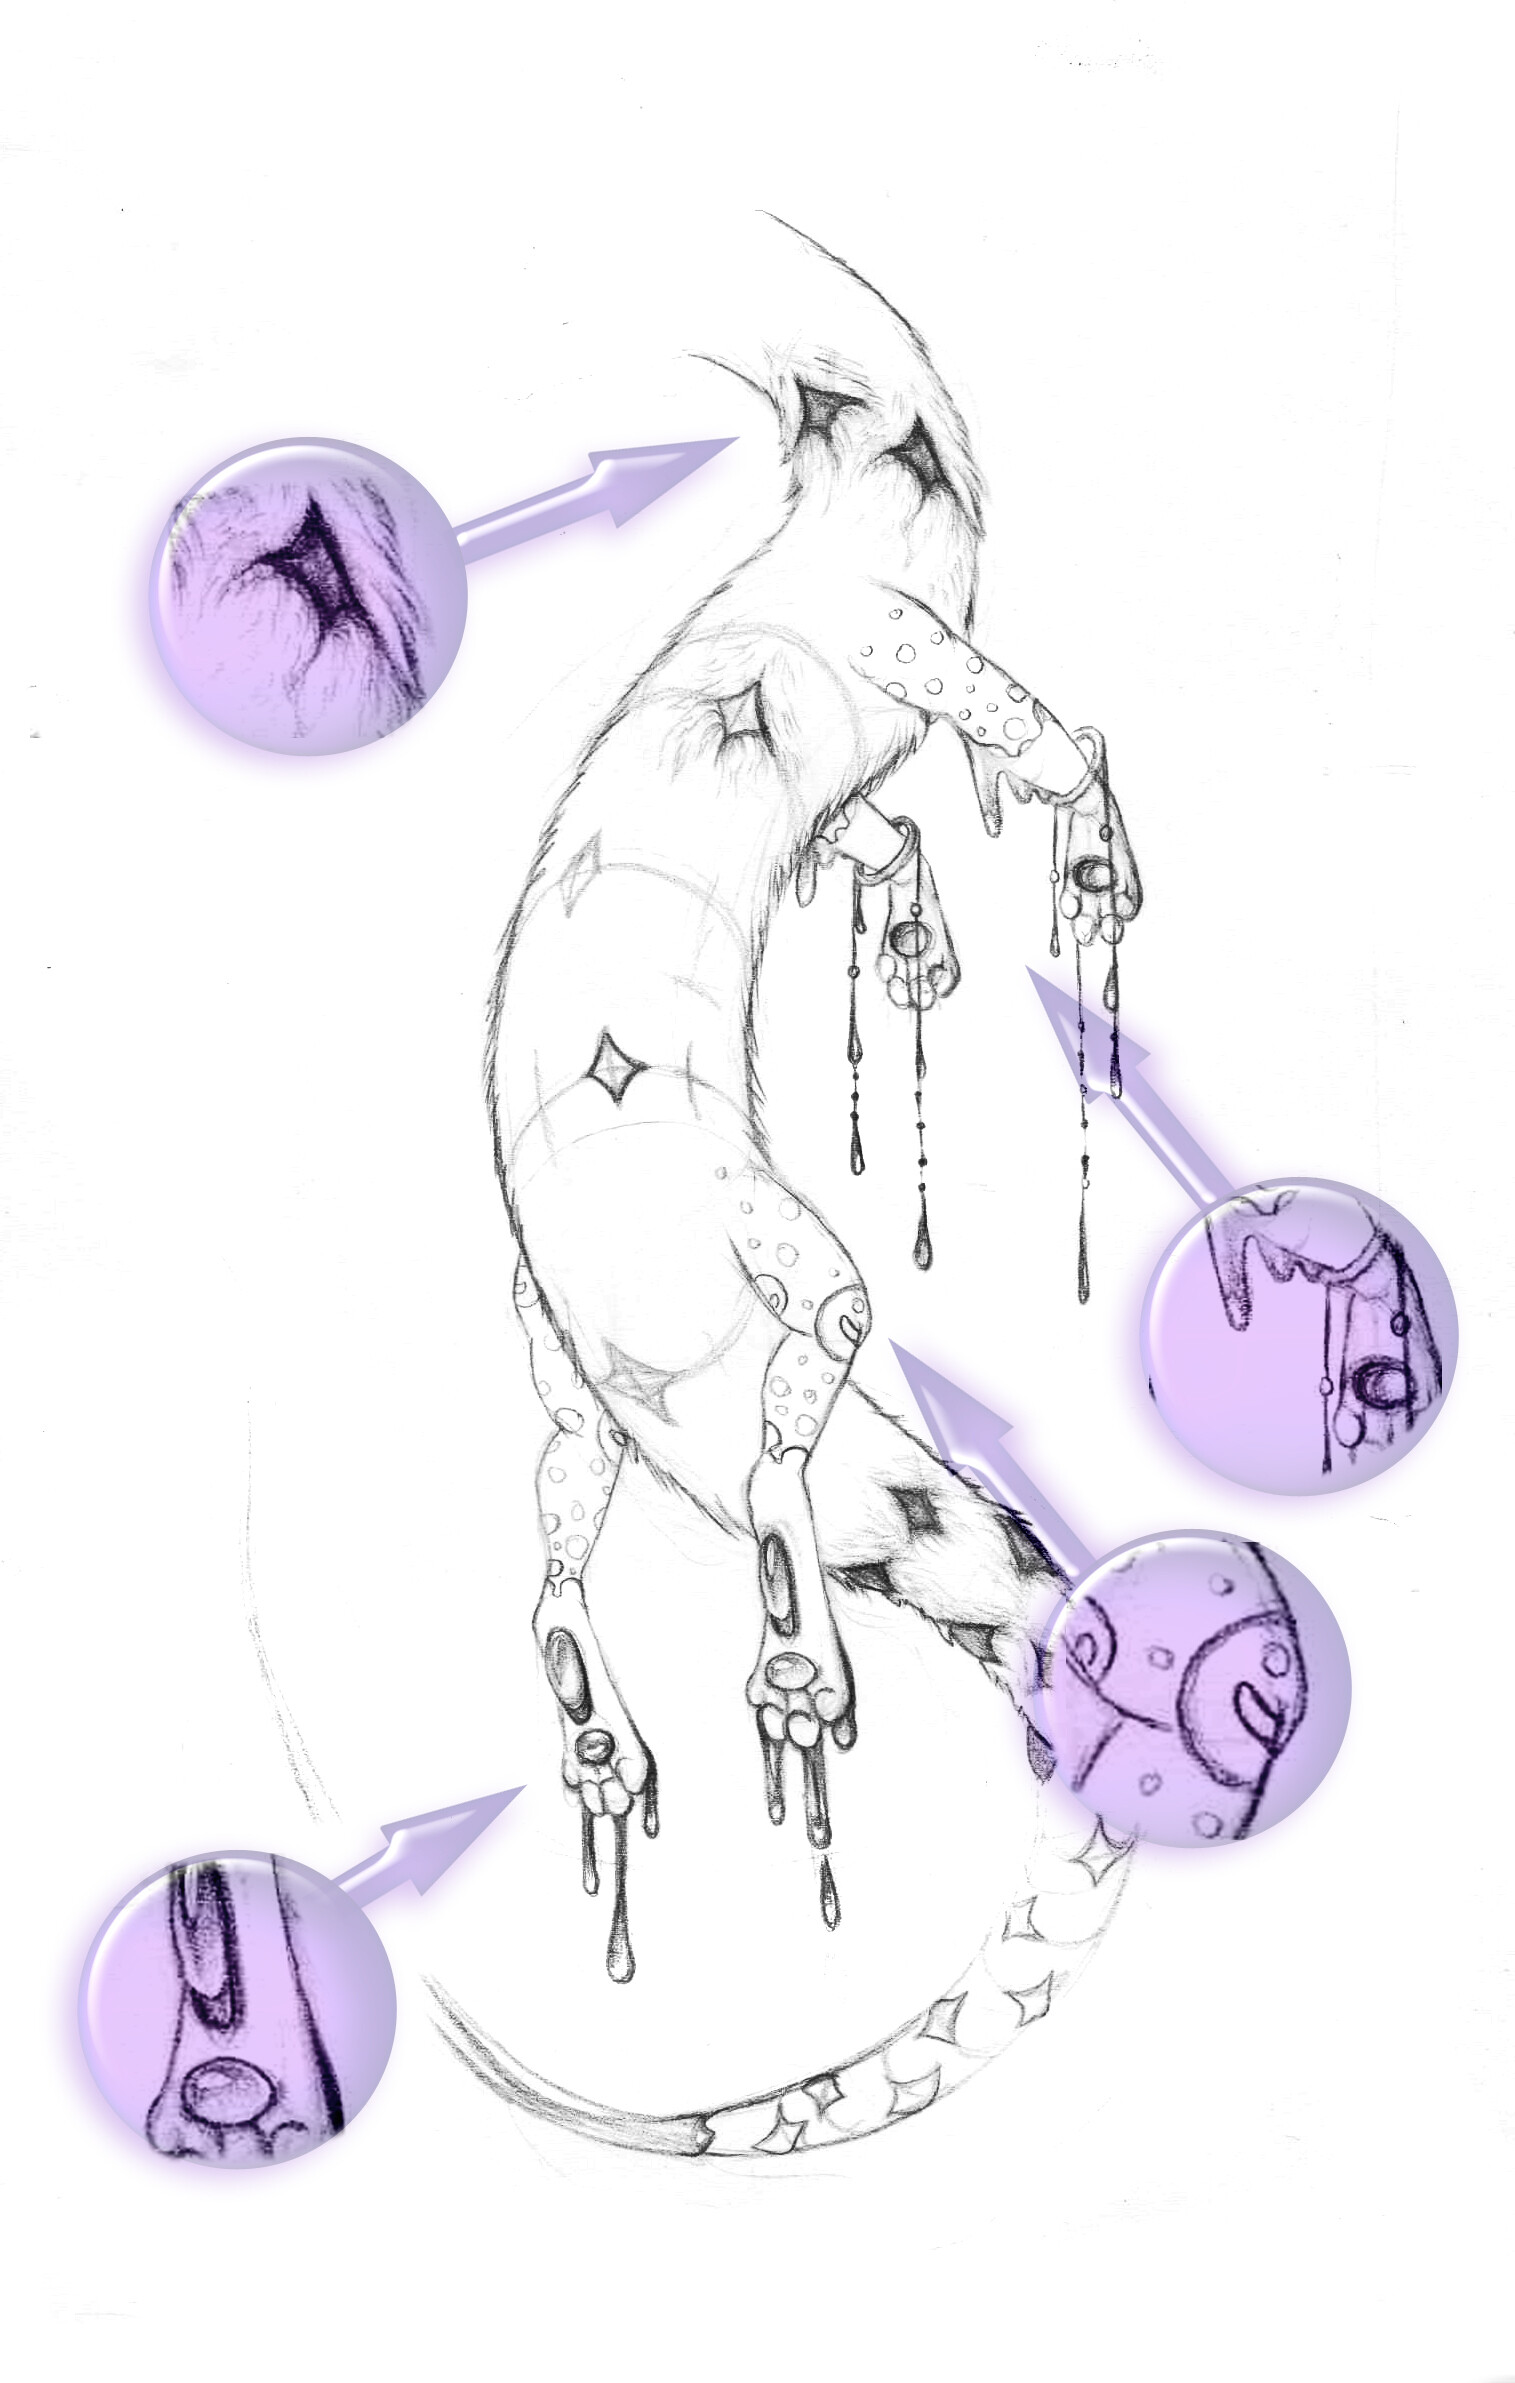
wow, do ya have these things somewhere or are these “just in time” productions? I´m wondering ´cause of the very proffesional and powerfull presentations…lol just adorable  @coon
@coon
1 Like
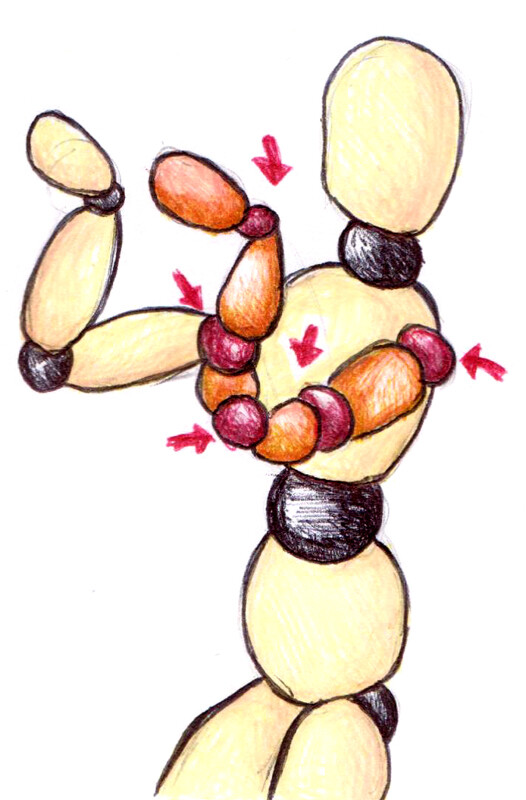
You’re talking about arrows and circles? I made them today when scanned a picture 
By the way, check your mail - I sent several versions of the composition for sleeeeve
1 Like
oh wow another time, would have an immediately look, thanx, you´re nice!!! pure nice  I made cake for ya,
1 Like
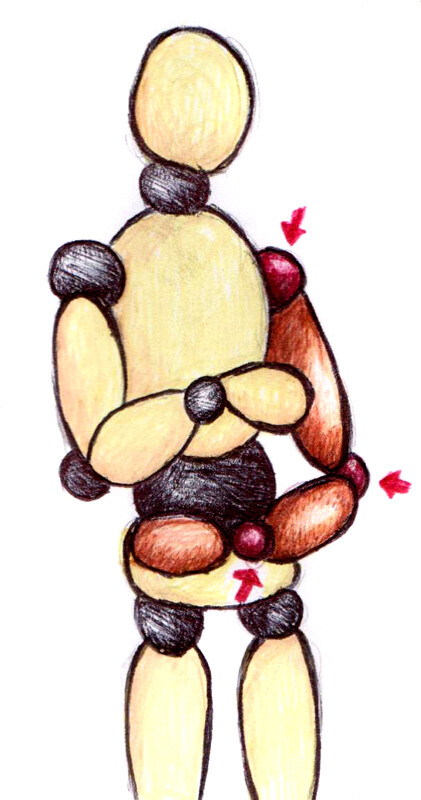
Drawing hands has always been difficult to me somehow. They always ended up looking rather… Disfigured. 
1 Like